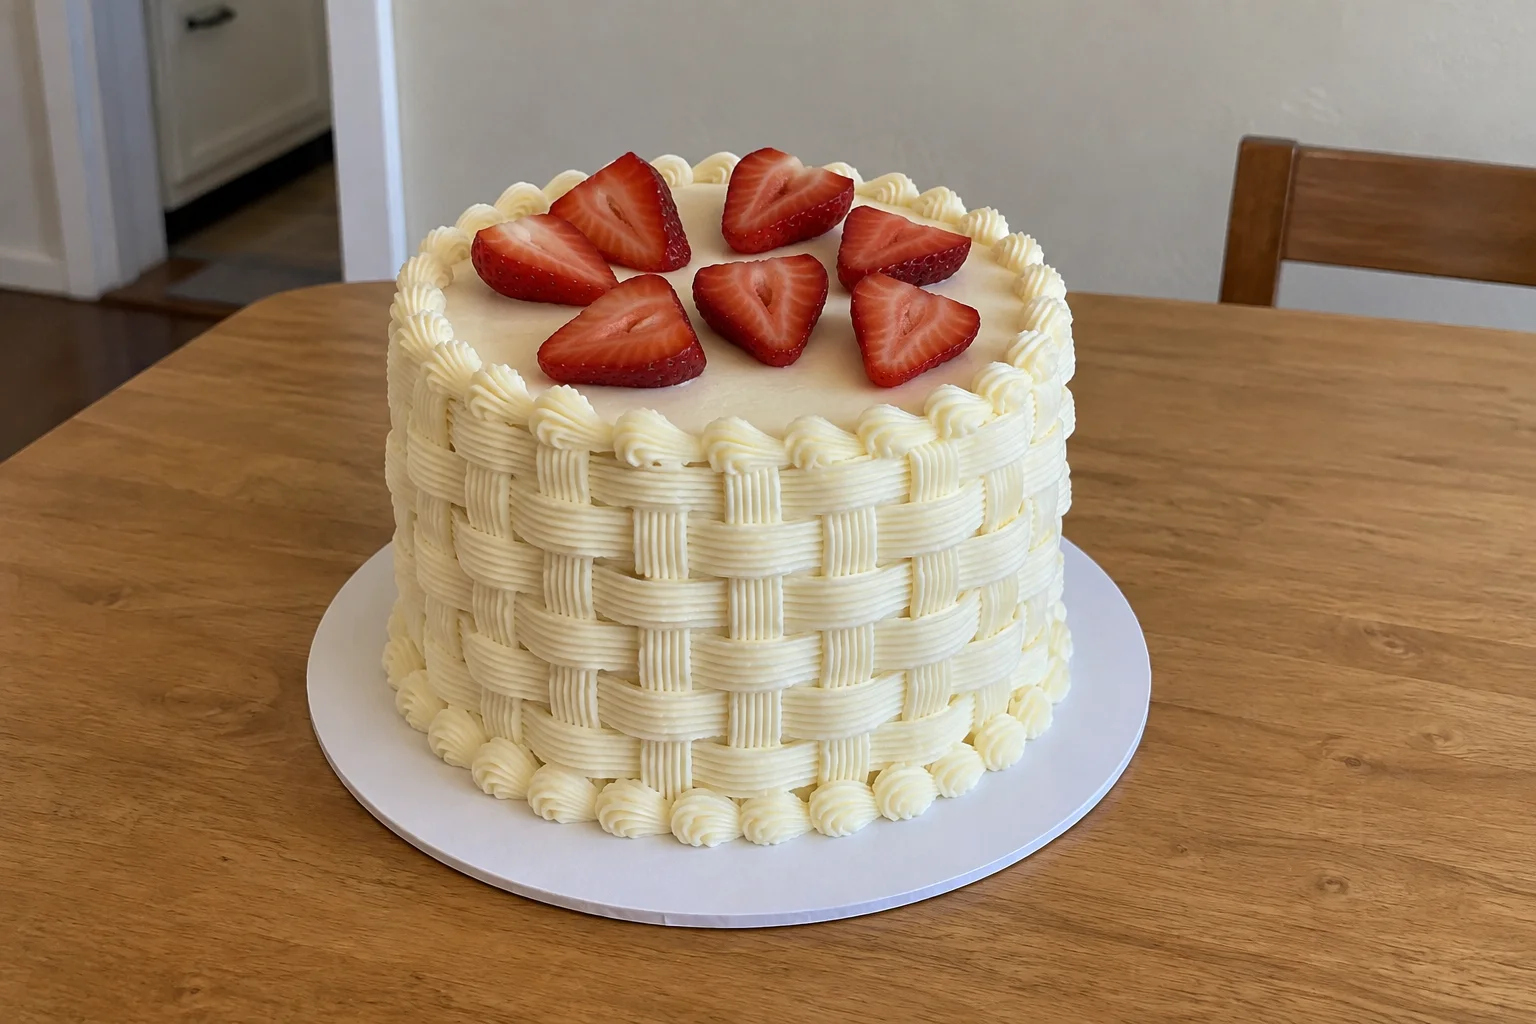
Turn a small cake into an ivory buttercream basket with tip 47. Learn the alternating strip pattern, seam planning and a simple fresh-strawberry finish.
Vanilla Piping Buttercream for a Basketweave Cake20 min · Approximately 1.05 kg for a small decorated cake · Recipe card
Prep 20 minCook 0 min
Ingredients
350 g unsalted butter, softened but not oily
650 g powdered / icing sugar, sifted
45 ml whole milk; begin with 25 ml and add only as needed
10 ml vanilla extract
2 g fine salt
Let’s make it
Beat the softened butter until smooth. Mix in the sifted icing sugar in several additions on low speed, starting with 25 ml of the measured milk.
Add vanilla and salt. Scrape the bowl and mix until the frosting is even. Add more of the measured milk only if needed to pipe an unbroken strip through tip 47.
Stir slowly by hand to remove large air pockets. Keep the frosting ivory and divide into portions for filling, base coating, weaving and borders.
Fill the tip-47 bag about halfway. Pipe a small three-column basketweave sample on parchment and check that the raised strips retain their texture.
Once the sample holds, decorate the chilled coated cake using the sequence in the article. Keep the reserved border portion covered until you change to tip 21.
Kitchen notes
Buttercream preparation only. Cake baking, cooling, chilling and decorating take additional time.
Original Kumora frosting formula, not kitchen-tested. Adjust using the piping test before decorating. Contains milk. This recipe is for buttercream, not cake batter. Cake layers and strawberry garnish are prepared separately. Use a tested cake recipe for the layers and refrigerate the finished cake according to its filling and fruit.
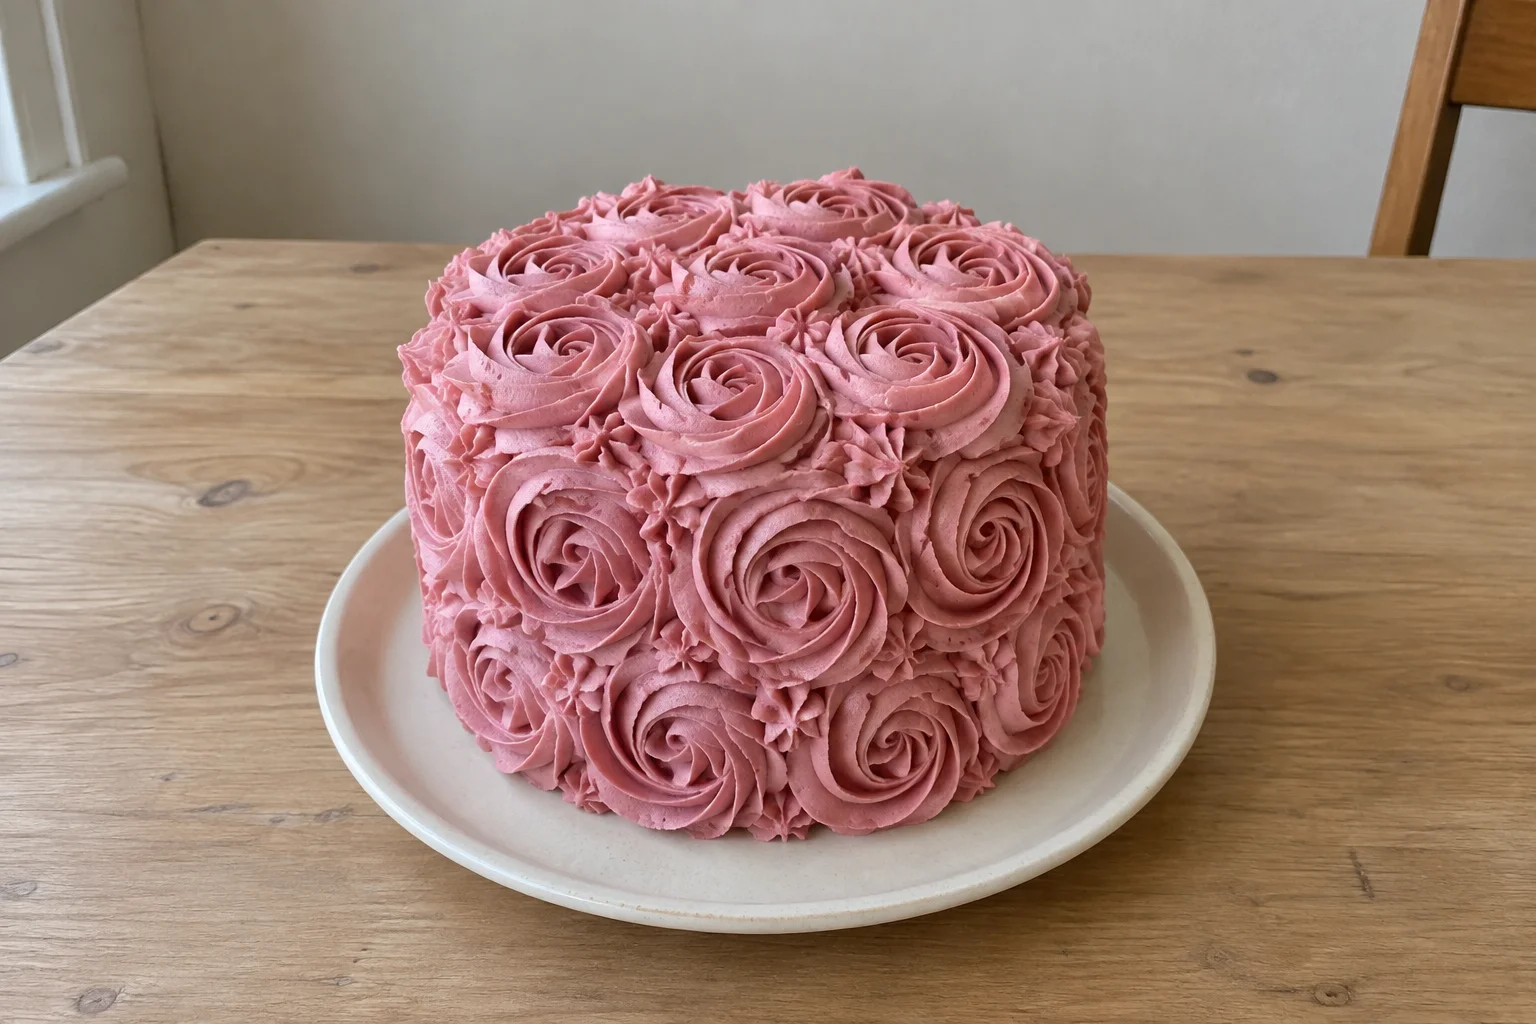
Cover a small birthday cake with pink buttercream rosettes using a 1M tip. Includes frosting quantities, row planning, spiral direction and gap fixes.
Vanilla Buttercream for a Pink Rosette Cake20 min · Approximately 1.35 kg for a small fully piped cake · Recipe card
Prep 20 minCook 0 min
Ingredients
450 g unsalted butter, softened but not oily
850 g powdered / icing sugar, sifted
70 ml whole milk; begin with 35 ml and add only as needed
10 ml vanilla extract
2 g fine salt
1 small dab food-grade pink gel colouring; adjust gradually to your shade
Let’s make it
Beat the softened butter until smooth. Add sifted icing sugar in several additions on low speed, using 35 ml of the measured milk to help combine it.
Add vanilla and salt. Scrape the bowl and mix until even. Use the remaining milk only as needed for a frosting that flows through a 1M tip and retains its ridges.
Stir in a very small amount of pink gel and check a smear against a white plate. Adjust gradually, colouring the main batch before dividing it for filling, coating and piping.
Stir with a spatula to remove large air pockets. Fill the piping bag no more than halfway so it is comfortable to control.
Pipe a few rosettes on parchment. Allow them to sit briefly, then check that the spiral stays defined and does not slump. Reserve the portions described in the guide and decorate only completely cooled cake.
Kitchen notes
Buttercream preparation only. Cake baking, cooling, chilling and decorating take additional time.
Original Kumora frosting formula, not kitchen-tested. Adjust using the piping test before decorating. Contains milk. This recipe makes decorating frosting only; use your own baked and cooled cake layers. Gel colouring strength varies, so the listed dab is a starting point rather than a precise universal measurement.
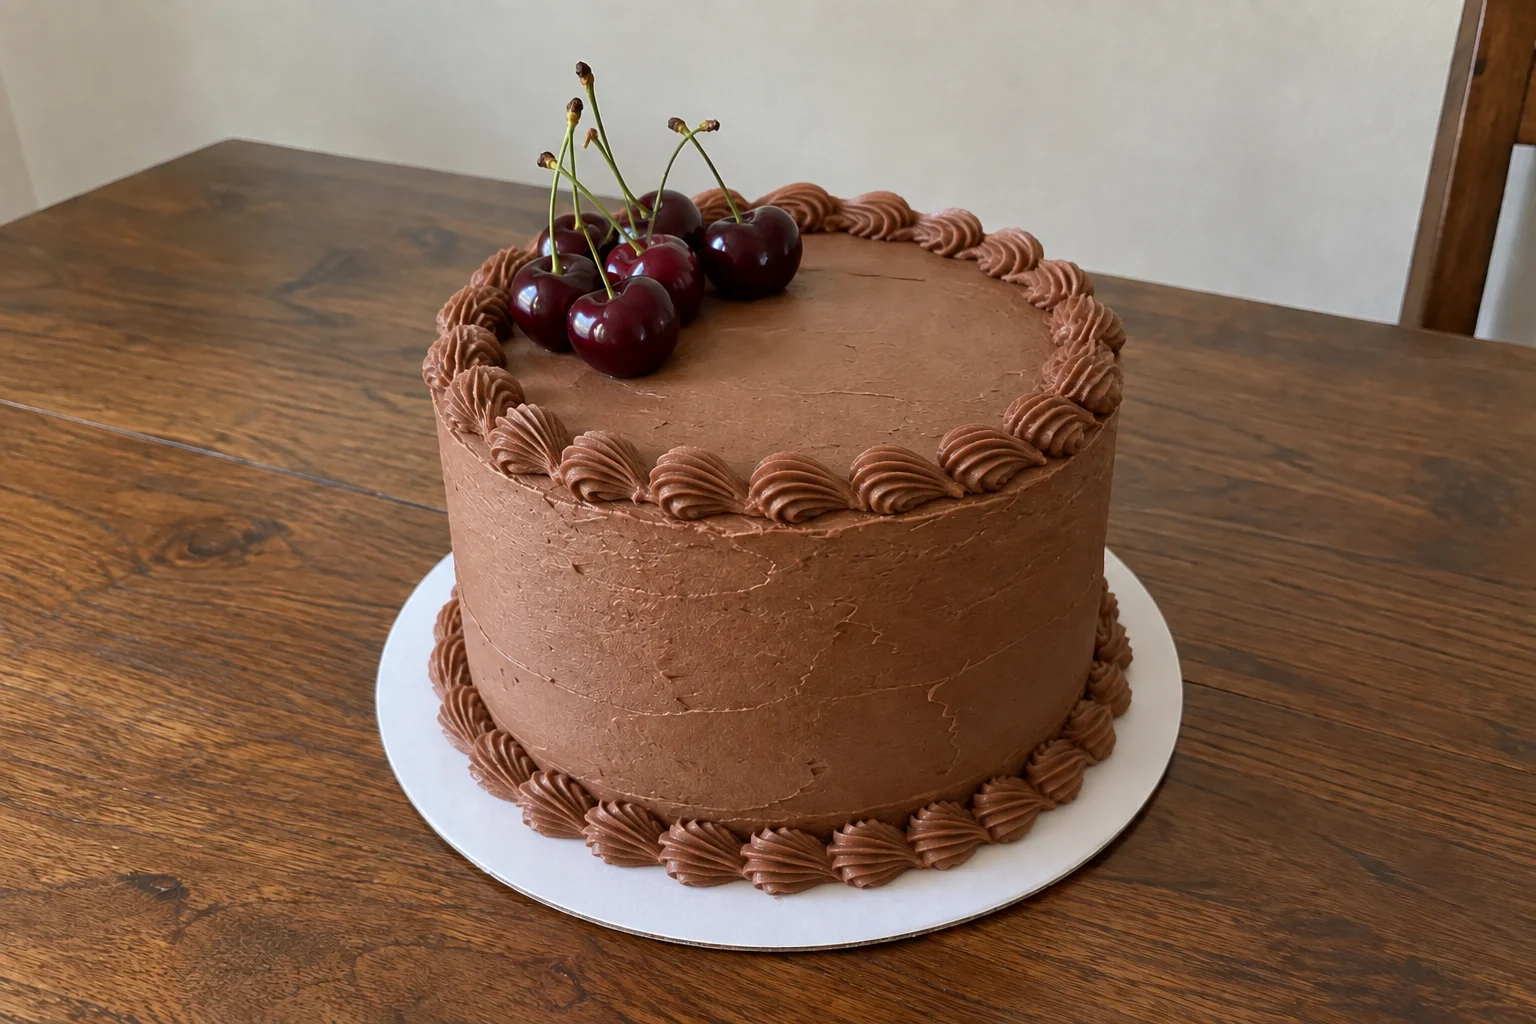
Learn the squeeze-and-release motion for chocolate shell borders, where to start and finish the ring, and how to fix ridges that crack or collapse.
Chocolate Buttercream for Shell Borders and a 6-Inch Cake20 min · Approximately 1 kg; coverage depends on piping size · Recipe card
Prep 20 minCook 0 min
Ingredients
330 g unsalted butter, softened but not oily
600 g powdered / icing sugar, sifted
60 g unsweetened cocoa powder, sifted
60 ml heavy cream; begin with 30 ml and add only as needed
10 ml vanilla extract
2 g fine salt
Let’s make it
Beat the softened butter on medium speed until smooth, about 2 minutes. Scrape the bowl. The butter should yield to a fingertip without looking melted.
Mix the sifted sugar and cocoa together. Add to the butter in several portions on low speed, alternating with 30 ml of the measured cream. Add the vanilla and salt.
Mix until smooth, scraping the sides and base of the bowl. Add the remaining cream a little at a time only if the frosting is too stiff to pipe. You may not need all of it.
Stir slowly with a spatula to reduce air pockets. Reserve separate portions for filling, crumb coating, outer coating and borders according to the guide.
Fit tip 21 to a half-filled piping bag. Pipe a test chain on parchment. Adjust a small portion until the frosting forms clear ridges and a tapering tail without excessive hand pressure.
Kitchen notes
Buttercream preparation only. Cake baking, cooling, chilling and decorating take additional time.
Original Kumora frosting formula, not kitchen-tested. Adjust using the piping test before decorating. Contains milk. Quantities include frosting for filling and coating a small cake as well as two borders; this is not a cake-batter recipe. Baking and decorating times are additional. Cocoa brands absorb liquid differently.
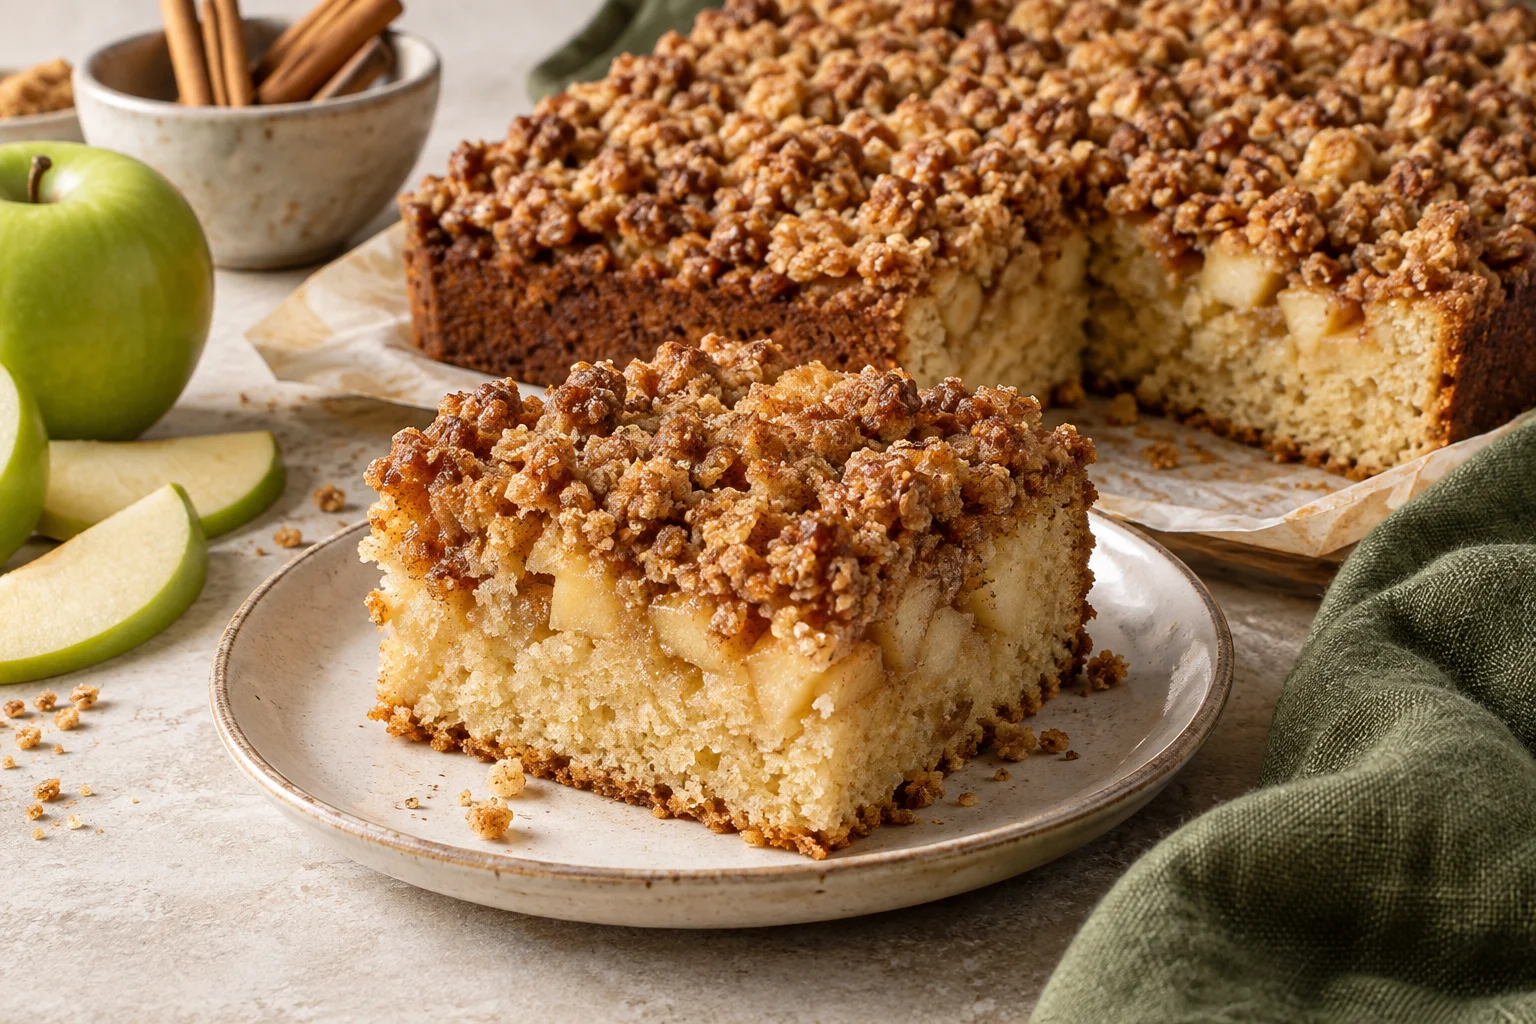
A square apple cake with tender fruit and a chunky cinnamon crumble top. The topping is the decoration: no frosting, glaze or piping needed.
Apple Crumble Cake135 min · 12 slices from one 9-inch square cake · Recipe card
Prep 30 minCook 45 minRest 60 min
Ingredients
100 g all-purpose flour
65 g light brown sugar
65 g cold unsalted butter, diced
2 g ground cinnamon
180 g all-purpose flour
6 g baking powder
2 g fine salt
2 g ground cinnamon
100 g unsalted butter, softened, plus a little for the pan
120 g caster or granulated sugar
2 large eggs, at room temperature
80 g plain full-fat yogurt, at room temperature
40 ml whole milk, at room temperature
5 ml vanilla extract
260 g firm apples, weighed after peeling and coring, diced into 1-cm pieces
Let’s make it
Heat the oven to 175°C / 350°F conventional, or 155°C fan. Grease a 9-inch square metal pan and line its base and two sides with parchment handles.
Make the streusel. Mix its flour, brown sugar and 2 g cinnamon, then rub in the cold diced butter with your fingertips until crumbly. Squeeze some mixture into small clusters and refrigerate while making the cake.
Whisk the cake flour, baking powder, salt and remaining 2 g cinnamon in a bowl. Stir the yogurt and milk together in a jug.
Beat the softened cake butter with the sugar for about 3 minutes until lighter. Beat in the eggs one at a time, then the vanilla. On low speed, add the flour mixture in three additions, alternating with the yogurt mixture in two additions. Stop once combined.
Spread roughly two-thirds of the batter in the prepared pan. Fold the diced apples into the remaining batter, then spoon this mixture over the base and level it lightly. Scatter the chilled streusel evenly on top without pressing it down.
Bake for approximately 40 to 55 minutes, checking from 40 minutes. A skewer inserted into the central cake beneath the crumble should show no wet batter. If the topping browns first, tent loosely with foil and continue baking until the sponge is done.
Leave in the pan for 20 minutes, then use the parchment to lift onto a rack if the cake feels firm enough to move. Allow roughly another 40 minutes before cutting, or cool completely for tidier slices.
Cut into 12 portions with a serrated knife using a gentle sawing motion through the crumble. Keep leftovers covered in the refrigerator once completely cool.
Kitchen notes
Allow about 60 minutes of cooling before lifting and slicing. The centre may need a longer bake than the estimated 45 minutes.
Original draft, not yet kitchen-tested. The AI image is an illustrative serving concept. Use prepared diced apples, not apple sauce, and follow the central doneness check. The streusel is crispest on the baking day and will soften during storage. Contains wheat, eggs and milk. Refrigerate covered and use within 3 days.
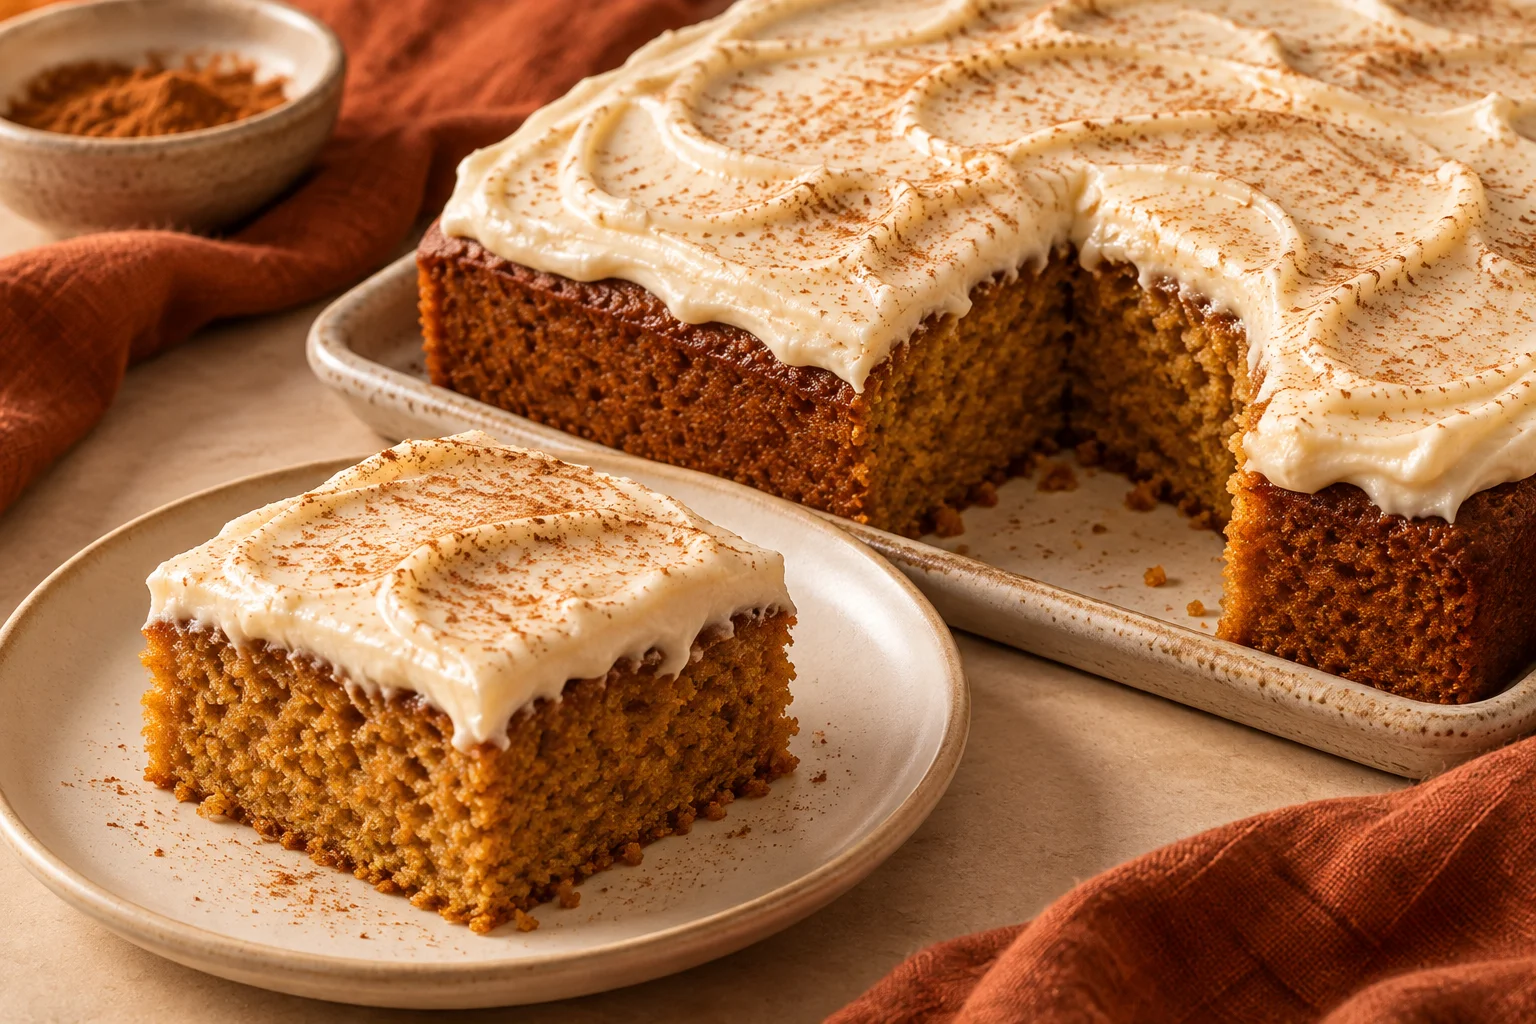
One square pumpkin cake, warm spices and maple cream cheese frosting swirled with a spoon. A fall cake with no layers to stack or piping skills to learn.
Pumpkin Maple Sheet Cake155 min · 12 slices from one 9-inch square cake · Recipe card
Prep 30 minCook 35 minRest 90 min
Ingredients
200 g all-purpose flour
8 g baking powder
2 g fine salt
5 g ground cinnamon
1 g ground ginger
0.5 g ground nutmeg
100 g light brown sugar
80 g caster or granulated sugar
2 large eggs, at room temperature
90 g neutral oil, plus a little for the pan
240 g plain unsweetened pumpkin puree
5 ml vanilla extract
80 g unsalted butter, softened
220 g icing sugar / powdered sugar, sifted
200 g full-fat block cream cheese, cool and cut into pieces
30 g pure maple syrup
1 g fine salt
0.5 g ground cinnamon, for a light dusting
Let’s make it
Heat the oven to 175°C / 350°F conventional, or 155°C fan. Grease a 9-inch square metal pan and line the base and two sides with parchment handles.
Whisk together the flour, baking powder, salt, 5 g cinnamon, ginger and nutmeg. Break up any lumps in the brown sugar in a separate bowl.
Whisk the brown and white sugars with the eggs, oil, pumpkin puree and vanilla until evenly combined. Add the flour mixture and fold with a spatula until no dry streaks remain.
Spread the batter evenly in the pan. Bake for approximately 30 to 40 minutes, checking from 30 minutes. The centre should spring back lightly and a skewer should show a few moist crumbs rather than raw batter.
Leave in the pan for 15 minutes, then lift onto a rack if serving on a board. Allow roughly another 75 minutes, or until the cake is completely cool, before frosting.
Beat the frosting butter until smooth. Gradually mix in the icing sugar and salt. Add the cool cream cheese and measured maple syrup, and mix briefly on low speed just until smooth. If loose, chill for 15 to 20 minutes and stir gently.
Spread over the cold cake. Use the back of a tablespoon to make broad, shallow swirls. Dust lightly with the finishing cinnamon; avoid a thick powder layer.
Cut into 12 slices. For cleaner edges, chill the frosted cake briefly before cutting and wipe the knife between cuts. Refrigerate leftovers covered.
Kitchen notes
Allow about 90 minutes for the cake to cool completely before frosting. Total time is approximately 2 hours 35 minutes.
Original draft, not yet kitchen-tested. The AI image shows a serving concept. Use plain pumpkin puree and full-fat block cream cheese. Baking time changes with puree moisture and pan material; follow the central doneness check. Contains wheat, eggs and milk. Keep the frosted cake refrigerated and use within 3 days.
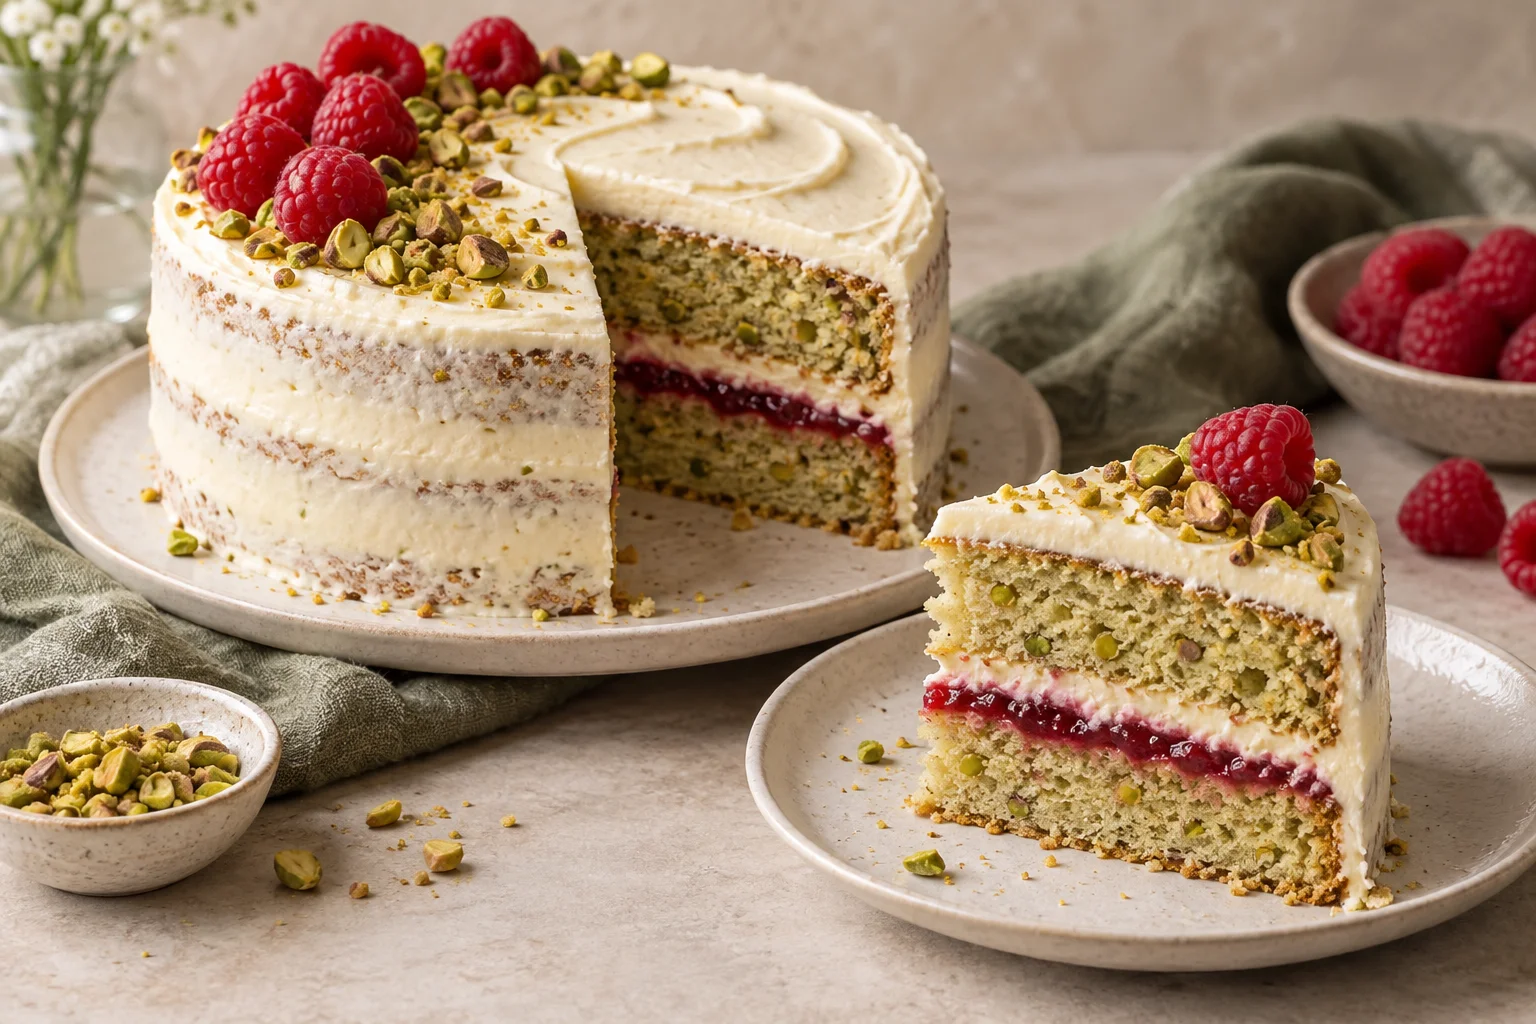
Two 6-inch pistachio cake layers with raspberry jam, cream cheese frosting and a simple berry-and-nut finish. A small celebration cake with no piping required.
Pistachio Raspberry Layer Cake165 min · 8 modest slices from one two-layer 6-inch cake · Recipe card
Prep 45 minCook 28 minRest 92 min
Ingredients
160 g all-purpose flour, with a spoonful reserved for grinding nuts
70 g shelled unsalted pistachios, finely ground with the reserved flour
6 g baking powder
2 g fine salt
100 g unsalted butter, softened, plus a little for the pans
150 g caster sugar
2 large eggs, at room temperature
80 g plain full-fat yogurt, at room temperature
70 ml whole milk, at room temperature
5 ml vanilla extract
100 g unsalted butter, softened
220 g icing sugar / powdered sugar, sifted
250 g full-fat block cream cheese, cool and cut into pieces
5 ml vanilla extract
1 g fine salt
70 g thick raspberry jam
80 g fresh raspberries, washed and dried thoroughly
30 g shelled unsalted pistachios, roughly chopped
Let’s make it
Heat the oven to 175°C / 350°F conventional, or 155°C fan. Grease two 6-inch round pans and line the bases with parchment.
If starting with whole pistachios, pulse the 70 g nuts with a spoonful of the measured flour until a fine meal forms. Stop before it becomes a paste. Whisk with the remaining flour, baking powder and salt.
Beat the softened cake butter and sugar for about 3 minutes until lighter. Beat in the eggs one at a time, scraping the bowl, then add the vanilla. Stir the yogurt and milk together in a jug.
On low speed, add the dry mixture in three additions, alternating with the yogurt mixture in two additions. Stop as soon as combined and scrape the bottom of the bowl with a spatula. Divide evenly between the prepared pans.
Bake for approximately 25 to 32 minutes. Check from 25 minutes: the tops should spring back gently and a skewer should show a few moist crumbs but no wet batter. Cool in the pans for 10 minutes, then turn out onto a rack and cool completely.
Make the frosting. Beat the 100 g frosting butter until smooth, gradually mix in the icing sugar and salt, then add the cool cream cheese and vanilla. Mix briefly on low speed just until smooth. If loose, chill for 15 to 20 minutes before using.
Set one cold cake layer on a plate. Spread roughly 100 g frosting over it, leaving the outer rim slightly thicker. Spoon the jam inside that rim, keeping it away from the edge. Add the second layer and press very gently to level.
Spread a thin coat of frosting around the sides so some crumb remains visible. Add the remaining frosting to the top and make shallow spoon swirls. Chill the assembled cake for about 30 minutes to support the filling.
Before serving, arrange the dry raspberries and chopped pistachios in a crescent across the top. Cut into eight modest slices and keep leftovers covered in the refrigerator.
Kitchen notes
Allow about 60 minutes for the layers to cool and 30 minutes to chill the assembled cake, in addition to preparation and baking.
Original draft, not yet kitchen-tested. The image illustrates the intended two-layer structure and natural nut colour. Use full-fat block cream cheese and thick jam; a wetter filling can slide. Contains pistachio nuts, wheat, eggs and milk. Keep refrigerated and use within 3 days.
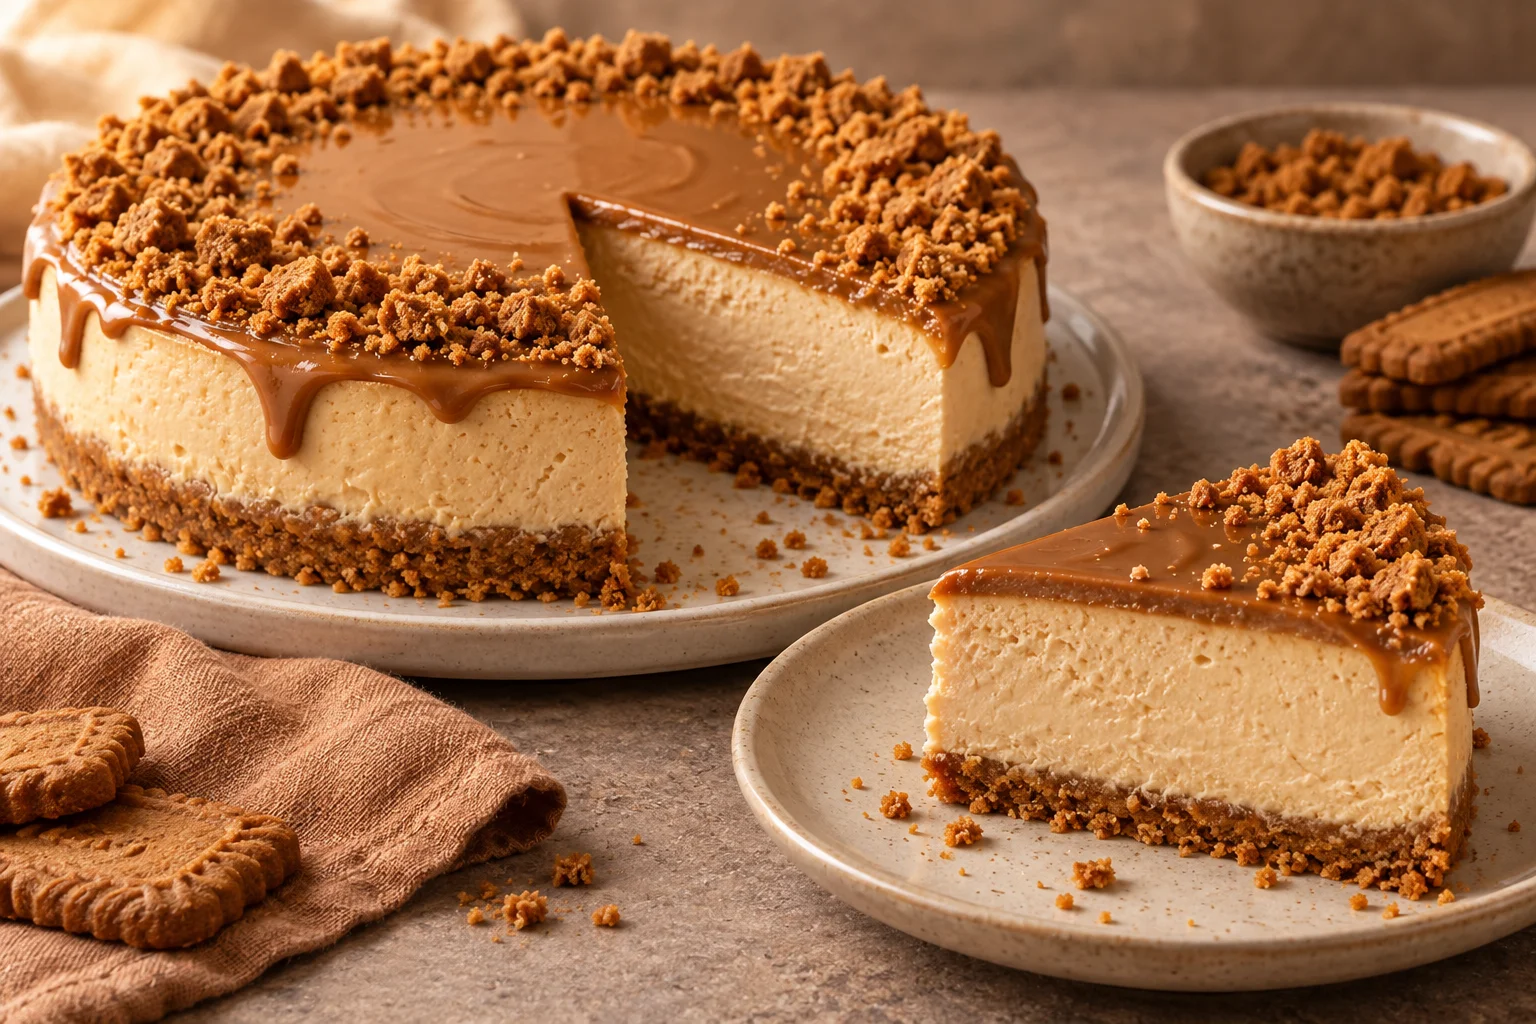
A chilled cookie butter cheesecake with a pressed biscuit base, a glossy Biscoff topping and a simple crumb border. No oven, gelatin or piping bag required.
No-Bake Biscoff Cheesecake510 min · 12 slices from one 8-inch cheesecake · Recipe card
Prep 30 minCook 0 minRest 480 min
Ingredients
250 g Biscoff caramelised biscuits
90 g unsalted butter, melted and cooled slightly
600 g full-fat block cream cheese, softened just enough to mix
70 g icing sugar / powdered sugar, sifted
180 g smooth Biscoff spread, at room temperature
5 ml vanilla extract
250 ml cold double or heavy cream, at least 35 percent fat
100 g smooth Biscoff spread
30 g Biscoff biscuits, roughly crushed
Let’s make it
Line the base of an 8-inch / 20-cm springform tin with parchment. Crush the 250 g biscuits into fine crumbs and stir in the melted butter until evenly damp.
Press the crumbs evenly across the base of the tin, without packing them excessively hard. Refrigerate while preparing the filling.
Beat the cream cheese with the icing sugar, 180 g cookie butter and vanilla until smooth. Scrape down the bowl and stop once combined.
In a separate bowl, whip the cold cream to medium-firm peaks. Fold half into the cream cheese mixture to loosen it, then gently fold in the rest until no white streaks remain.
Spoon the filling over the chilled base, pressing gently into the edges to avoid large gaps. Smooth the top, cover without touching the surface and refrigerate for at least 8 hours or overnight.
Check that the filling holds its edge before releasing the tin. Run a thin knife around the inside edge if needed, release the springform ring and transfer carefully to a plate.
Warm the 100 g topping spread in short, gentle bursts or over warm water until just fluid. Let it cool to barely warm, then spread a thin layer over the cold cheesecake. Chill again briefly if the surface softens.
Scatter the 30 g biscuit crumbs around the top edge shortly before serving. Slice with a warm, dry knife, wiping between cuts. Keep the remaining cheesecake refrigerated.
Kitchen notes
Chill for at least 8 hours, ideally overnight. The total includes the minimum chilling period, not just preparation.
Original draft, not yet kitchen-tested. This is a refrigerator-set dessert; full-fat block cream cheese, adequately whipped cream and a long chill matter. The AI image is illustrative. Refrigerate covered and use within 3 days. Contains milk and wheat; check biscuit and spread labels for other allergens.
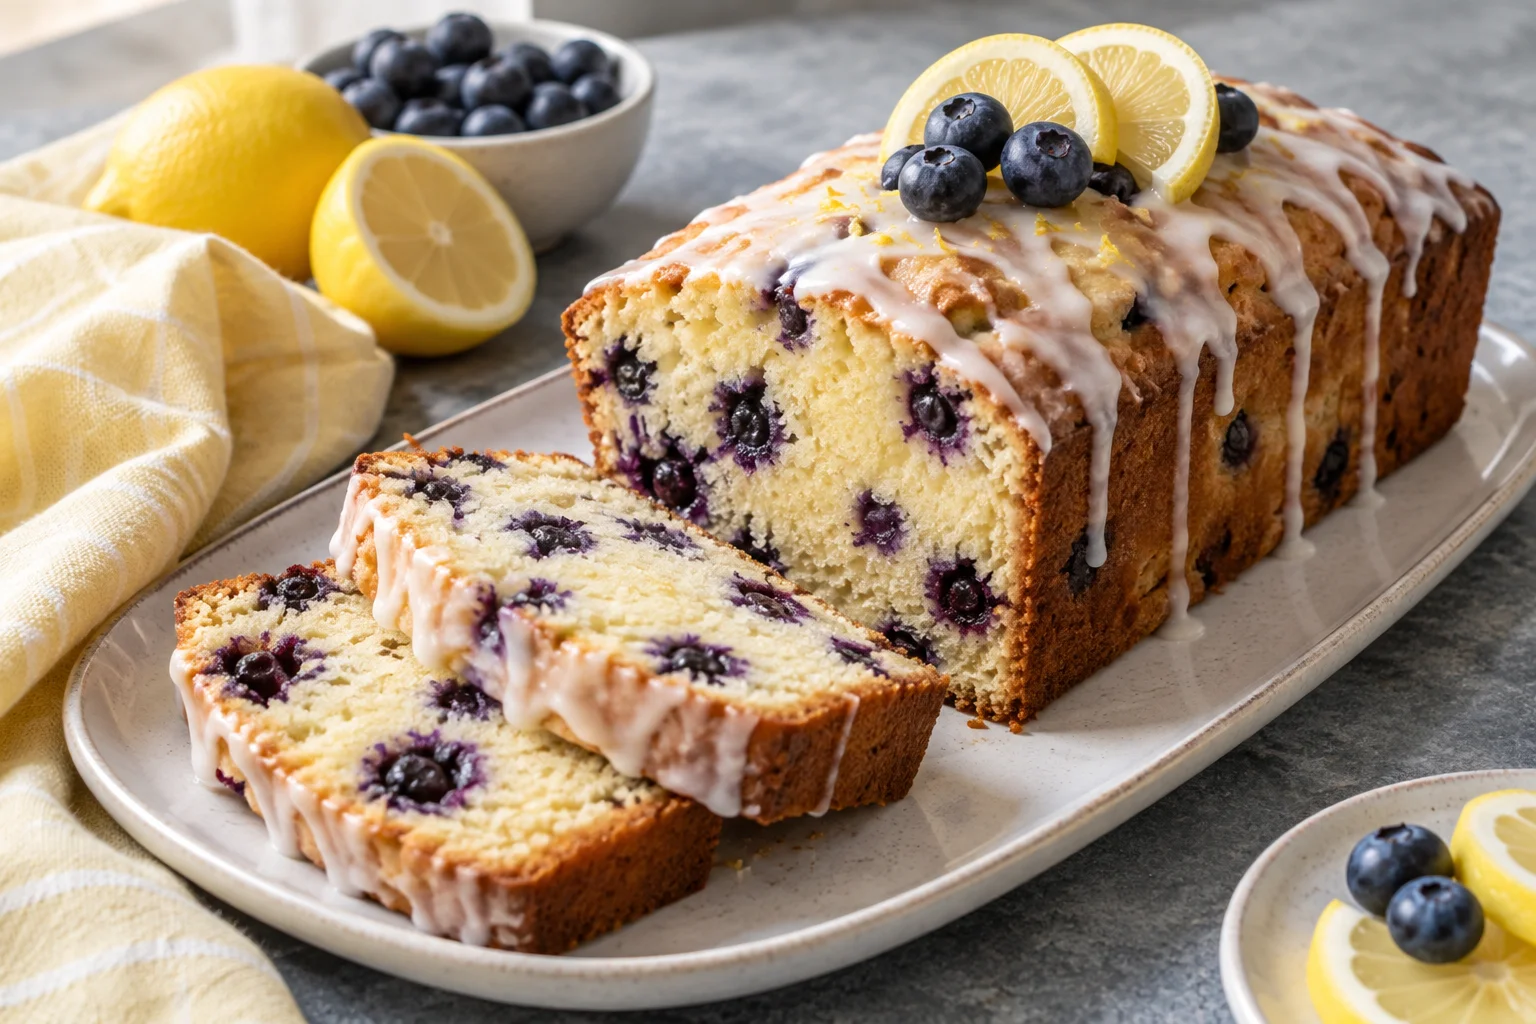
A lemon yogurt loaf with blueberries and a simple lemon glaze, mixed by hand and baked in one 9-by-5-inch pan. Includes tips for frozen berries and a set glaze.
Lemon Blueberry Loaf Cake165 min · 10 slices from one 9-by-5-inch loaf · Recipe card
Prep 20 minCook 55 minRest 90 min
Ingredients
230 g all-purpose flour; reserve 10 g for the berries
8 g baking powder
2 g fine salt
160 g caster or granulated sugar
2 large eggs, at room temperature
150 g plain full-fat yogurt
80 g neutral oil, plus a little for the pan
30 ml fresh lemon juice
8 g finely grated lemon zest, about 2 lemons
5 ml vanilla extract
150 g blueberries, fresh and dry or still frozen
100 g icing sugar / powdered sugar, sifted
20 ml fresh lemon juice; start with 15 ml and add the rest as needed
30 g fresh blueberries, washed and dried
2 thin lemon half-moon slices, for decoration
Let’s make it
Heat the oven to 175°C / 350°F conventional, or 155°C fan. Grease and line a 9-by-5-inch metal loaf pan with parchment, leaving handles over the long sides.
Reserve 10 g of the flour. Whisk the remaining flour with the baking powder and salt in one bowl. In another bowl, rub the lemon zest into the sugar with your fingertips until fragrant.
Whisk the eggs into the lemon sugar, then whisk in the yogurt, oil, 30 ml lemon juice and vanilla until combined. Add the dry ingredients and fold until almost combined.
Toss the blueberries with the reserved flour and fold them through the batter with a few gentle turns. Scrape into the pan and level the top.
Bake for approximately 50 to 65 minutes, checking from 50 minutes. The centre should spring back gently and a skewer inserted into crumb rather than a berry should show no wet batter. Tent loosely with foil if the top colours before the centre is done.
Cool in the pan for 15 minutes, then lift onto a rack. Allow roughly another 75 minutes, or until completely cold, before glazing.
Stir the icing sugar with 15 ml of the glaze lemon juice. Add the remaining juice a little at a time only as needed for a thick, slowly flowing glaze. Spoon over the cool loaf and allow it to settle.
Add the optional dry blueberries and lemon half-moons just before serving. Slice with a serrated knife and store leftovers covered in the refrigerator.
Kitchen notes
Allow about 90 minutes for cooling and glazing after baking; the loaf must be cold before the glaze goes on.
Original draft, not yet kitchen-tested. Baking and cooling times are estimates; frozen berries may extend the bake. The AI image is a serving concept. Use the specified 9-by-5-inch pan, and do not substitute self-raising flour without reformulating the leavening. Contains wheat, eggs and milk.
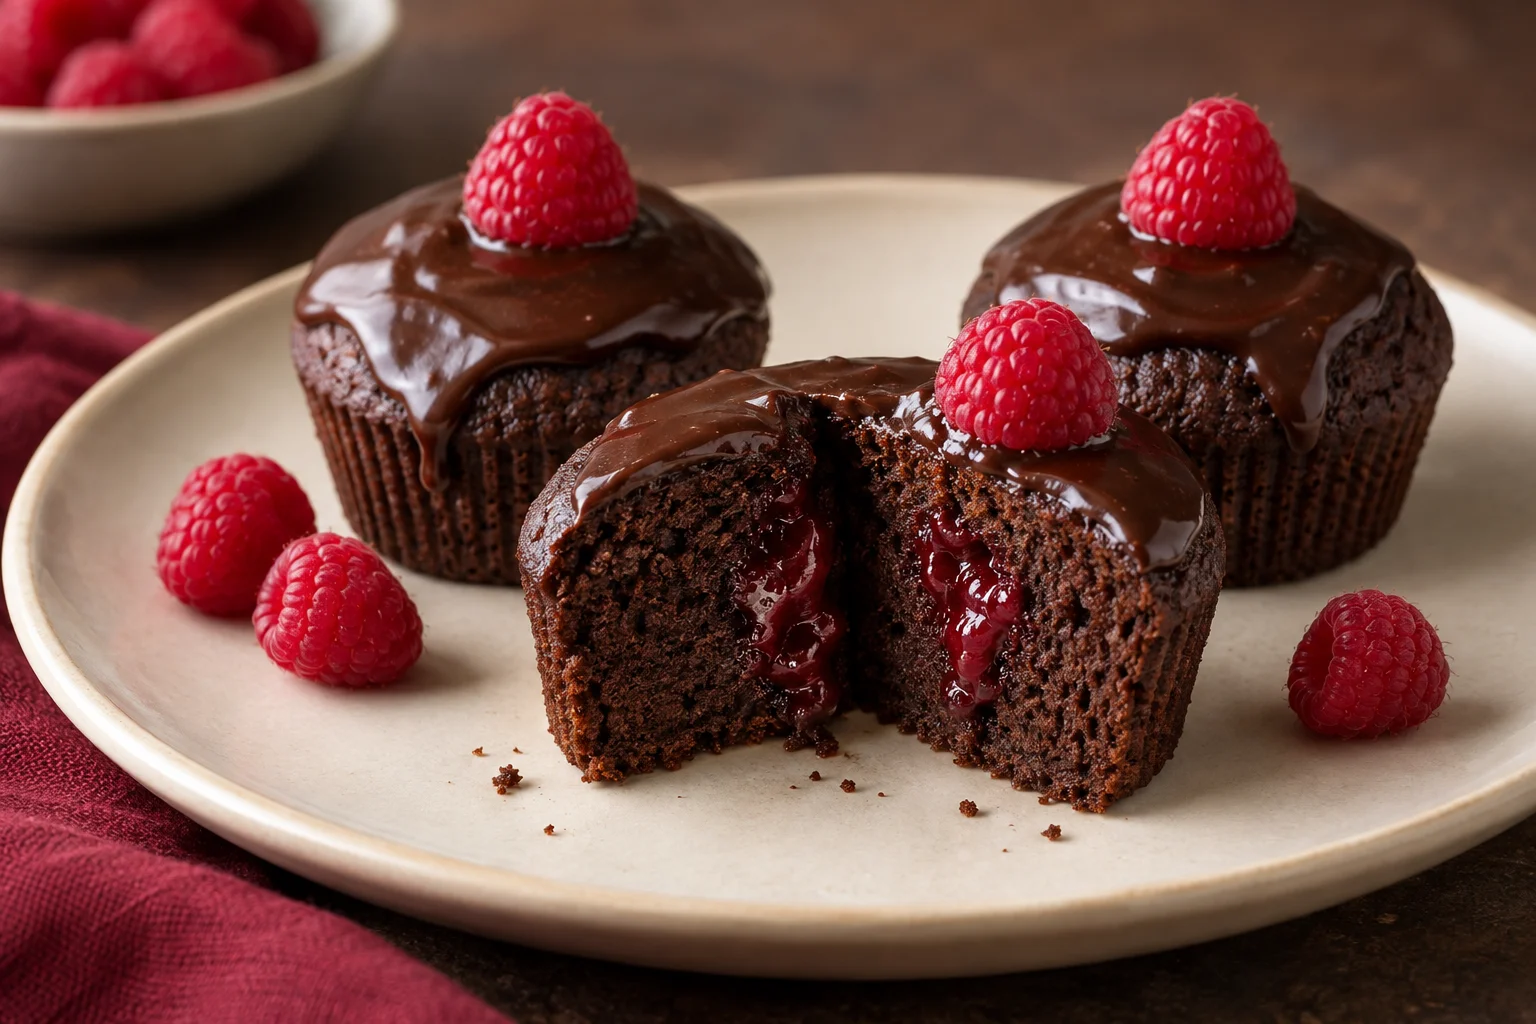
Make individual chocolate cakes with raspberry jam centres and spooned ganache using a standard muffin tin. No mini cake pans, stacked layers or piping bag required.
Mini Chocolate Raspberry Cakes125 min · 12 standard muffin-sized cakes · Recipe card
Prep 40 minCook 22 minRest 63 min
Ingredients
150 g all-purpose flour
6 g baking powder (about 1 1/2 level teaspoons)
2 g fine salt
35 g unsweetened Dutch-process cocoa powder, sifted
60 ml just-boiled water
120 ml whole milk
170 g caster or granulated sugar
2 large eggs, at room temperature (about 100 g without shells)
65 g neutral oil, such as sunflower or canola
80 g plain full-fat yogurt, at room temperature
5 ml vanilla extract (1 teaspoon)
120 g thick raspberry jam, seedless if preferred
180 g dark chocolate, about 55 to 65 percent cocoa, finely chopped
150 ml double or heavy cream, at least 35 percent fat
12 whole fresh raspberries, gently washed and dried thoroughly
Let’s make it
Prepare the tin and oven. Heat the oven to 175°C / 350°F conventional, or 155°C fan. Line a standard 12-cup muffin tin with paper liners and place the oven rack in the centre.
Bloom the cocoa. Put the cocoa in a heatproof jug and gradually whisk in the just-boiled water to form a paste. Whisk in the milk until smooth. Set aside until the mixture is lukewarm rather than hot.
Mix the batter. Whisk the flour, baking powder and salt in a bowl. In a second bowl, whisk the sugar, eggs, oil, yogurt and vanilla until combined, then whisk in the lukewarm cocoa mixture. Add the dry ingredients and fold just until no dry flour remains. The batter should be pourable; do not keep beating it.
Portion and bake. Divide the batter between the liners, aiming for about two-thirds full. Bake for approximately 18 to 23 minutes, checking from 18 minutes. The tops should spring back lightly and a skewer should show a few moist crumbs but no raw batter. Tin sizes vary; bake any excess batter separately rather than filling the cups to the rim.
Cool. Leave the cakes in the tin for 5 to 10 minutes, then transfer them to a rack. Allow roughly another 50 minutes, or until completely cool. Peel away the paper liners carefully. If desired, trim only a very thin slice from any tall domes.
Make the ganache while the cakes cool. Put the chopped dark chocolate in a heatproof bowl. Warm the cream in a small saucepan until steaming with small bubbles at the edge, then pour it over the chocolate. Leave for 2 minutes. Stir slowly from the centre until smooth. Let it cool, stirring occasionally, until it falls from a spoon in a broad ribbon and spreads slowly. Cooling may take 15 to 30 minutes or longer depending on the room.
Fill the cakes. Cut a small cavity about 2 cm wide and 2 cm deep into the top of each cool cake, leaving at least 1.5 cm of sponge beneath it. Reserve the removed pieces. Spoon approximately 10 g jam into each cavity, stopping below the top. Trim each reserved piece into a thin lid and place it back over the jam. For a shallower cake, make a smaller cavity and use less jam.
Spoon on the ganache. Divide the thickened ganache between the cakes, starting with a spoonful on each and adding more as needed. Nudge it toward the edge with the back of the spoon. If it runs off immediately, pause and let the remaining ganache cool further.
Finish and serve. Place one dry raspberry on each cake while the ganache is still soft. Serve once the ganache has settled, or refrigerate covered until needed. Let chilled cakes stand briefly before serving so the chocolate topping softens.
Kitchen notes
Allow about 60 minutes for the cakes to cool, plus time for the ganache to become spoonable. Plan roughly 2 hours overall.
Original recipe draft; not yet kitchen-tested. The generated image illustrates the intended presentation, and your cakes may differ. Total time is approximate; the ganache cools while the cakes cool. Use a standard muffin tin, thick raspberry jam and dark chocolate within the stated cocoa range. Store the filled cakes covered in the refrigerator for up to 3 days, adding fresh fruit on the serving day. Contains wheat, eggs and milk; chocolate may contain soy or other allergens, so check packaging.
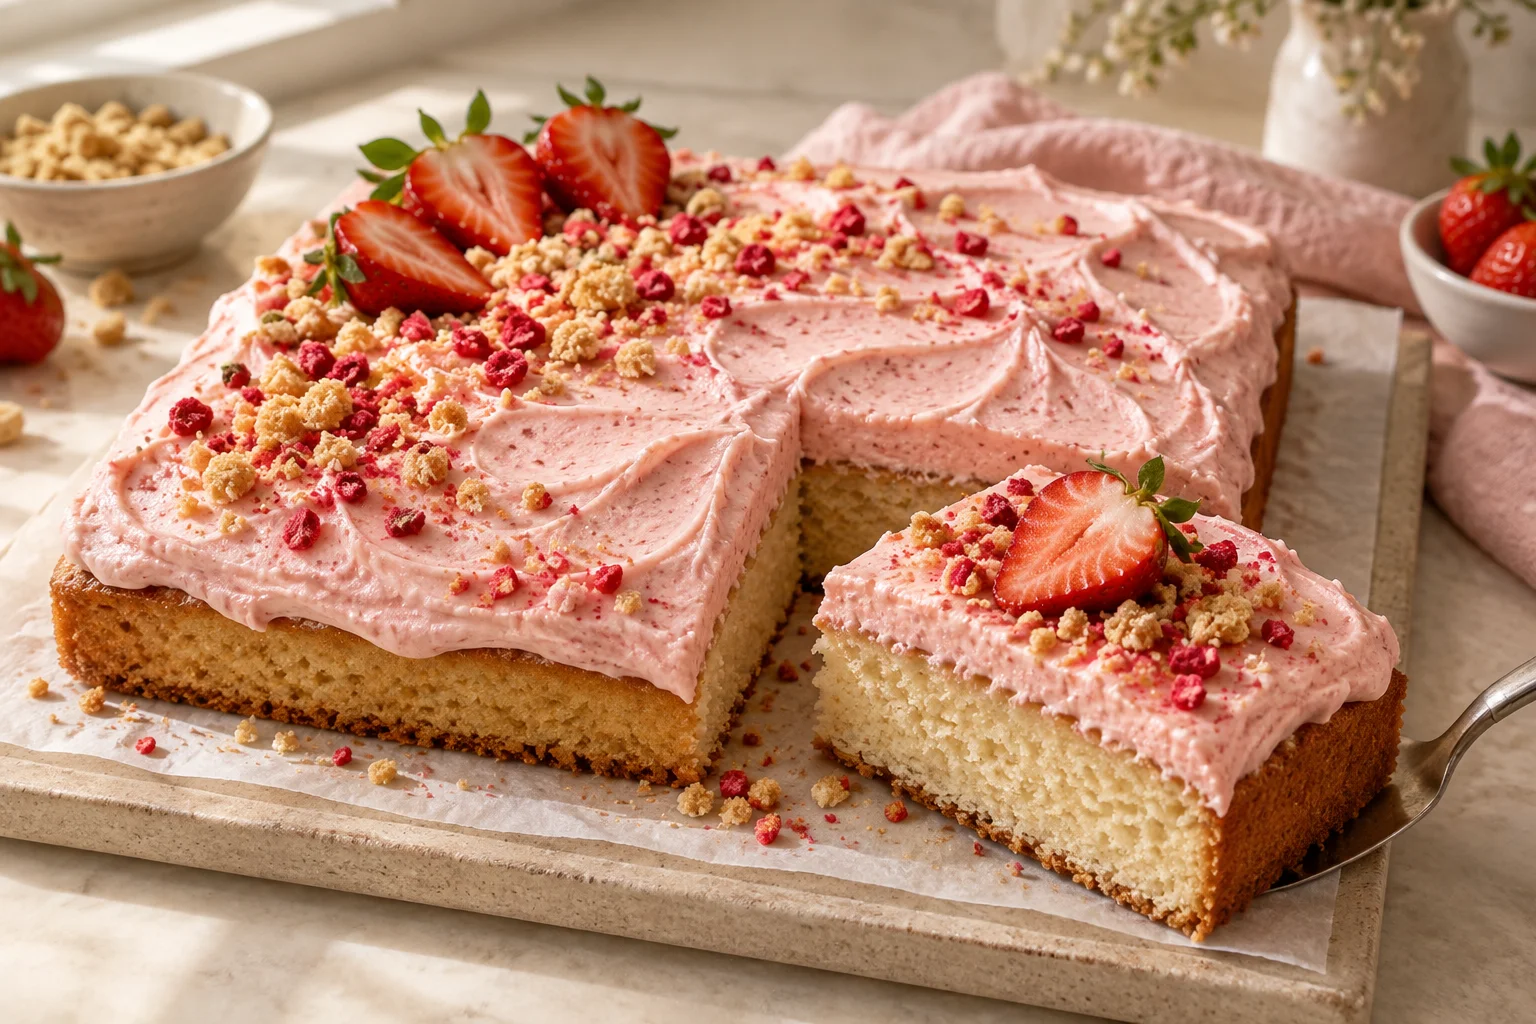
One 9-inch vanilla cake, strawberry cream cheese frosting swirled with a spoon, and a pink biscuit crunch. A birthday-cake idea with no layers to stack and no piping bag to buy.
Strawberry Crunch Sheet Cake165 min · 12 slices from one 9-inch square cake · Recipe card
Prep 40 minCook 35 minRest 90 min
Ingredients
250 g all-purpose flour
8 g baking powder (about 2 level teaspoons)
3 g fine salt
115 g unsalted butter, softened, plus a little for the pan
200 g caster or granulated sugar
2 large eggs, at room temperature (about 100 g without shells)
5 ml vanilla extract (1 teaspoon)
80 g full-fat sour cream, at room temperature
160 ml whole milk, at room temperature
115 g unsalted butter, softened
280 g icing sugar / powdered sugar, sifted
15 g freeze-dried strawberries, ground finely and sifted
225 g full-fat block cream cheese, cool and cut into pieces
5 ml vanilla extract (1 teaspoon)
1 g fine salt
60 g vanilla sandwich biscuits, including their filling
10 g freeze-dried strawberries, roughly crushed
15 g unsalted butter, melted and cooled
150 g fresh strawberries, washed, dried thoroughly and halved
Let’s make it
Prepare the pan and oven. Heat the oven to 175°C / 350°F conventional, or 155°C fan. Grease a 9-inch / 23 cm square metal pan and line its base and two sides with parchment, leaving handles for lifting. Set a rack in the centre of the oven.
Mix the dry and wet ingredients separately. Whisk the flour, baking powder and salt in one bowl. In a jug, stir the sour cream and milk together until reasonably smooth.
Cream the butter and sugar. Beat the softened butter with the sugar for about 3 minutes until lighter and fluffy. Scrape down the bowl. Beat in the eggs one at a time, then the vanilla. The mixture may look slightly curdled; stop beating once the eggs are incorporated.
Finish the batter. On low speed, add one-third of the flour mixture, half of the milk mixture, another third of the flour, the remaining milk and finally the remaining flour. Stop as soon as there are no dry streaks. Fold once or twice with a spatula to check the bottom of the bowl.
Bake. Spread the batter evenly in the prepared pan. Bake for approximately 30 to 38 minutes, checking from 30 minutes. The centre should spring back gently and a skewer should come out with a few moist crumbs but no wet batter. If the centre is still wet, continue baking and check again after a few minutes.
Cool completely. Leave the cake in its pan for 15 minutes, then lift it onto a rack with the parchment. Allow roughly another 75 minutes, or until the centre and underside are completely cool. Do not frost a warm cake.
Make the frosting. Beat the softened frosting butter until smooth. Gradually mix in the icing sugar, strawberry powder and salt on low speed, then beat until combined. Add the cream cheese and vanilla and mix briefly on low speed just until smooth, scraping the bowl as needed. If it is too loose to hold a spoon trail, chill for 15 to 20 minutes and stir gently.
Make the crunch. Crush the biscuits into a mix of crumbs and small pieces. Stir in the crushed freeze-dried strawberries and melted, cooled butter. Keep in an airtight container until you are ready to decorate.
Decorate and serve. Transfer the cool cake to a board or platter. Spread the frosting across the top and make broad swirls with the back of a spoon. Just before serving, scatter the crunch around the edges and a little across the centre, then add the dry strawberry halves. Cut into 12 slices. Refrigerate leftovers covered.
Kitchen notes
Allow about 90 minutes for the cake to cool completely. Plan around 2 hours 45 minutes overall; cooling and baking vary.
Original recipe draft; not yet kitchen-tested. The generated image illustrates the intended style, and your bake may differ. Timing is approximate and includes about 90 minutes of cooling. Use full-fat block cream cheese, not a soft spreadable tub product. The frosting and topping require 25 g freeze-dried strawberries in total. Store the frosted cake covered in the refrigerator for up to 3 days; add the crunch and fresh fruit on the serving day. Contains wheat, milk and eggs; check biscuit labels for other allergens.
Arrange small white geese around a blue pond-inspired cake, with simple edible shapes and a manageable low-profile layout.
Decorating notes3 min read · Tools, tips & technique
What you’ll need
Stable round cake with a blue frosting coat
Two or three related blue buttercream shades
White and orange edible modeling material
Small palette knife
Paper circles or markers for planning figure positions
Plan a small flock
The reference uses repeated white goose shapes around the rim and sides. Make a layout with a few figures first rather than starting with a crowded flock. Leave an open section for the greeting and a clear place to cut the first slice.
Use a stable cake height and avoid putting the largest figures near an unsupported edge. A simpler version can keep all geese on top, with only piped water texture on the sides. Repetition creates the theme; you do not need many different poses.
Build the pond texture
Apply a firm blue base coat, then add thin patches of lighter and darker blue with a palette knife. Let the colors overlap slightly without blending into one uniform shade. Short curved strokes suggest water more naturally than long vertical stripes.
Keep the heaviest texture away from the places where figures will sit. A smooth small landing spot gives each goose a stable attachment area. Check the side finish before adding figures because repairs become harder afterward.
Scatter miniature blue flowers and green stems around an ivory cake, leaving a soft painted area for the birthday greeting.
Decorating notes3 min read · Tools, tips & technique
What you’ll need
Smooth ivory-frosted cake
Pale blue, deeper blue, green and ivory icing
Fine round tips and small palette knife
Parchment for tiny flower practice
Toothpick for message placement
Reserve the message patch
The reference gives its center a pale blue brush of color, with small flowers around it. Mark an open central area before piping stems. Keep the patch loose-edged rather than making a hard rectangle that fights the organic flowers.
On a firm ivory base, spread a very thin layer of pale blue with a small palette knife. Make a few broad strokes and stop. Repeated scraping can lift the base coat and turn a light patch into a thick mound.
Practice the smallest flower
At this scale, a blossom can be two or three small blue dots with a tiny contrasting center. Practice on parchment using the same tip size you will use on the cake. The flowers should remain readable without needing a dozen petals each.
Make a few sizes and orientations. Some can be buds, some open flowers, and some short leaf sprigs. Repeat the same colors so the variations feel like one meadow rather than a collection of unrelated decorations.