 0 comments
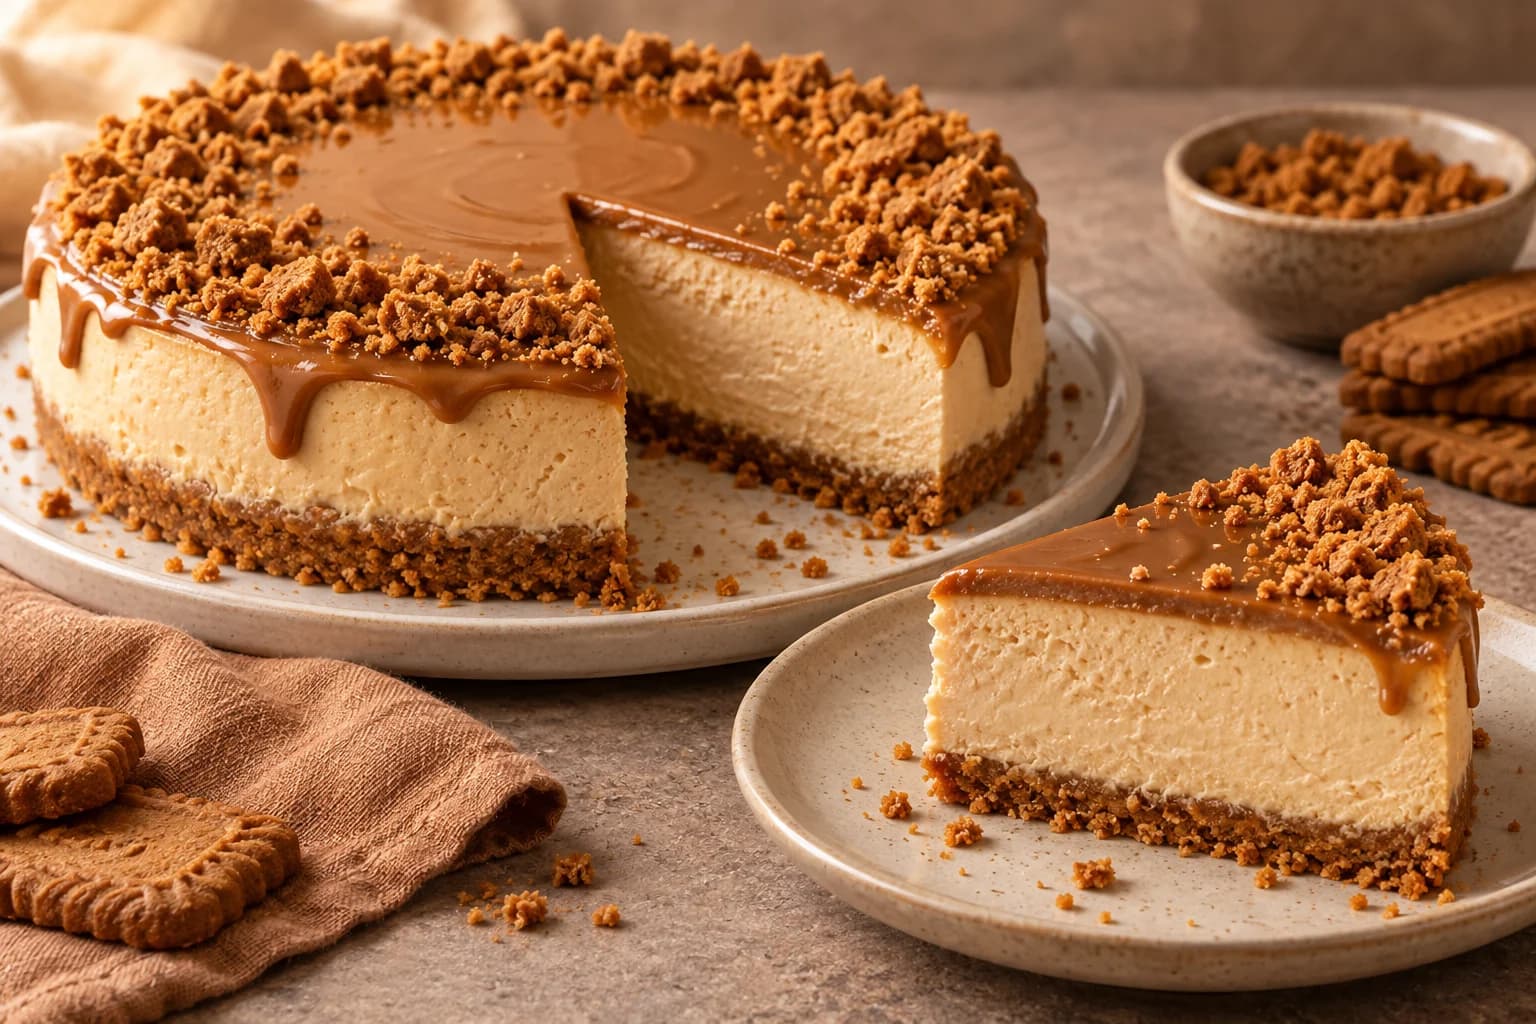
This no-bake Biscoff cheesecake turns caramelised biscuits and cookie butter into a celebration dessert with a simple crumb border. The base is pressed into the tin, the filling sets in the refrigerator, and a thin layer of spread makes the top glossy. There is no baking or gelatin step, but the long chill is essential: plan to make it the day before you want to serve it. This is an original recipe draft that has not yet been kitchen-tested; use the texture and doneness cues alongside the estimated timings.
Before you start
- One 8-inch / 20-cm springform tin, at least 2.5 inches / 6 cm deep
- Baking parchment for the base
- Kitchen scale and two mixing bowls
- Food processor or bag and rolling pin for biscuit crumbs
- Electric whisk, spatula and spoon
- Refrigerator space for the level tin
The ingredients that help a no-bake filling hold
Use full-fat block cream cheese and cold double or heavy cream with at least 35 percent fat. Soft spreadable cream cheese and low-fat substitutes can contain more water, so they are not direct replacements here. The texture depends on those ingredients and on adequate chilling.
Use smooth Biscoff cookie butter for a consistent filling. Other biscuit spreads may contain different amounts of oil or sugar, so their texture is not guaranteed to match. This is a cookie butter cheesecake, not a baked cheesecake with a custard-style centre.
Press the biscuit base without making it rock hard
Crush the biscuits into fine crumbs and stir in melted butter until evenly damp. Press across the lined base with the back of a spoon or a flat-bottomed glass, just firmly enough for the crumbs to bind. Pushing with all your weight can make the chilled base difficult to cut.
Keep the crumb mixture on the base rather than building a thick wall around the sides. Chill it while making the filling. The side of the finished cheesecake will show the biscuit base and the pale cookie butter filling as two separate bands.
Fold in whipped cream gently
Beat the cream cheese, icing sugar, vanilla and room-temperature cookie butter just until smooth. In a separate bowl, whip the cold cream to medium-firm peaks: the peak should hold, with a tip that bends slightly. Stop before the cream looks grainy.
Fold the cream into the cream cheese mixture in two additions. The first lightens the thicker mixture; the second should keep as much air as possible. A loose filling cannot be fixed simply by beating it for longer once everything is combined.
Allow an overnight chill before decorating
Refrigerate the filled tin for at least 8 hours, ideally overnight. No-bake does not mean ready immediately. Keep the tin level and covered, and do not try to speed the full setting stage by serving a partly frozen cheesecake.
Only unmould once the filling is firm enough to hold its edge. For the topping, warm cookie butter just until fluid and then let it become barely warm before spreading. Hot topping can soften the surface. Add the biscuit border close to serving so it stays crisp.
Neat slices and practical storage
A warm, dry knife helps make clean cuts. Run the blade under hot water, dry it, cut one slice and wipe it before the next. Keep portions modest; this is a rich filling with both cream cheese and cookie butter.
Store the cheesecake covered in the refrigerator and use within 3 days. Add the crumb decoration on the serving day when possible. If a chilled slice slumps, return the cheesecake to the refrigerator; ingredient choice, whipping and chill time all affect how firmly an unbaked filling sets.
No-Bake Biscoff Cheesecake
- Makes, at 1×
- 12 slices from one 8-inch cheesecake
- Prep
- 30 min
- Baking
- 0 min
- Start to finish
- About 8 hr 30 min
Chill for at least 8 hours, ideally overnight. The total includes the minimum chilling period, not just preparation.
Original recipe draft · not yet kitchen-tested. Baking times are estimates; use the doneness checks in the method.
Ingredients
Biscuit base
Cookie butter filling
Topping
Let’s make it
- Line the base of an 8-inch / 20-cm springform tin with parchment. Crush the 250 g biscuits into fine crumbs and stir in the melted butter until evenly damp.
- Press the crumbs evenly across the base of the tin, without packing them excessively hard. Refrigerate while preparing the filling.
- Beat the cream cheese with the icing sugar, 180 g cookie butter and vanilla until smooth. Scrape down the bowl and stop once combined.
- In a separate bowl, whip the cold cream to medium-firm peaks. Fold half into the cream cheese mixture to loosen it, then gently fold in the rest until no white streaks remain.
- Spoon the filling over the chilled base, pressing gently into the edges to avoid large gaps. Smooth the top, cover without touching the surface and refrigerate for at least 8 hours or overnight.
- Check that the filling holds its edge before releasing the tin. Run a thin knife around the inside edge if needed, release the springform ring and transfer carefully to a plate.
- Warm the 100 g topping spread in short, gentle bursts or over warm water until just fluid. Let it cool to barely warm, then spread a thin layer over the cold cheesecake. Chill again briefly if the surface softens.
- Scatter the 30 g biscuit crumbs around the top edge shortly before serving. Slice with a warm, dry knife, wiping between cuts. Keep the remaining cheesecake refrigerated.
Original draft, not yet kitchen-tested. This is a refrigerator-set dessert; full-fat block cream cheese, adequately whipped cream and a long chill matter. The AI image is illustrative. Refrigerate covered and use within 3 days. Contains milk and wheat; check biscuit and spread labels for other allergens.
The little details
- Bring the cream cheese just soft enough to beat smooth, but keep the whipping cream cold.
- Reserve the topping biscuits separately so they do not absorb refrigerator moisture overnight.
- Plan the eight-hour chill before promising a same-day dessert.
Your questions, answered
Does this cheesecake need gelatin?
This draft uses full-fat block cream cheese, whipped cream, cookie butter and an overnight chill rather than gelatin. Its final firmness has not yet been kitchen-tested.
How long does no-bake Biscoff cheesecake need to chill?
Allow at least 8 hours in the refrigerator, preferably overnight. It should hold its edges when unmoulded before you add the topping.
Can I use low-fat cream cheese?
It is not a direct substitute in this recipe. The fat and water balance helps determine whether the filling sets, so use full-fat block cream cheese.
Is Biscoff cheesecake nut-free or dairy-free?
This recipe contains milk and wheat and should not be described as dairy-free. Check every ingredient label for allergens and cross-contact information rather than assuming a brand or flavour is safe for an allergy.
Made it? Let’s talk.
Share how your bake went, ask a question, or pass on a helpful tip. There’s a seat for you here.
A kind kitchen is a happy kitchen. Our community guidelines →
No comments yet. Be the first to say hello.