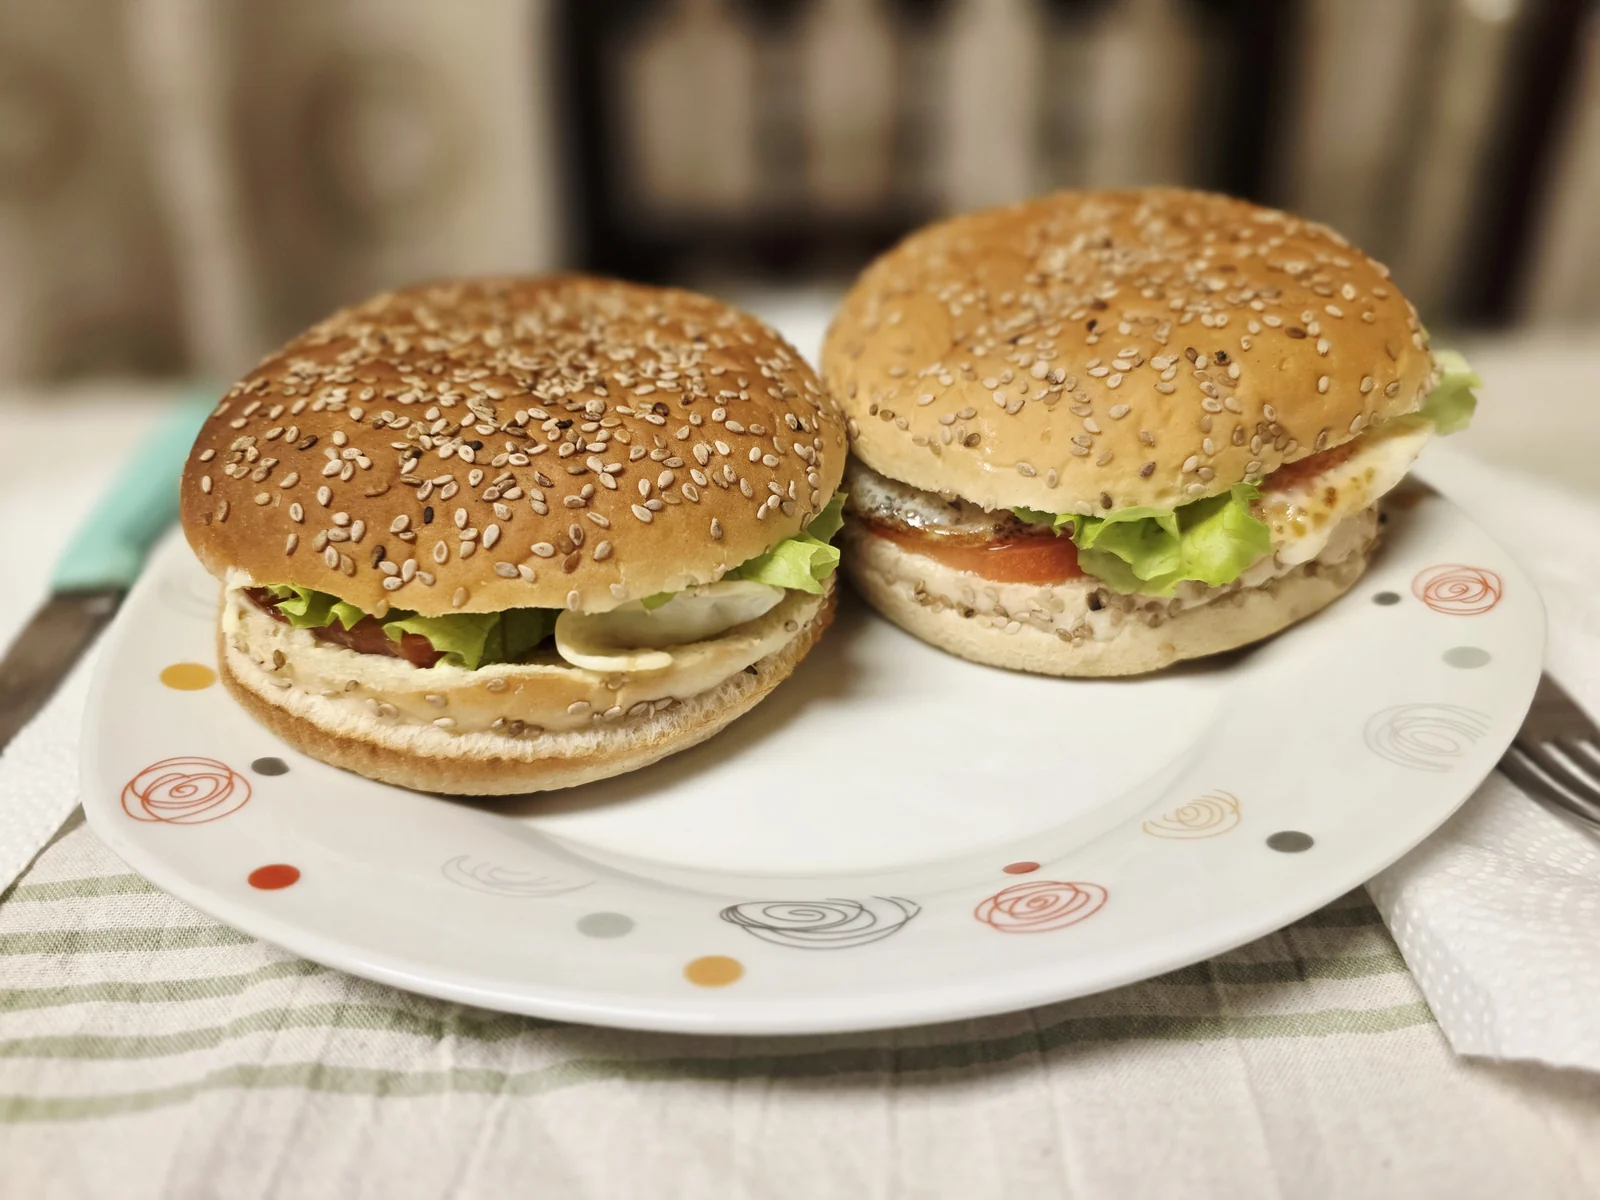
Recreate a tidy cafe presentation with correctly sized trays, grease-resistant sleeves and a realistic packaging test.
Decorating notes3 min read · Tools, tips & technique
What you’ll need
Food-contact packaging suitable for the serving temperature
Grease-resistant sleeves and shallow trays
Ruler and a sample assembled burger
Plain paper for sizing mock-ups only
Measure the food before ordering
The reference works because the wrapper supports the lower burger while revealing the upper bun. Measure an actual assembled burger, including its height. Choose a tray that supports the base and a sleeve that contains the layers without squeezing out the filling.
Make a paper mock-up for sizing, then use food-contact packaging for service. Ordinary printed craft paper is not a substitute for a food-safe sleeve. Develop your own name and typography instead of copying the branding in the photograph.
Test moisture and grease
Drain wet toppings and control the sauce quantity. A sleeve can contain a burger but cannot rescue a soaked bun. Test your real combination of bread, filling, paper and outer box rather than judging the wrapper on an empty table.
Closed boxes trap more steam than open trays. Check the burger after a realistic service delay. Look for collapsed bread, leaking sauce and grease spreading through to the outside, then adjust the liner or assembly.
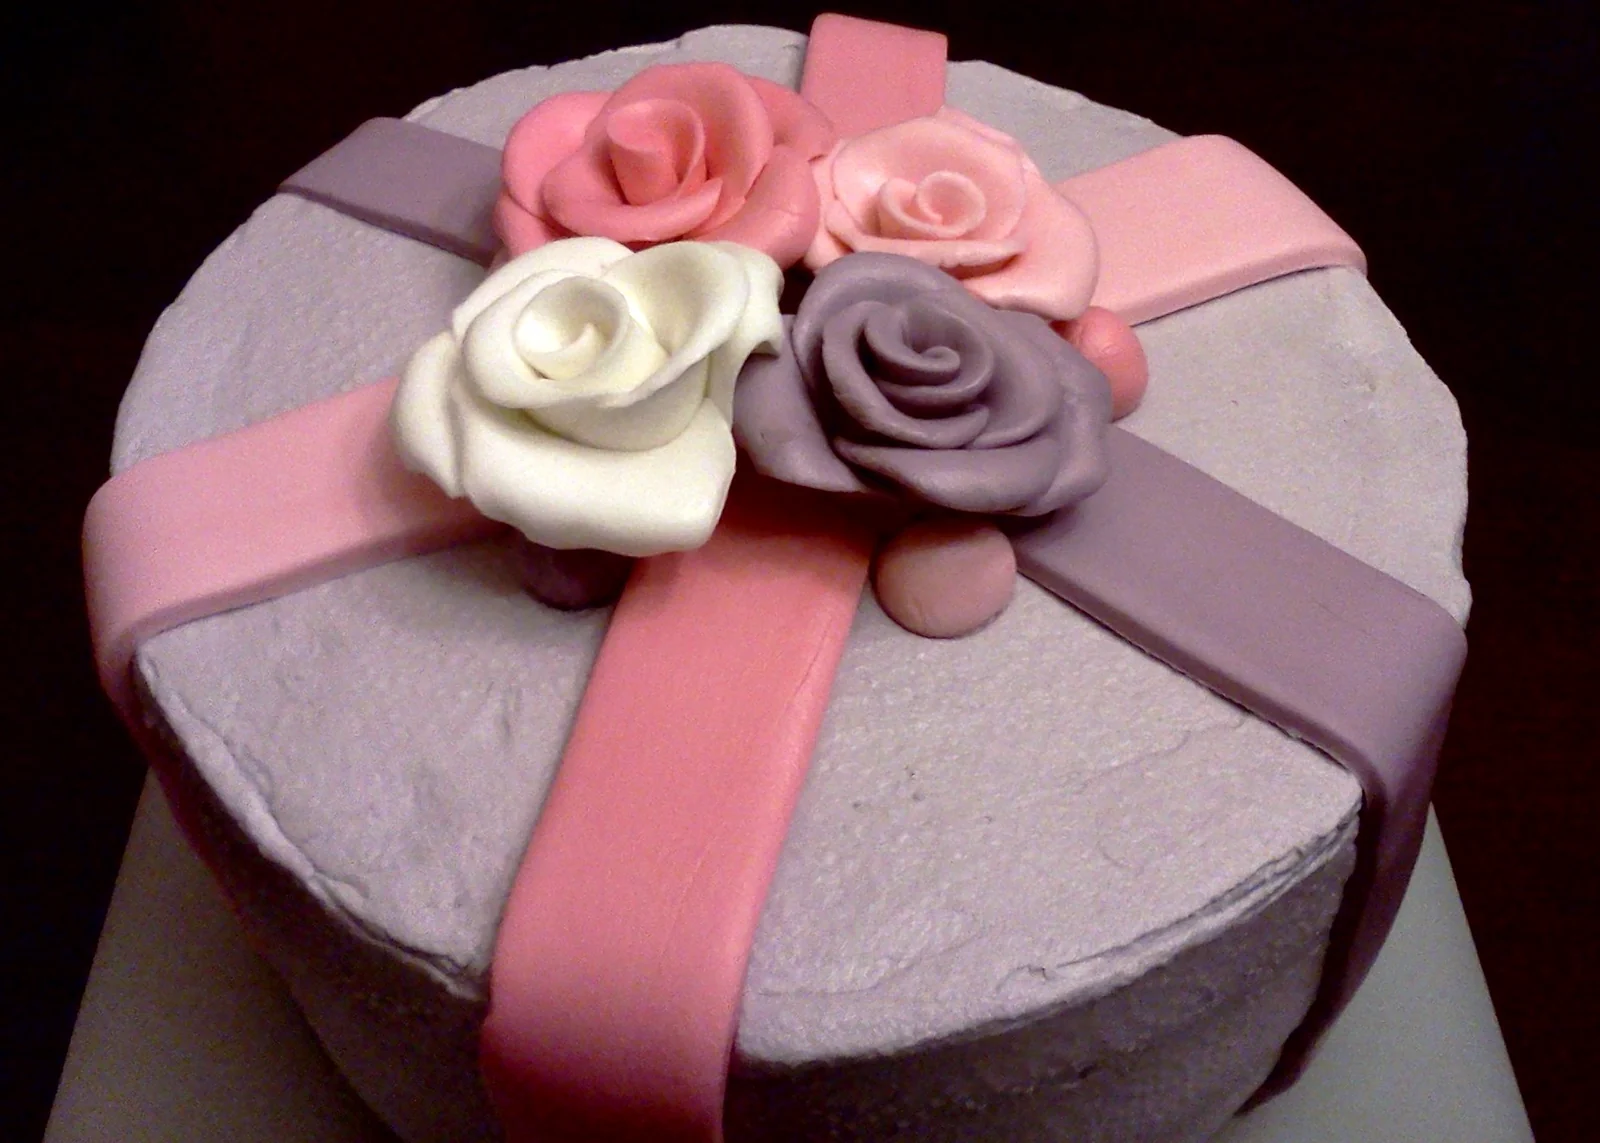
Create a lavender cake with scattered pink blossoms, or adapt the layout for larger palette-knife petals.
Decorating notes3 min read · Tools, tips & technique
What you’ll need
Smooth chilled round cake
Lavender, blush, ivory and muted green buttercream
Fine round tip and small blossom tip
Small palette knife and parchment
Mix a quiet background
Mix enough lavender buttercream for the entire coat so the top and sides match. Add violet coloring gradually; a pastel base leaves room for pink flowers to stand out. Smooth the surface and chill until decoration will not drag the base out of shape.
Choose a main cluster away from the center and leave a generous open area opposite it. That empty space is part of the design. It also gives a birthday inscription somewhere to sit without competing with the flowers.
Pipe blossoms in three sizes
Practice five small petal dots around a center on parchment. Release pressure before lifting the tip. Make a few larger flowers, several medium flowers and tiny buds instead of repeating one size everywhere.
Place the larger blooms in the main cluster, then trail smaller ones toward the far edge. Rotate the cake between groups to check balance. A few buds on the side connect the decoration without covering the whole surface.
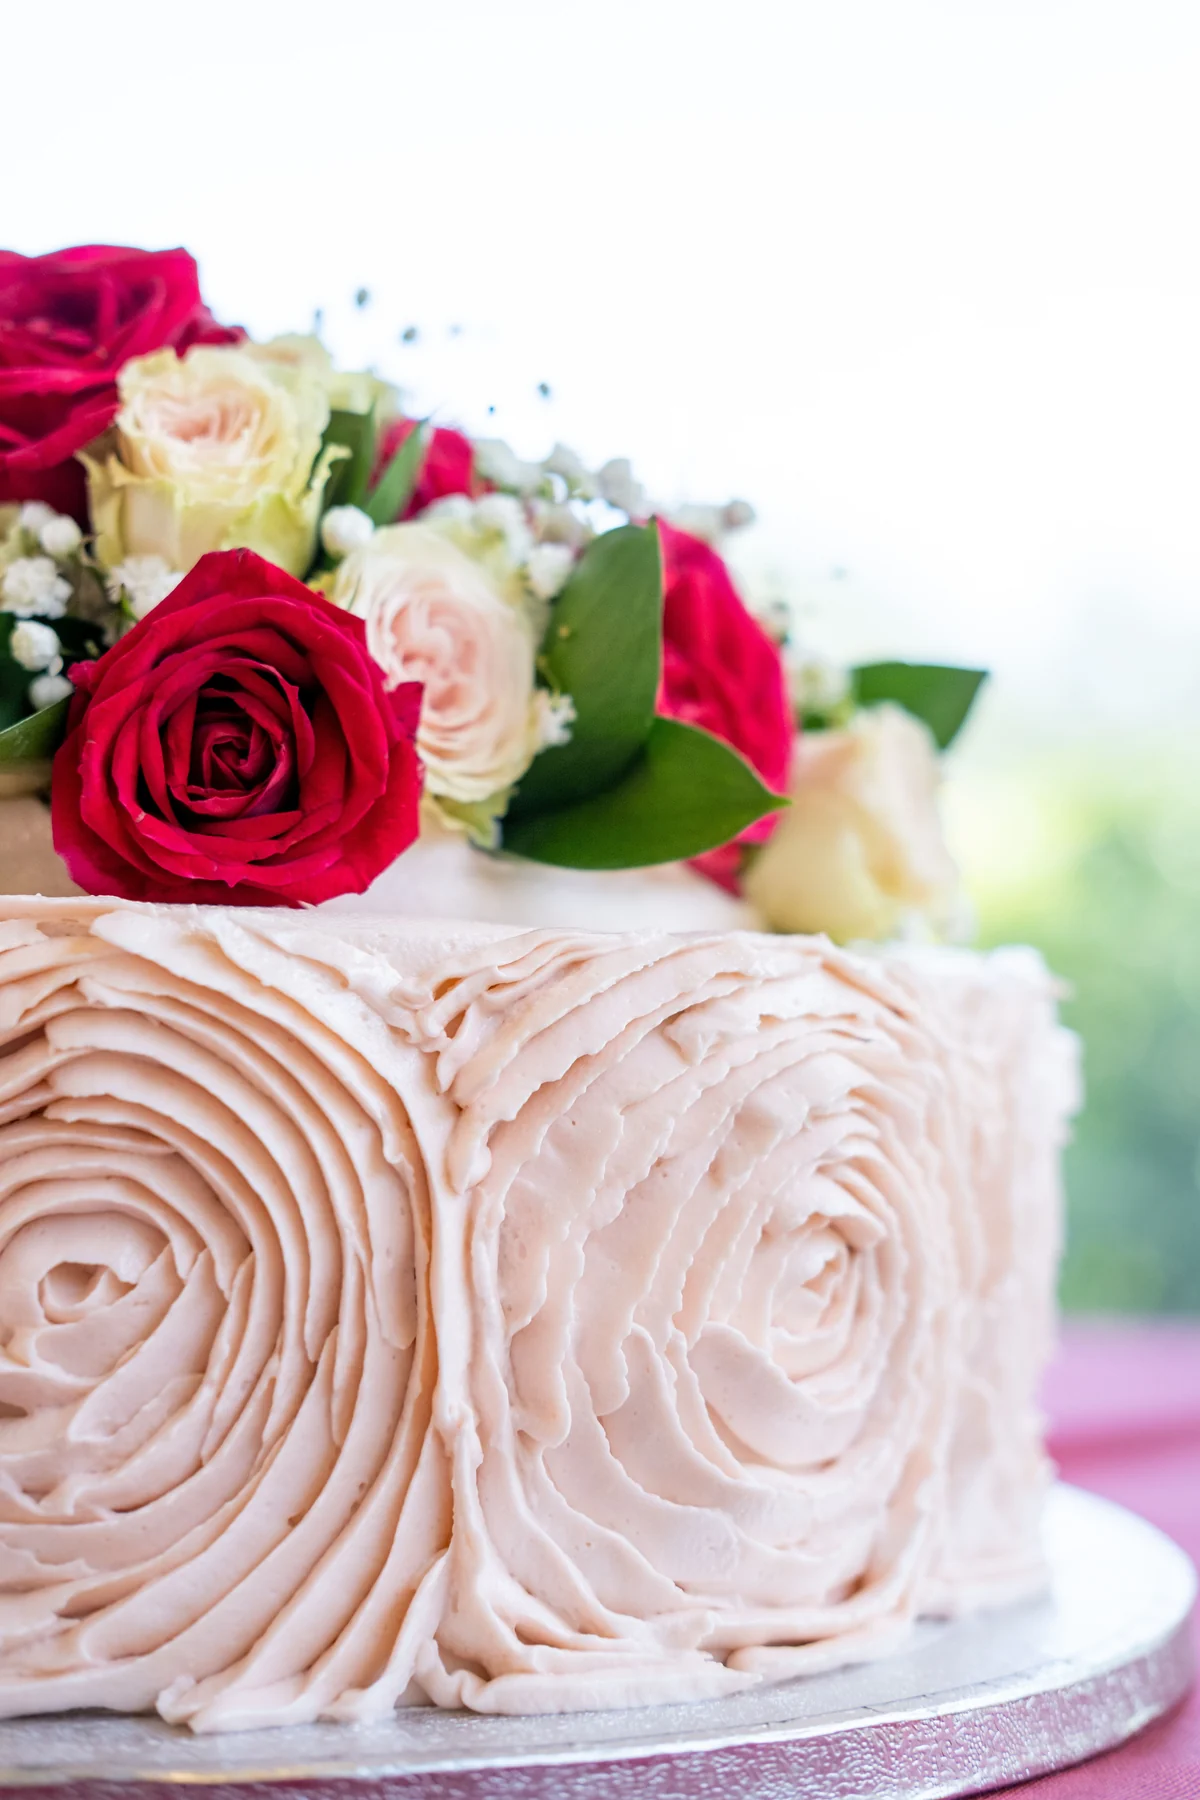
Plan a rectangular celebration cake with textured white sides, edible calla-style flowers and an uncluttered top.
Decorating notes3 min read · Tools, tips & technique
What you’ll need
Cooled rectangular cake on a rigid board
White buttercream and a little green icing
Offset spatula, scraper and piping bags
Petal tip or small palette knife
Edible modeling paste for optional flowers
Choose the silhouette first
The design depends on a low, long shape and a restrained white palette. Start with a rectangle that fits your board, box and refrigerator. Leave enough board visible to lift it without touching the frosting. Use your recipe’s serving yield rather than estimating portions from a photograph.
One reference places flowers on top; the other lets tall side ruffles carry the design. Choose one main focal point. A fuller arrangement benefits from quieter sides, while a clean top can support more texture around the edges.
Work the ruffles in short sections
Crumb-coat and chill the cake before applying the final buttercream. For soft texture, pull narrow palette-knife strokes upward along the side. Vary the height slightly and wipe the knife often. Do one side at a time so the coating remains workable.
For more defined ribbons, use a petal tip and overlap short vertical strokes. Practice on parchment first. Slumping ribbons suggest softer icing than the shape can support; torn edges may indicate icing that is too stiff. Adjust the consistency before changing every tool.
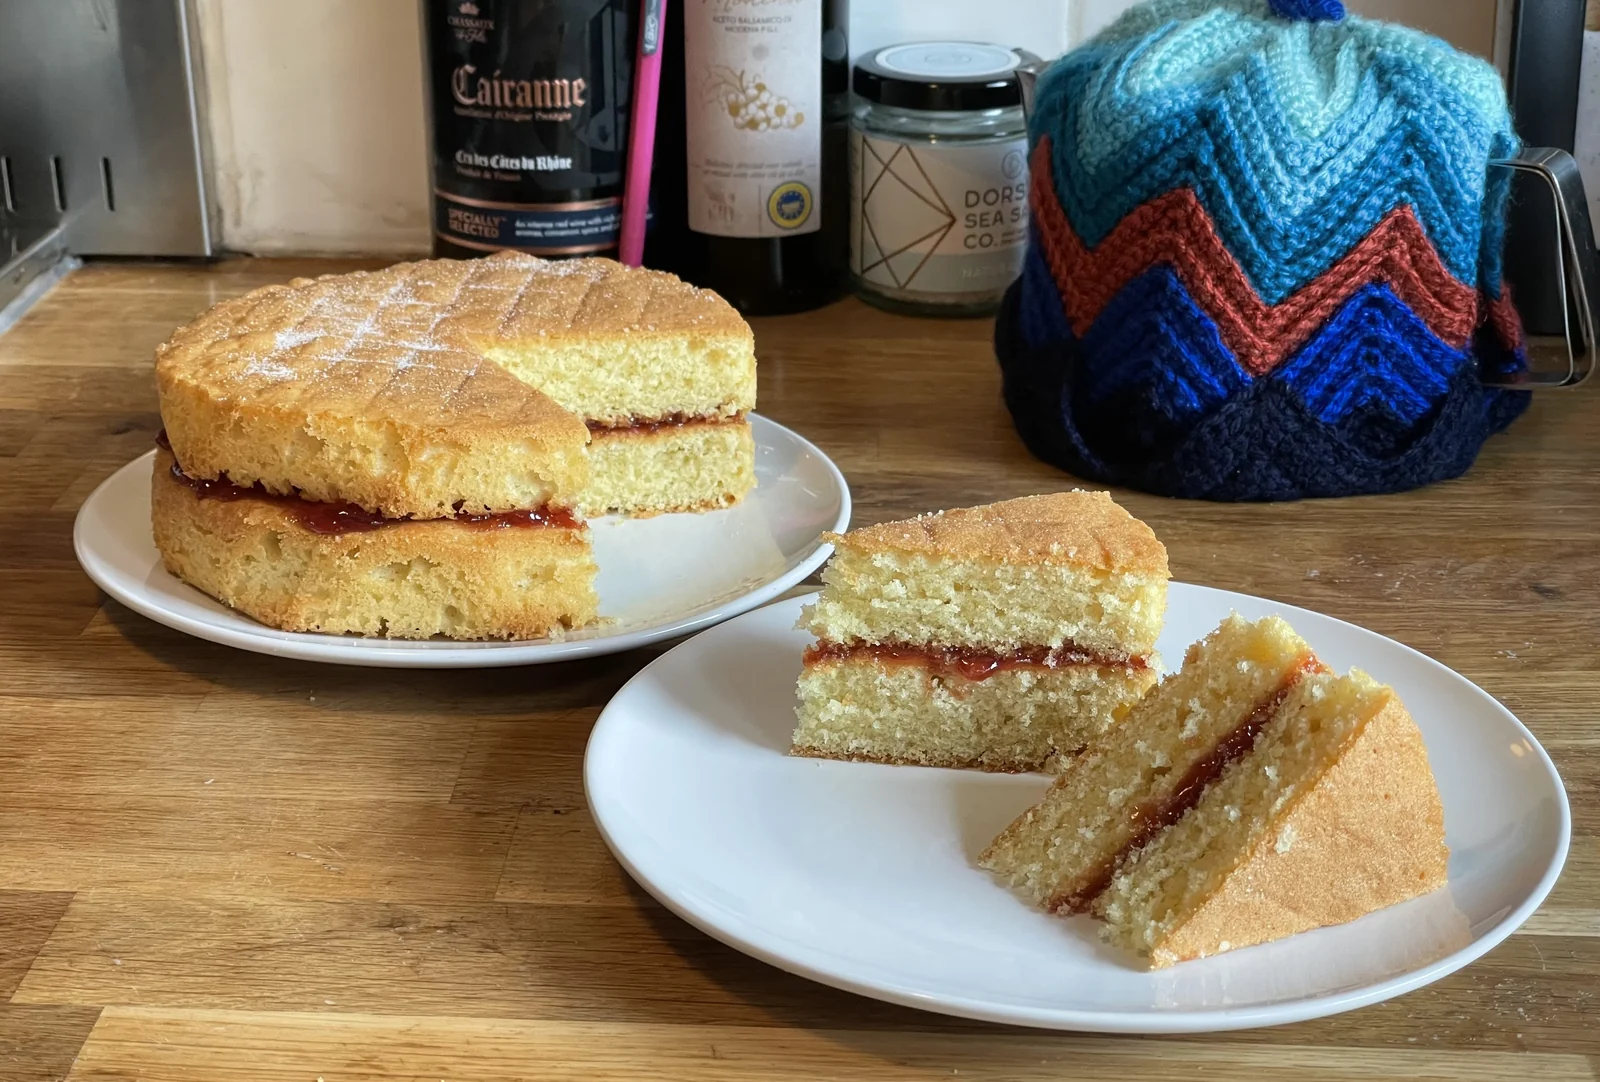
Understand egg foam, gentle folding and cooling, with practical checks for a dense or sunken sponge.
Decorating notes3 min read · Tools, tips & technique
What you’ll need
A tested sponge recipe and its specified pan
Digital scale and oven thermometer
Large bowl, whisk or electric mixer
Wide flexible spatula and cooling rack
Choose the right starting recipe
The soft slice in this reference does not reveal whether the cake is a whole-egg sponge, chiffon or another style. Choose a tested formula before shopping. This is a texture and technique guide, not the source baker’s recipe. Keep the specified pan size and flour unchanged on your first attempt.
Prepare the pan and preheat the oven before mixing. A finished egg foam should not sit waiting while you cut parchment or search for equipment. Weigh the ingredients and arrange them in the order the recipe uses them.
Watch the foam, not only the clock
Whole-egg sponge recipes often ask you to whisk eggs and sugar until pale and thick. When the whisk is lifted, a trail briefly rests on the surface before blending back in. That visual cue is more useful than blindly copying a mixing time from different equipment.
Hand whisking can be possible but requires sustained effort. Do not assume every sponge is a no-mixer recipe. A formula using separated eggs has a different whipping sequence: follow its instructions for the whites rather than substituting the whole-egg method.
Bake dark cocoa cake with a thick blackberry filling and pink berry buttercream. Includes a cooked-fruit method, clean layering tips and a dark-cocoa guide.
Black velvet blackberry layer cake260 min · One 6-inch, three-layer cake; 10–12 slices · Recipe card
Prep 90 minCook 32 minRest 138 min
Ingredients
210 g all-purpose flour
280 g granulated sugar
35 g Dutch-process cocoa
25 g black cocoa
10 g baking powder
3 g fine salt
3 large eggs
180 g whole milk
100 g neutral oil
150 g hot water
5 g vanilla extract
450 g blackberries, fresh or frozen
60 g sugar
15 g lemon juice
8 g cornstarch
20 g water
300 g softened unsalted butter
500 g sifted icing sugar
20 g heavy cream
3 g vanilla extract
2 g fine salt
Let’s make it
Heat the oven to 175°C / 350°F conventional (155°C fan). Grease and line three 6-inch pans. Mix both cocoas with the hot water until smooth and leave for 5 minutes.
Whisk flour, sugar, baking powder and salt together. In another bowl whisk eggs, milk, oil and vanilla. Combine the wet mixture, dry mixture and cocoa mixture just until smooth. Divide evenly between pans.
Bake for 27–32 minutes until the centers spring back and a skewer has no wet batter. Cool for 15 minutes in the pans, then turn out and cool completely.
Simmer blackberries, sugar and lemon juice for 8–10 minutes. Press through a fine sieve and discard the seeds. Return the puree to the pan and reduce to 230 g, weighing carefully in a heat-safe bowl if needed.
Mix cornstarch with 20 g water, stir into the puree and simmer for 1–2 minutes until thick. Cool completely. Reserve 50 g for the buttercream; divide the rest between the two filling layers.
Beat the buttercream butter until pale. Add icing sugar gradually, then cream, vanilla and salt. Beat in the 50 g cold berry mixture a teaspoon at a time. Stop and chill briefly if the frosting becomes loose.
Level the sponges. On the first sponge, pipe a buttercream dam and spread half the reserved filling inside it, followed by a thin layer of buttercream. Add the next sponge and repeat. Top with the third sponge.
Crumb-coat, chill for 20 minutes, then cover with the remaining berry buttercream. Chill at least 30 minutes before cutting to reveal the contrasting layers.
Kitchen notes
Allow 2 hours or more for the sponges and berry mixture to cool and the assembled cake to chill.
Contains wheat, eggs and milk. If black cocoa is unavailable, replace it gram for gram with Dutch-process cocoa; the cake will be browner. The reference uses different components, so the texture and slice pattern will differ.
Make blue crêpe-wrapped cheesecake slices with a blueberry center and tiny cream rosettes. A chilled dessert with a full English method and folding guidance.
Line the base of a 6-inch springform pan or ring and line the sides with parchment. Simmer the filling blueberries with sugar and lemon juice for 4–5 minutes. Mix cornstarch with 10 g water, stir in and simmer for 1 minute until thick. Cool fully.
Sprinkle gelatin evenly over 30 g cold water and leave for 5–10 minutes. Beat cream cheese with 55 g icing sugar and vanilla until smooth. In a separate bowl whip 150 g cream to soft peaks.
Warm the bloomed gelatin gently just until dissolved; do not boil. Stir 2 tablespoons of the cream cheese mixture into the gelatin, then immediately whisk that mixture back into the remaining cream cheese. Fold in the whipped cream.
Spread half the filling in the lined pan. Spoon the cold blueberry mixture in the middle, leaving a 1 cm border. Cover with the remaining filling and smooth. Refrigerate for at least 6 hours, preferably overnight, until firm all the way through.
For the crêpes, whisk flour, sugar and salt. Whisk in the egg and half the milk to make a smooth paste, then the remaining milk, melted butter and a small amount of blue gel. Rest for 20 minutes and strain.
Heat a 20–22 cm nonstick pan over medium-low heat and lightly grease it. Pour in just enough batter to cover the base in a thin layer, about 45–50 g, and swirl immediately. Cook until set, about 60–90 seconds, then flip for 15–20 seconds. Repeat for at least 6 good crêpes plus any spares, and cool completely.
Whip the finishing cream with 8 g icing sugar to medium peaks. Unmold the chilled cheesecake and cut into six equal wedges with a warm, wiped knife.
Wrap each wedge in one cool crêpe, folding the edges over and tucking the seam underneath. Use a small dab of whipped cream if a fold needs help staying in place. Transfer to a plate and chill for 20 minutes.
Pipe a small cream rosette on each parcel and add a blueberry. Serve cold and keep leftovers refrigerated.
Kitchen notes
The cheesecake needs at least 6 hours in the refrigerator; overnight is easiest. Total time includes chilling.
Contains wheat, eggs and milk; gelatin is animal-derived unless the label states otherwise. Do not replace gelatin with agar gram for gram; it needs a different method. No-bake refers to the cheesecake filling—the crêpes and berry center are cooked.
Make a vanilla rose garden cake with ivory buttercream pleats and pink piped roses. Includes flower-nail guidance, a rosette shortcut and a make-ahead plan.
Vanilla buttercream rose garden cake260 min · One 8-inch, two-layer cake; 16 slices · Recipe card
Prep 100 minCook 35 minRest 125 min
Ingredients
350 g all-purpose flour
12 g baking powder
4 g fine salt
240 g unsalted butter, softened
300 g caster or fine granulated sugar
4 large eggs, at room temperature (about 50 g each without shells)
10 g vanilla extract
200 g whole milk, at room temperature
450 g unsalted butter, softened
810 g icing sugar, sifted
54 g heavy cream, plus a little only if needed
9 g vanilla extract
3.6 g fine salt
1 g food-grade rosewater, optional
2 small drops pink and green gel food colors, or as needed
Let’s make it
Heat the oven to 175°C / 350°F conventional (155°C fan). Grease two 8-inch round cake pans, line their bases with parchment, and set them on the middle rack when baking. Whisk the flour, baking powder and salt together.
Beat the cake butter and sugar for 3–4 minutes until noticeably lighter. Beat in the eggs one at a time, scraping the bowl between additions. Add the vanilla.
On low speed, add the flour mixture in three additions, alternating with the milk in two additions. Stop when the last streaks of flour disappear; do not keep beating.
Divide evenly between the prepared pans and level. Bake for 30–35 minutes, checking toward the early end. The centers should spring back lightly and a skewer should emerge without wet batter. Cool in the pans for 15 minutes, then turn onto racks and cool completely.
Beat the buttercream butter for 4 minutes. Add the sifted icing sugar in four additions on low speed. Add cream, vanilla and salt; beat until smooth, then mix on low for 2 minutes to reduce air pockets. If using rosewater, add just 1 g and taste. Reserve about 300 g frosting for flowers and leaves.
Tint part of the reserved frosting blush pink and a small amount green. Pipe pink and ivory roses on parchment squares using a flower nail and petal tip, or plan to pipe rosettes directly on the cake. Freeze separate flowers for 15–20 minutes.
Level the cakes and sandwich with about 220 g buttercream. Crumb-coat and chill for 20 minutes. Add a smooth coat to the top and a slightly thicker coat to the sides.
Pipe overlapping vertical pleats around the sides with a flat tip, or pull vertical strokes through the frosting with a small spatula. Keep the top rim clean.
Lift firm flowers from their parchment and attach around the top edge using tiny dabs of buttercream. Add small green leaves between clusters. Use remaining frosting for a narrow border at the base if desired.
Refrigerate until stable. Before serving, allow only the needed portions to soften slightly at room temperature.
Kitchen notes
Allow for sponge cooling, a crumb-coat chill and 20 minutes to firm the piped flowers.
Contains wheat, eggs and milk. Rosewater strengths vary greatly; it is optional and should remain subtle. All flowers in this adaptation are piped buttercream, even though the source design appears to use real flowers.
Turn a spiced carrot sheet cake into carrot-shaped mini cakes with cream cheese filling and an orange candy coating. Includes a simple paper-template method.
Carrot-shaped mini carrot cakes240 min · 6 filled mini cakes, plus cake offcuts · Recipe card
Prep 90 minCook 25 minRest 125 min
Ingredients
160 g all-purpose flour
5 g baking powder
2 g baking soda
3 g ground cinnamon
1 g ground ginger
2 g fine salt
2 large eggs
140 g light brown sugar
100 g neutral oil
60 g plain yogurt
180 g peeled carrots, finely grated
5 g vanilla extract
100 g full-fat block cream cheese, cool but pliable
50 g softened unsalted butter
120 g sifted icing sugar
400 g orange candy melts
50 g green candy melts
Let’s make it
Heat the oven to 175°C / 350°F conventional (155°C fan). Grease and line a 9 × 13-inch pan with parchment, leaving handles at the sides. Whisk flour, baking powder, baking soda, spices and salt together.
Whisk eggs, brown sugar, oil, yogurt and vanilla until combined. Fold in the flour mixture, then the finely grated carrot. Spread evenly in the pan.
Bake for 20–25 minutes until the center springs back and a skewer has no raw batter. Cool fully, then refrigerate the sheet for at least 45 minutes.
Beat the filling butter with the icing sugar until smooth. Add the cream cheese and mix briefly just until combined. Chill if soft.
Use the parchment template to cut twelve tapered carrot shapes. Spread a thin layer of filling over six pieces, leaving a narrow edge, and sandwich with the other six. Smooth any gaps with filling and refrigerate for 30–45 minutes.
Melt the orange coating according to the packet. Set one cold cake on a rack over parchment, spoon coating over it and smooth the sides with a small spatula. Transfer carefully to a lined tray. Repeat and let the shells set.
Put remaining orange coating in a piping bag and drizzle narrow lines across each carrot. Melt the green coating, pipe six leafy tops onto parchment and let them harden. Attach each with a small dot of orange coating.
Refrigerate the finished cakes in a covered container. Serve with a small knife or fork; the coating will have a gentle snap.
Kitchen notes
Allow about 2 hours for cooling, firming the filling and setting the candy coating.
Contains wheat, eggs and milk; check candy-melt labels for other allergens. Yield depends on the template and your cutting layout. Use full-fat block cream cheese; spreadable tub cheese may make the filling too loose.
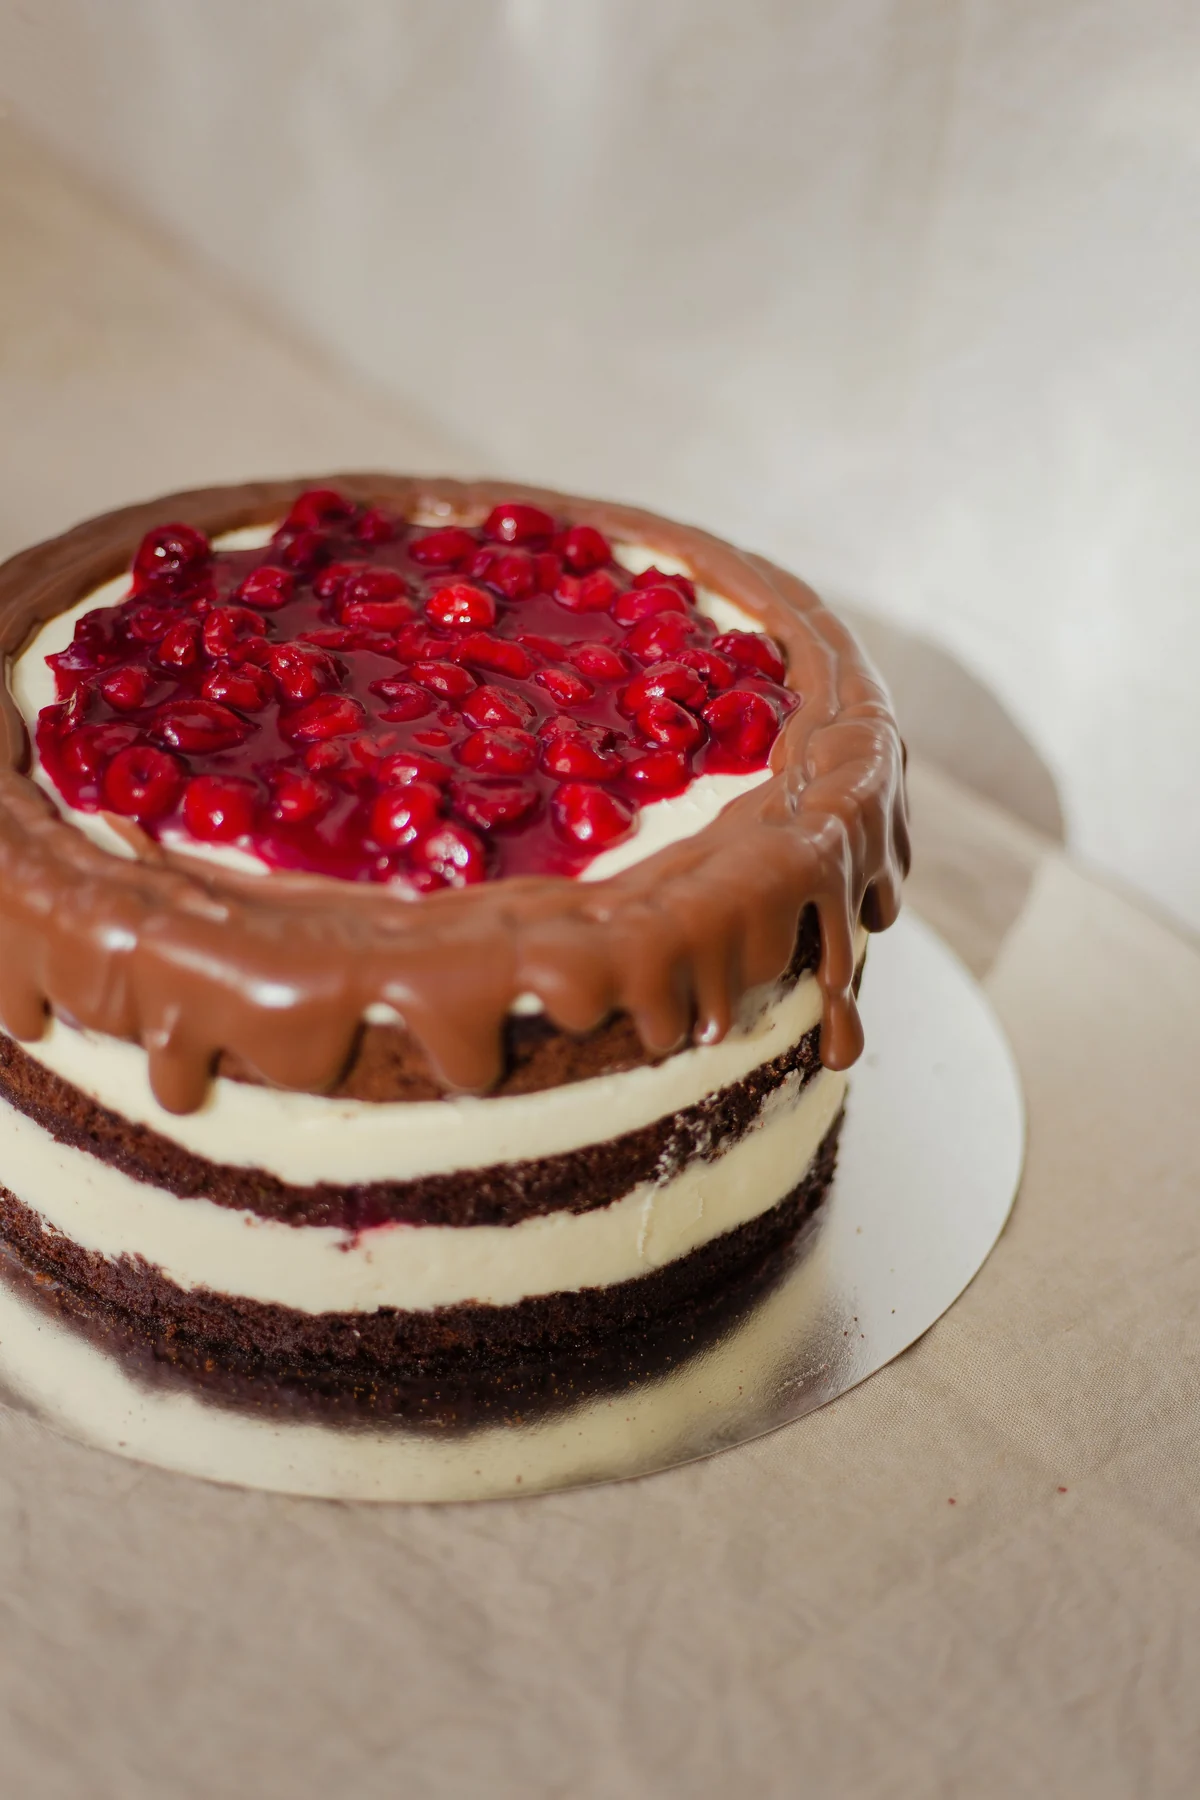
Make a chocolate cherry cake with cocoa layers, cherry filling, chocolate buttercream and vintage piping. Includes a decorating sequence and make-ahead tips.
Chocolate cherry vintage layer cake240 min · One 6-inch, three-layer cake; 10–12 slices · Recipe card
Prep 85 minCook 32 minRest 123 min
Ingredients
210 g all-purpose flour
300 g granulated sugar
60 g natural unsweetened cocoa powder
6 g baking powder
3 g baking soda
3 g fine salt
3 large eggs, at room temperature
180 g whole milk
100 g neutral oil
150 g hot water
5 g vanilla extract
250 g pitted cherries, fresh or frozen
35 g sugar
10 g cornstarch
20 g water
10 g lemon juice
350 g softened unsalted butter
500 g sifted icing sugar
60 g sifted unsweetened cocoa
80 g heavy cream
5 g vanilla extract
2 g fine salt
150 g fresh cherries, washed, dried and pitted
Let’s make it
Heat the oven to 175°C / 350°F conventional (155°C fan). Grease and line three 6-inch round pans. Whisk the cocoa with the hot water until smooth and let it stand for 5 minutes.
Whisk the flour, sugar, baking powder, baking soda and salt in a large bowl. Separately whisk eggs, milk, oil and vanilla. Add the wet ingredients and cocoa mixture to the dry ingredients; whisk only until smooth. Divide between the pans.
Bake for 27–32 minutes, until the centers spring back and a skewer has moist crumbs but no wet batter. Cool in the pans for 15 minutes, then turn out and cool completely.
For the filling, simmer cherries, sugar and lemon juice for 5–8 minutes. Stir the cornstarch with the water, add it, and simmer while stirring for 1–2 minutes until thick. Transfer to a shallow bowl and refrigerate until cold.
Beat the frosting butter for 4 minutes. Gradually beat in icing sugar and cocoa on low speed. Add cream, vanilla and salt. Beat until smooth, then mix slowly to reduce air bubbles. If too soft to hold a ridge, chill briefly.
Level the cakes if needed. Set the first layer on a board, spread a thin coat of frosting, pipe a buttercream dam at the edge and add half the cherry filling inside. Repeat with the second layer, then place the third layer on top.
Crumb-coat the cake and chill for 20 minutes. Smooth on the final coat, reserving about one third of the buttercream. Pipe a shell border at the base and around the top; use a small round tip for optional bows.
Add the dry pitted cherries inside the top border. Chill until the cake is stable, then cut with a warm, wiped knife. Keep covered in the refrigerator.
Kitchen notes
Allow about 2 hours for cooling, chilling and setting, in addition to hands-on work.
Contains wheat, eggs and milk. These are original recipe-development quantities, not the source baker’s formula. If using stemmed cherries for styling, remove and pit them before serving.
Bake a small Earl Grey cake with vanilla cream filling, ivory buttercream and piped winter greenery. A 6-inch design with clear tea-infusion and decorating steps.
Earl Grey bento cake with vanilla cream210 min · One 6-inch, two-layer cake; 6–8 slices · Recipe card
Prep 65 minCook 30 minRest 115 min
Ingredients
175 g all-purpose flour
6 g baking powder
2 g fine salt
120 g unsalted butter, softened
150 g caster or fine granulated sugar
2 large eggs, at room temperature (about 50 g each without shells)
5 g vanilla extract
100 g whole milk, at room temperature
50 g additional milk for infusion losses; top up the strained milk to 100 g
6 g loose Earl Grey tea
100 g cold mascarpone
80 g cold heavy whipping cream
20 g icing sugar
3 g vanilla extract
187.5 g unsalted butter, softened
337.5 g icing sugar, sifted
22.5 g heavy cream, plus a little only if needed
3.75 g vanilla extract
1.5 g fine salt
2 small drops green and red gel food colors, or as needed
Let’s make it
Heat the cake milk together with the extra 50 g milk until steaming. Add the tea, cover and steep for 10 minutes. Strain, then add fresh milk if needed to reach exactly 100 g. Cool to room temperature.
Heat the oven to 175°C / 350°F conventional (155°C fan). Grease two 6-inch (15 cm) round cake pans, line their bases with parchment, and set them on the middle rack when baking. Whisk the flour, baking powder and salt together.
Beat the cake butter and sugar for 3–4 minutes until noticeably lighter. Beat in the eggs one at a time, scraping the bowl between additions. Add the vanilla.
On low speed, add the flour mixture in three additions, alternating with the milk in two additions. Stop when the last streaks of flour disappear; do not keep beating.
Divide evenly between the prepared pans and level. Bake for 25–32 minutes, checking toward the early end. The centers should spring back lightly and a skewer should emerge without wet batter. Cool in the pans for 15 minutes, then turn onto racks and cool completely.
Whip the mascarpone, filling cream, 20 g icing sugar and 3 g vanilla together on medium-low speed just until thick and spreadable. Refrigerate until needed.
Beat the buttercream butter for 4 minutes. Add the sifted icing sugar in four additions on low speed. Add cream, vanilla and salt; beat until smooth, then mix on low for 2 minutes to reduce air pockets. Reserve 2 tablespoons each for green and red details before coating the cake.
Level the cooled sponges. Spread a thin layer of buttercream on the bottom sponge and pipe a dam at its edge. Add the mascarpone filling within the ring, top with the second sponge and chill for 20 minutes.
Apply a thin crumb coat and chill for 15 minutes. Cover with the remaining ivory buttercream, keeping the reserved portions for decoration. Smooth the sides and make a shallow spiral on top with the end of an offset spatula.
Tint the reserved frosting and pipe small green branches around the lower sides. Add red buttercream dots and chill until serving.
Kitchen notes
Include time for the tea milk to cool, the sponges to cool and the filled cake to chill.
Contains wheat, eggs and milk. Use the strained, measured tea milk in the batter wherever the method says milk. The colors are optional; a plain ivory finish works equally well.
Create a jewel-covered vanilla cake with smooth white chocolate buttercream and edible candy gems. A manageable single-tier version of the dramatic Pinterest design.
Single-tier edible jewel cake210 min · One 6-inch, two-layer cake; 8 slices · Recipe card
Prep 70 minCook 30 minRest 110 min
Ingredients
175 g all-purpose flour
6 g baking powder
2 g fine salt
120 g unsalted butter, softened
150 g caster or fine granulated sugar
2 large eggs, at room temperature (about 50 g each without shells)
5 g vanilla extract
100 g whole milk, at room temperature
200 g softened unsalted butter
320 g sifted icing sugar
150 g real white chocolate, chopped
25 g heavy cream
3 g vanilla extract
1 g fine salt
80 g purchased edible candy gems, assorted sizes
Let’s make it
Heat the oven to 175°C / 350°F conventional (155°C fan). Grease two 6-inch (15 cm) round cake pans, line their bases with parchment, and set them on the middle rack when baking. Whisk the flour, baking powder and salt together.
Beat the cake butter and sugar for 3–4 minutes until noticeably lighter. Beat in the eggs one at a time, scraping the bowl between additions. Add the vanilla.
On low speed, add the flour mixture in three additions, alternating with the milk in two additions. Stop when the last streaks of flour disappear; do not keep beating.
Divide evenly between the prepared pans and level. Bake for 25–32 minutes, checking toward the early end. The centers should spring back lightly and a skewer should emerge without wet batter. Cool in the pans for 15 minutes, then turn onto racks and cool completely.
Melt the white chocolate in short microwave bursts, stirring each time, or over a gently steaming water bath. Keep water out of the chocolate. Let it cool until fluid but barely warm.
Beat the frosting butter for 4 minutes. Add icing sugar gradually, then cream, vanilla and salt. Beat in the cooled melted chocolate. If loose, chill for 5–10 minutes, then stir until smooth.
Level the cooled layers and sandwich them with about 150 g frosting. Apply a thin crumb coat and chill for 20 minutes. Add a generous final coat, smooth the sides and top, and chill until stable.
Shortly before serving, set out the edible gems. Place the largest pieces first, then medium and small pieces, using a tiny dot of buttercream as glue when necessary. Keep the decoration sparse enough to show the smooth frosting.
Cut with a warm, dry knife, taking care around hard candies. Store remaining cake covered in the refrigerator; the candy finish may soften over time.
Kitchen notes
Cool the sponges fully and allow short chilling stages before attaching the gems.
Contains wheat, eggs and milk; candy decorations may introduce other allergens. This recipe does not make the two-tier cake shown in the reference. Do not substitute craft rhinestones, glue or glitter.
Decorate an ivory birthday cake with pink buttercream flowers, a butterfly motif and strawberry filling. Includes safe flower alternatives and a piping order.
Strawberry floral butterfly birthday cake250 min · One 6-inch, two-layer cake; 8 slices · Recipe card
Prep 95 minCook 30 minRest 125 min
Ingredients
175 g all-purpose flour
6 g baking powder
2 g fine salt
120 g unsalted butter, softened
150 g caster or fine granulated sugar
2 large eggs, at room temperature (about 50 g each without shells)
5 g vanilla extract
100 g whole milk, at room temperature
300 g unsalted butter, softened
540 g icing sugar, sifted
36 g heavy cream, plus a little only if needed
6 g vanilla extract
2.4 g fine salt
12 g finely ground freeze-dried strawberries
60 g thick strawberry jam
3 small drops pink, deep pink and green gel food colors, or as needed
Let’s make it
Heat the oven to 175°C / 350°F conventional (155°C fan). Grease two 6-inch (15 cm) round cake pans, line their bases with parchment, and set them on the middle rack when baking. Whisk the flour, baking powder and salt together.
Beat the cake butter and sugar for 3–4 minutes until noticeably lighter. Beat in the eggs one at a time, scraping the bowl between additions. Add the vanilla.
On low speed, add the flour mixture in three additions, alternating with the milk in two additions. Stop when the last streaks of flour disappear; do not keep beating.
Divide evenly between the prepared pans and level. Bake for 25–32 minutes, checking toward the early end. The centers should spring back lightly and a skewer should emerge without wet batter. Cool in the pans for 15 minutes, then turn onto racks and cool completely.
Beat the buttercream butter for 4 minutes. Add the sifted icing sugar in four additions on low speed. Add cream, vanilla and salt; beat until smooth, then mix on low for 2 minutes to reduce air pockets.
Mix 160 g of the buttercream with the sifted strawberry powder. Reserve another 250 g plain buttercream for flowers, leaves and the butterfly.
Level the cooled cake layers. Spread a little plain frosting over the bottom layer and pipe a dam at its edge. Add the jam inside the dam, followed by the strawberry buttercream. Place the second layer on top.
Apply a thin crumb coat and chill for 20 minutes. Cover with ivory buttercream. Smooth the top and make shallow horizontal ridges on the sides with a comb or spatula. Chill again for 15 minutes.
Tint the reserved frosting in two shades of pink and a little green, keeping some plain for dots. Pipe several flowers on parchment squares and chill or freeze until firm enough to handle.
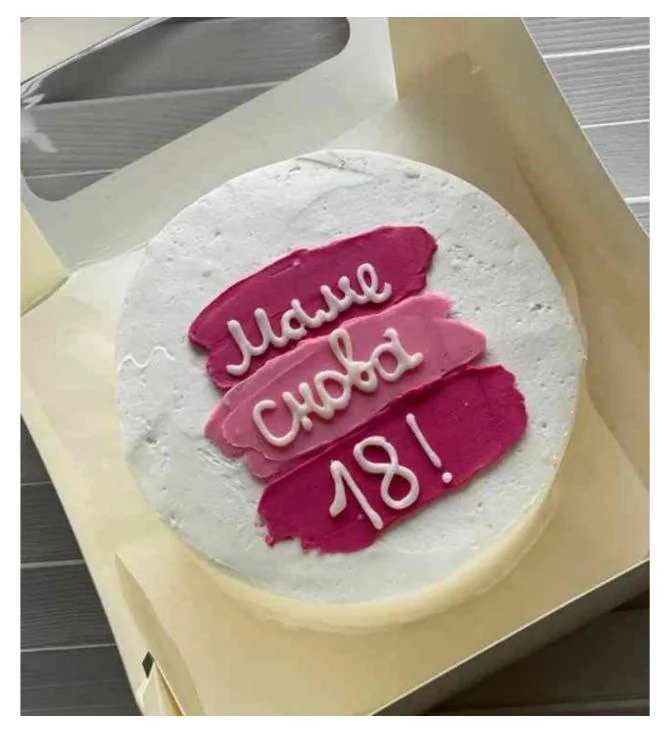
Mark and pipe a simple butterfly outline on the top with a fine round tip. Add a short message if desired. Attach the chilled flowers around the rim with fresh buttercream, then add small blossoms, leaves and dots.
Add a few flowers at the base, keeping the design balanced. Refrigerate until stable and keep covered until serving.
Kitchen notes
Allow about 2 hours for cooling, chilling the flowers and setting the assembled cake.
Contains wheat, eggs and milk. The source photograph includes real floral elements; this version replaces them with edible buttercream. The exact flavor and frosting used by the source baker are not known.