 0 comments
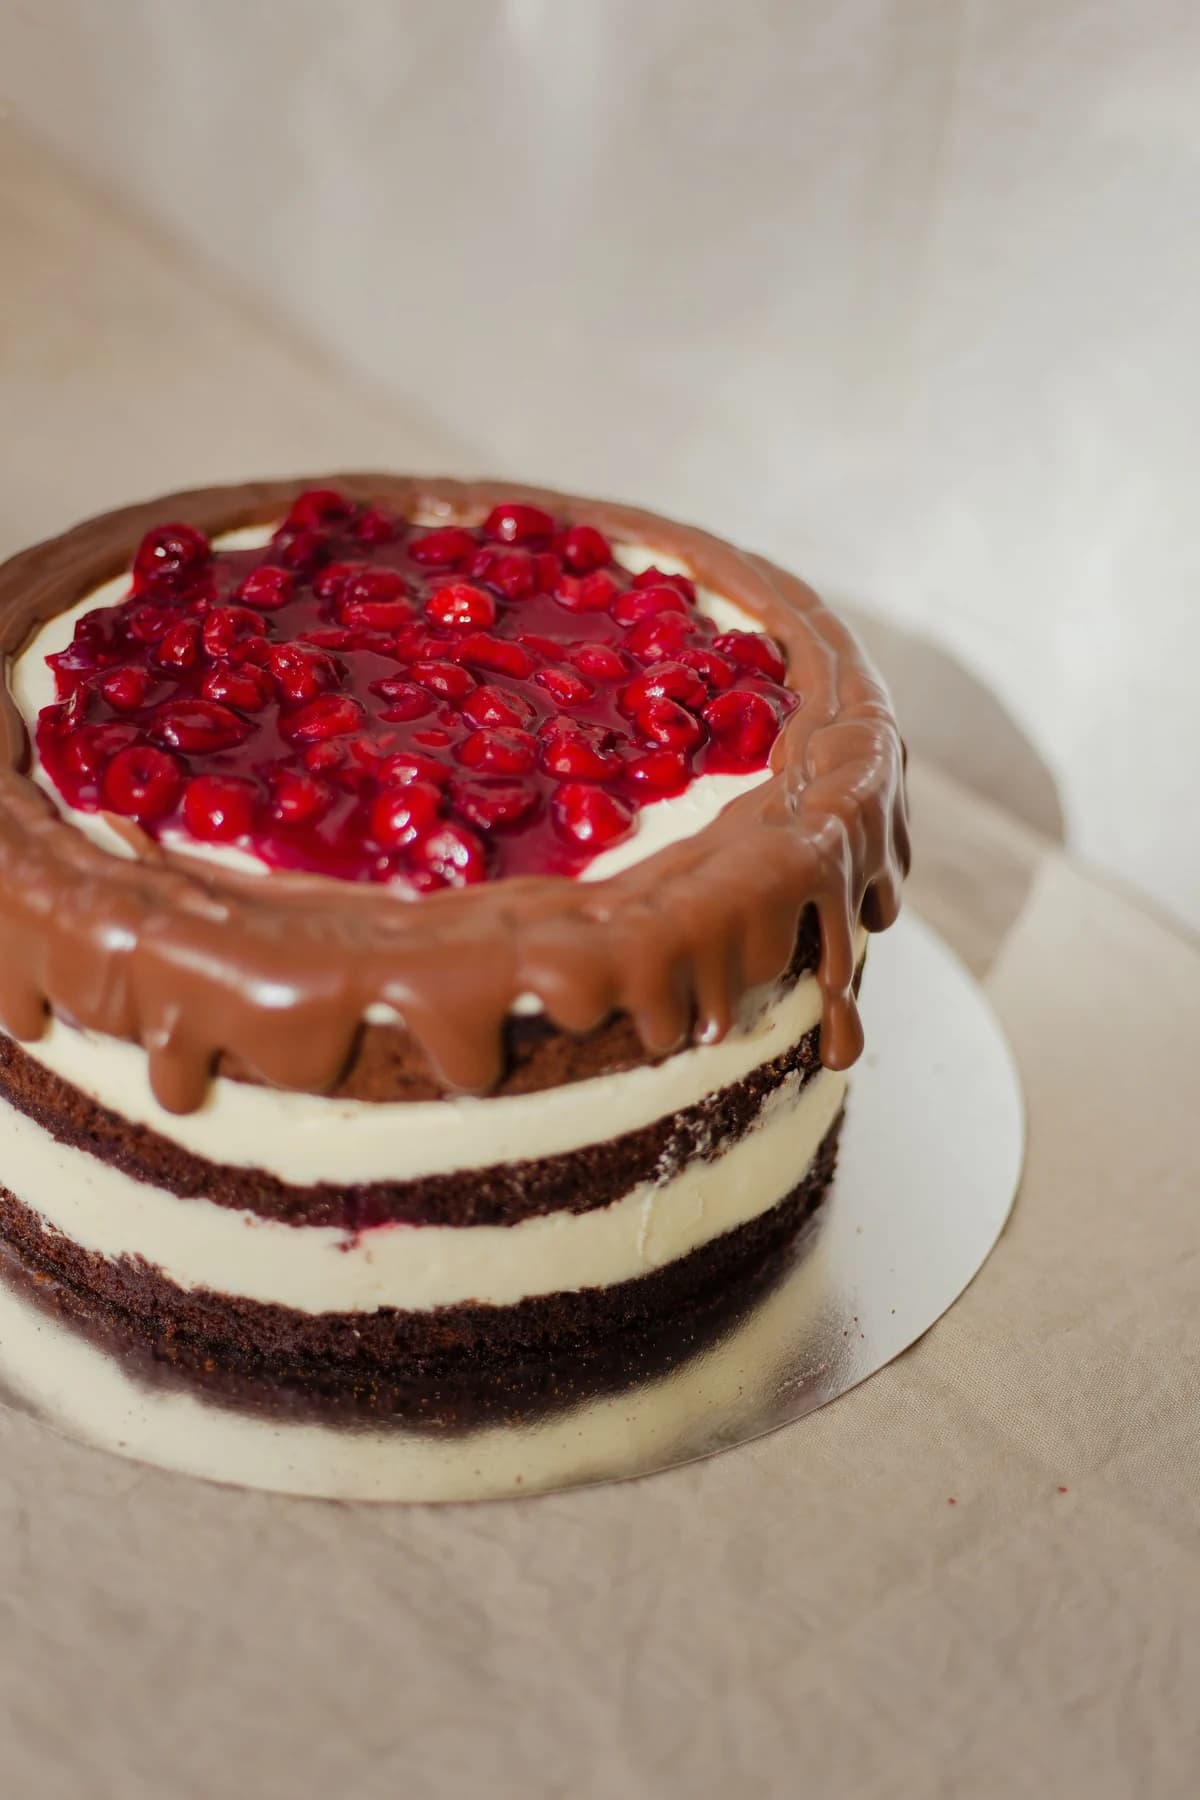
A deep chocolate finish, glossy cherries and generous shell borders make this cake feel like a tiny celebration. This interpretation uses three chocolate layers, a thick cherry filling and chocolate buttercream that can hold a piped ridge. The linked pin is our visual starting point; the cake formula and assembly below are an original, untested Kumora adaptation.
An original Kumora recipe inspired by the linked cake design. The linked reference is decorating inspiration, not evidence of a kitchen-tested result from this recipe. The cover is identified in its caption.
Before you start
- Digital kitchen scale
- Electric hand mixer or stand mixer
- Mixing bowls, silicone spatula and cooling rack
- Offset spatula, cake board and turntable
- Piping bags and parchment paper
- Three 6-inch (15 cm) round pans, at least 2 inches deep
- Medium open-star piping tip, small round tip and cherry pitter
Build flavor without a slippery filling
The chocolate layers use both cocoa and hot water: whisking them together first disperses the cocoa before the flour goes in. Natural cocoa and the small amount of baking soda are paired deliberately; swapping all the cocoa for black cocoa changes the flavor and acidity.
Cook the cherries until their juices form a thick, spoonable compote. Let it cool completely. A buttercream ring around each layer keeps the filling away from the outer coating; a thinner layer of filling is easier to stack than a deep pool.
Pipe the vintage borders in the right order
Apply the crumb coat first and chill it until firm, about 20 minutes. Add the final coat and smooth it before beginning any piping. Keep roughly one third of the buttercream for the borders.
For each shell, hold the star tip at about 45 degrees, squeeze to build a rounded head, then release pressure as you pull away. Start the next shell over the previous tail. Practice five shells on parchment before moving to the cake.
Finish with cherries and edible bows
Dry the cherries thoroughly before placing them on buttercream. Use pitted cherries for an entirely edible finish. Whole stemmed cherries look closest to the reference but must be removed and pitted before serving.
The reference includes decorative ribbon. For an edible version, pipe small buttercream bows with a fine round tip: two loops, a center dot and two short tails. Keep any non-edible topper on a food-safe support and remove it before cutting.
Make ahead and troubleshoot
Bake and wrap the cooled layers a day ahead. Refrigerate the assembled cake, covered, for up to 3 days. For a softer slice, take out only the portion you plan to serve about 20–30 minutes beforehand.
If the piping slumps, chill the bag for 5 minutes and knead it briefly before retrying. If it breaks into rough edges, the frosting may be too cold or too stiff; knead the bag or add cream to the bowl a teaspoon at a time.
Chocolate cherry vintage layer cake
- Makes, at 1×
- One 6-inch, three-layer cake; 10–12 slices
- Prep
- 1 hr 25 min
- Baking
- 32 min
- Start to finish
- About 4 hr
Allow about 2 hours for cooling, chilling and setting, in addition to hands-on work.
Original recipe draft · not yet kitchen-tested. Baking times are estimates; use the doneness checks in the method.
Ingredients
Cake
Cherry filling
Chocolate buttercream
Finish
Let’s make it
- Heat the oven to 175°C / 350°F conventional (155°C fan). Grease and line three 6-inch round pans. Whisk the cocoa with the hot water until smooth and let it stand for 5 minutes.
- Whisk the flour, sugar, baking powder, baking soda and salt in a large bowl. Separately whisk eggs, milk, oil and vanilla. Add the wet ingredients and cocoa mixture to the dry ingredients; whisk only until smooth. Divide between the pans.
- Bake for 27–32 minutes, until the centers spring back and a skewer has moist crumbs but no wet batter. Cool in the pans for 15 minutes, then turn out and cool completely.
- For the filling, simmer cherries, sugar and lemon juice for 5–8 minutes. Stir the cornstarch with the water, add it, and simmer while stirring for 1–2 minutes until thick. Transfer to a shallow bowl and refrigerate until cold.
- Beat the frosting butter for 4 minutes. Gradually beat in icing sugar and cocoa on low speed. Add cream, vanilla and salt. Beat until smooth, then mix slowly to reduce air bubbles. If too soft to hold a ridge, chill briefly.
- Level the cakes if needed. Set the first layer on a board, spread a thin coat of frosting, pipe a buttercream dam at the edge and add half the cherry filling inside. Repeat with the second layer, then place the third layer on top.
- Crumb-coat the cake and chill for 20 minutes. Smooth on the final coat, reserving about one third of the buttercream. Pipe a shell border at the base and around the top; use a small round tip for optional bows.
- Add the dry pitted cherries inside the top border. Chill until the cake is stable, then cut with a warm, wiped knife. Keep covered in the refrigerator.
Contains wheat, eggs and milk. These are original recipe-development quantities, not the source baker’s formula. If using stemmed cherries for styling, remove and pit them before serving.
The little details
- Cool the filling and cake completely before stacking.
- Keep cherry juice off the final coat: blot each garnish with paper towel.
- Scaling the recipe changes the number of cakes, not the recommended pan size or baking time.
Your questions, answered
Can I use frozen cherries?
Yes. Use them straight from frozen for the cooked filling and simmer until excess water reduces. Use fresh cherries for the garnish.
Can I bake this in two 8-inch pans?
That produces thinner layers and a different silhouette. For the tall reference look, keep the three 6-inch pans. If using wider pans, start checking earlier and rely on the doneness cues.
Why does my chocolate buttercream look bubbly?
Use a paddle or mix slowly with a spatula for the final few minutes. Fast whipping introduces air; a slightly warm scraper helps smooth the final coat.
Made it? Let’s talk.
Share how your bake went, ask a question, or pass on a helpful tip. There’s a seat for you here.
A kind kitchen is a happy kitchen. Our community guidelines →
No comments yet. Be the first to say hello.