 0 comments
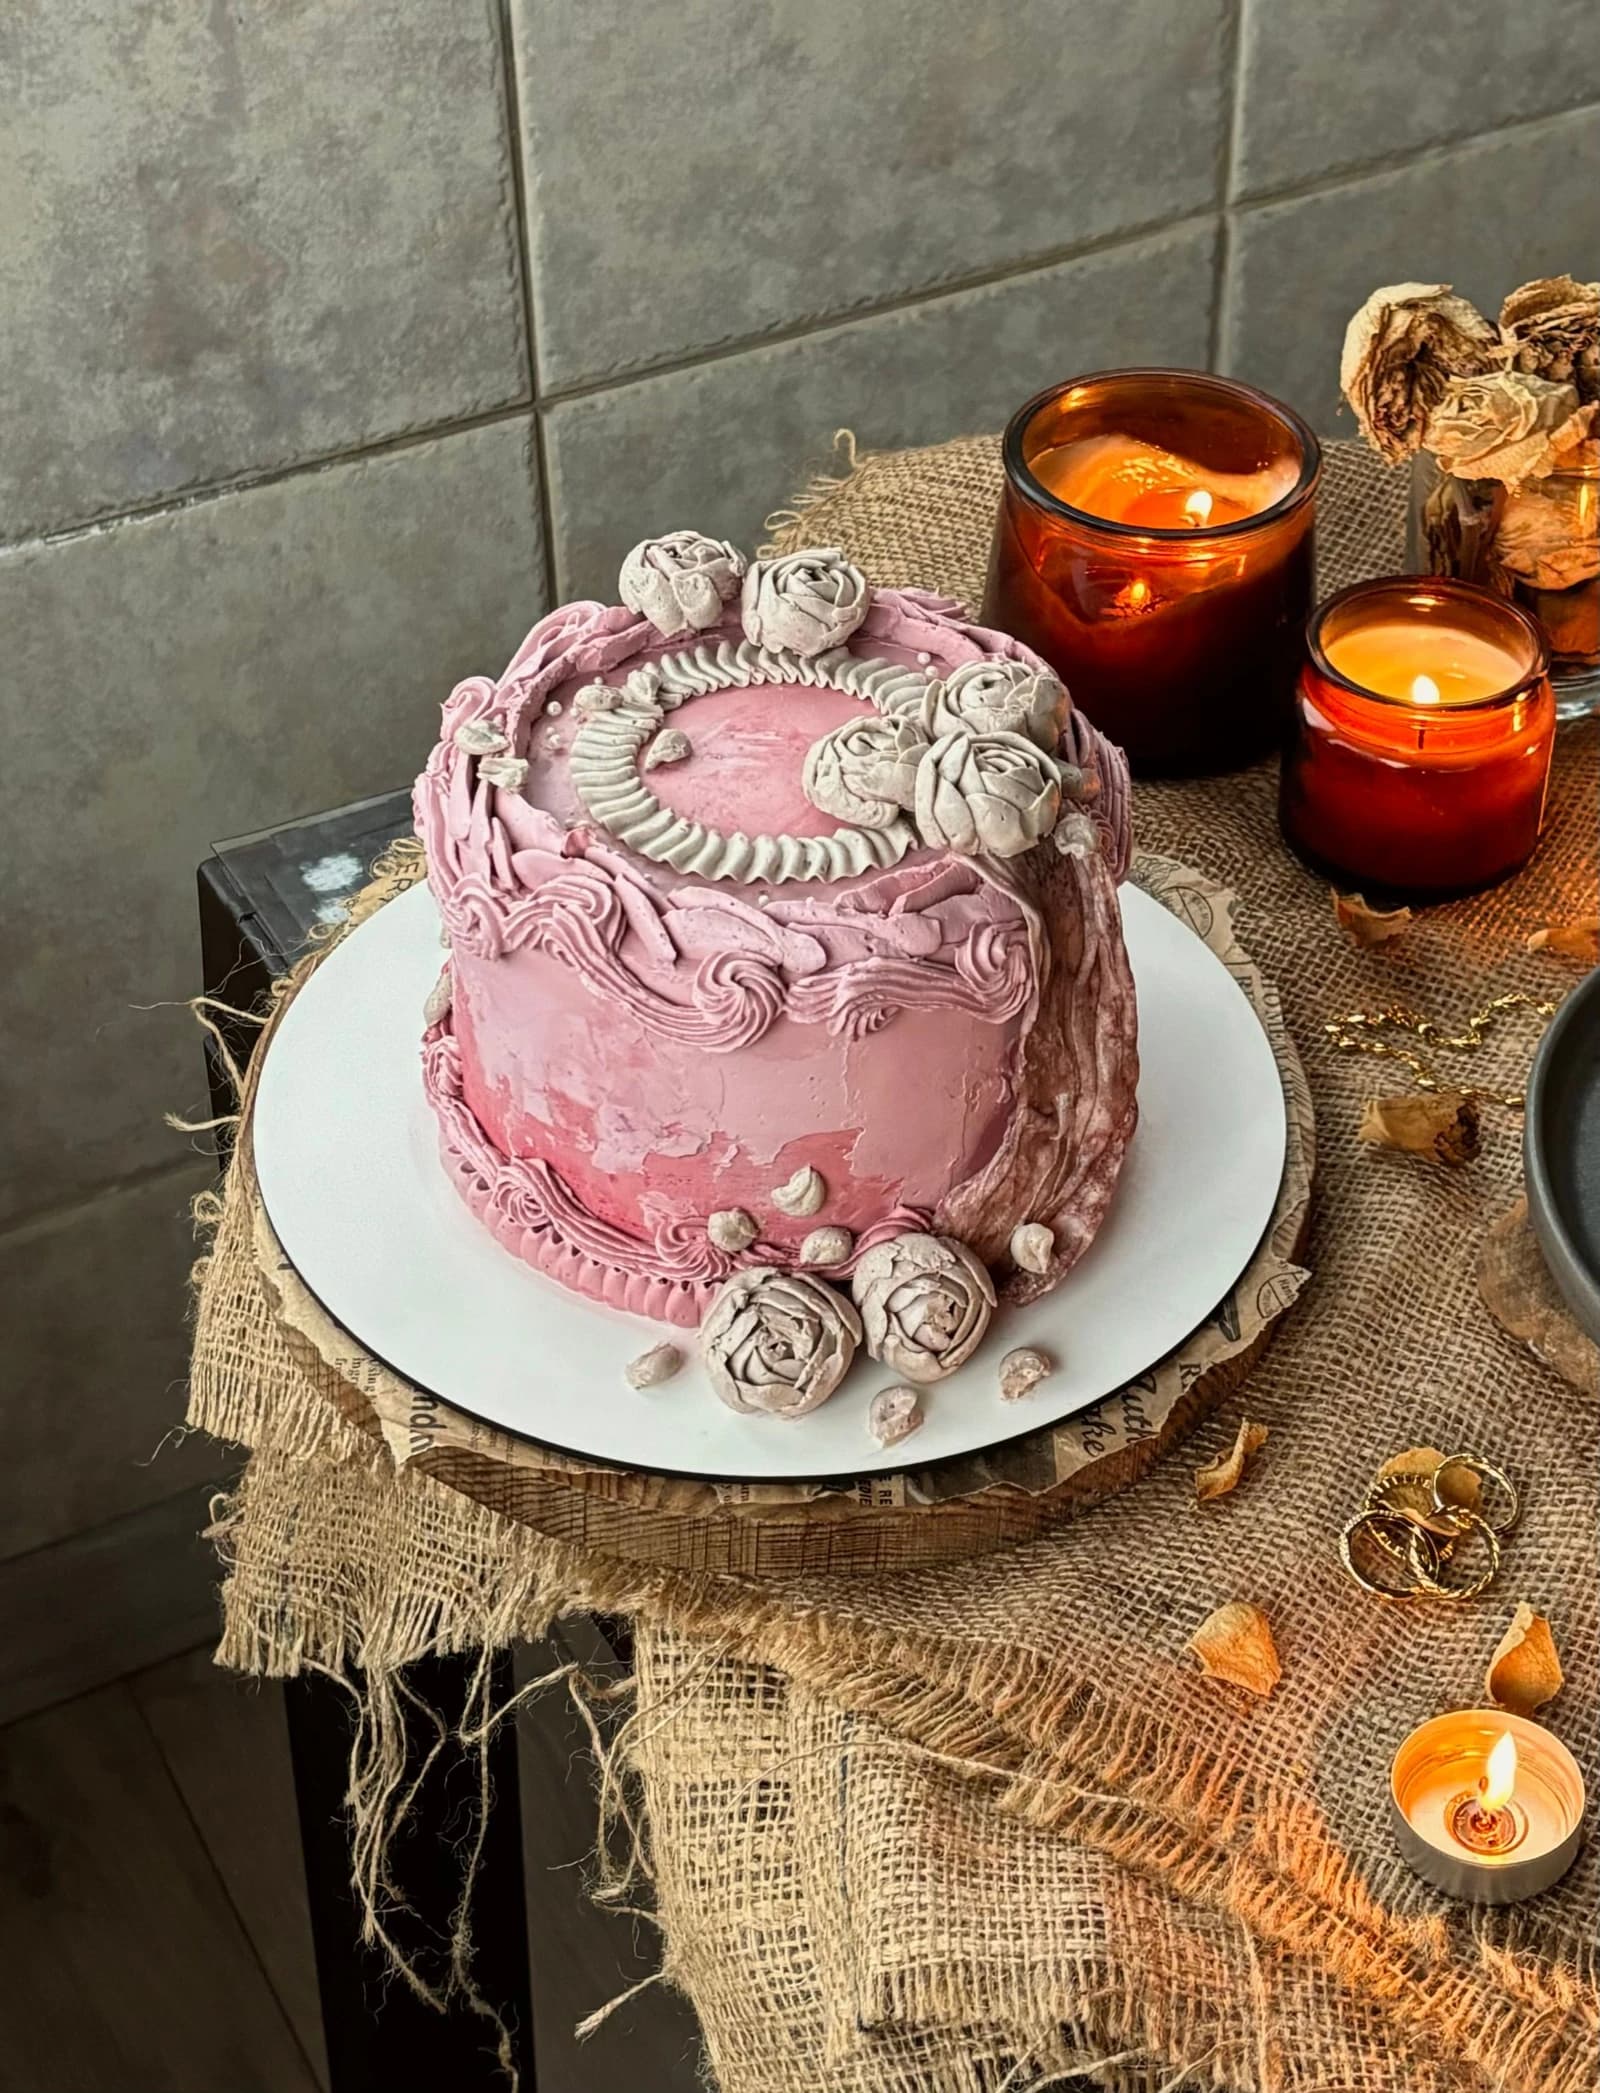
Build a vintage pink cake in a sensible order: smooth base, guide marks, swags, shell borders and rosettes. A short practice strip makes the decorating rhythm easier to control. The licensed photograph is a visual reference. The instructions are an independent approach to the style, not a claim about the source baker’s ingredients or exact method.
Before you start
- Crumb-coated cake on a sturdy board
- Prepared pink and ivory buttercream suitable for piping
- Small open-star tip, fine round tip and piping bags
- Offset spatula, turntable and parchment
- Toothpick for light guide marks
Choose two colors and three motifs
Use pink for the main coat and ivory or a lighter pink for the details. Limit the first version to a shell border, shallow swags and a few rosettes. A cake does not need every possible vintage pattern to feel ornate.
Keep the top center open for a short message or simply leave it plain. Plan where your piping joins will meet and place those joins toward the back. Reserve frosting for practice and repairs before coating the cake.
Smooth the coat and mark the spacing
Apply the final pink coat over a firm crumb coat. Chill until it will support detail without smearing. Use small dots to divide the upper rim into even sections; you can begin with quarters and split each quarter again.
Mark a midpoint below each pair of upper dots to show how low the swag should fall. Keep the curves shallow enough that you still have room for the base border. Tiny guide marks can be covered by the finished piping.
Practice and pipe the swags
With a fine round tip, anchor a short line at one upper mark and guide it in a gentle curve toward the next. Maintain steady pressure as the line falls toward the midpoint and rises again. Try the movement on parchment first; keep the bag movement smooth rather than stopping at the bottom of the curve.
Work one section at a time. If a curve breaks, stop, chill the area if needed and remove that small section before trying again. Adding a second line directly over an uneven one usually makes the problem more noticeable.
Add the shell borders
Use an open-star tip and practice a chain of shells on parchment. Build a rounded head with pressure, then reduce the squeeze as you draw out the tail. The next shell begins over that tail. Keep the direction consistent around the cake.
Pipe the base border first, then the top rim. Look ahead before reaching the starting point and adjust the last few shells gradually. A large final blob is harder to hide than a small change in spacing over several shells.
Finish with a few rosettes
For each rosette, hold a star-tip bag toward the surface, form a small center and spiral around it. Stop pressure before lifting so the end blends into the outer curve. Practice the size you want; changing nozzle size affects the amount of frosting and the look of the ridges.
Place a few rosettes at selected joins or around the top rather than filling every gap. The basic star-tip movement is also demonstrated by Wilton: https://wilton.com/how-to-pipe-a-rosette/wlblogrecip-23128/ . Kumora’s arrangement and color plan here are independent.
Fix the cause of rough or soft piping
If ridges spread, let the frosting cool and retest a small portion. If the piping breaks into rough fragments, check whether it is too cold or stiff. Avoid adjusting the entire bowl until you know which correction helps. Expel trapped air onto parchment before returning to the cake.
Chill the completed design before transport, use a box with generous clearance and follow the storage instructions for your cake and filling. Keep candles and other non-edible decorations separate until serving, and remove them before cutting.
About the photograph and this guide
Photograph by Beyza Ç.. Original source: https://www.pexels.com/photo/decorative-floral-cake-with-candles-and-burlap-32755092/ . Used under the Pexels License: https://www.pexels.com/license/ . The photographer does not endorse Kumora.
This decorating guide was written with AI assistance and editorial review. It has not been kitchen-tested. Start with a small practice section and use a cake and frosting recipe you already trust.
The little details
- Reserve some frosting in each color for repairs.
- Mark the swag spacing before piping.
- Finish with fewer rosettes than you first think you need; add more only after stepping back.
Made it? Let’s talk.
Share how your bake went, ask a question, or pass on a helpful tip. There’s a seat for you here.
A kind kitchen is a happy kitchen. Our community guidelines →
No comments yet. Be the first to say hello.