 0 comments
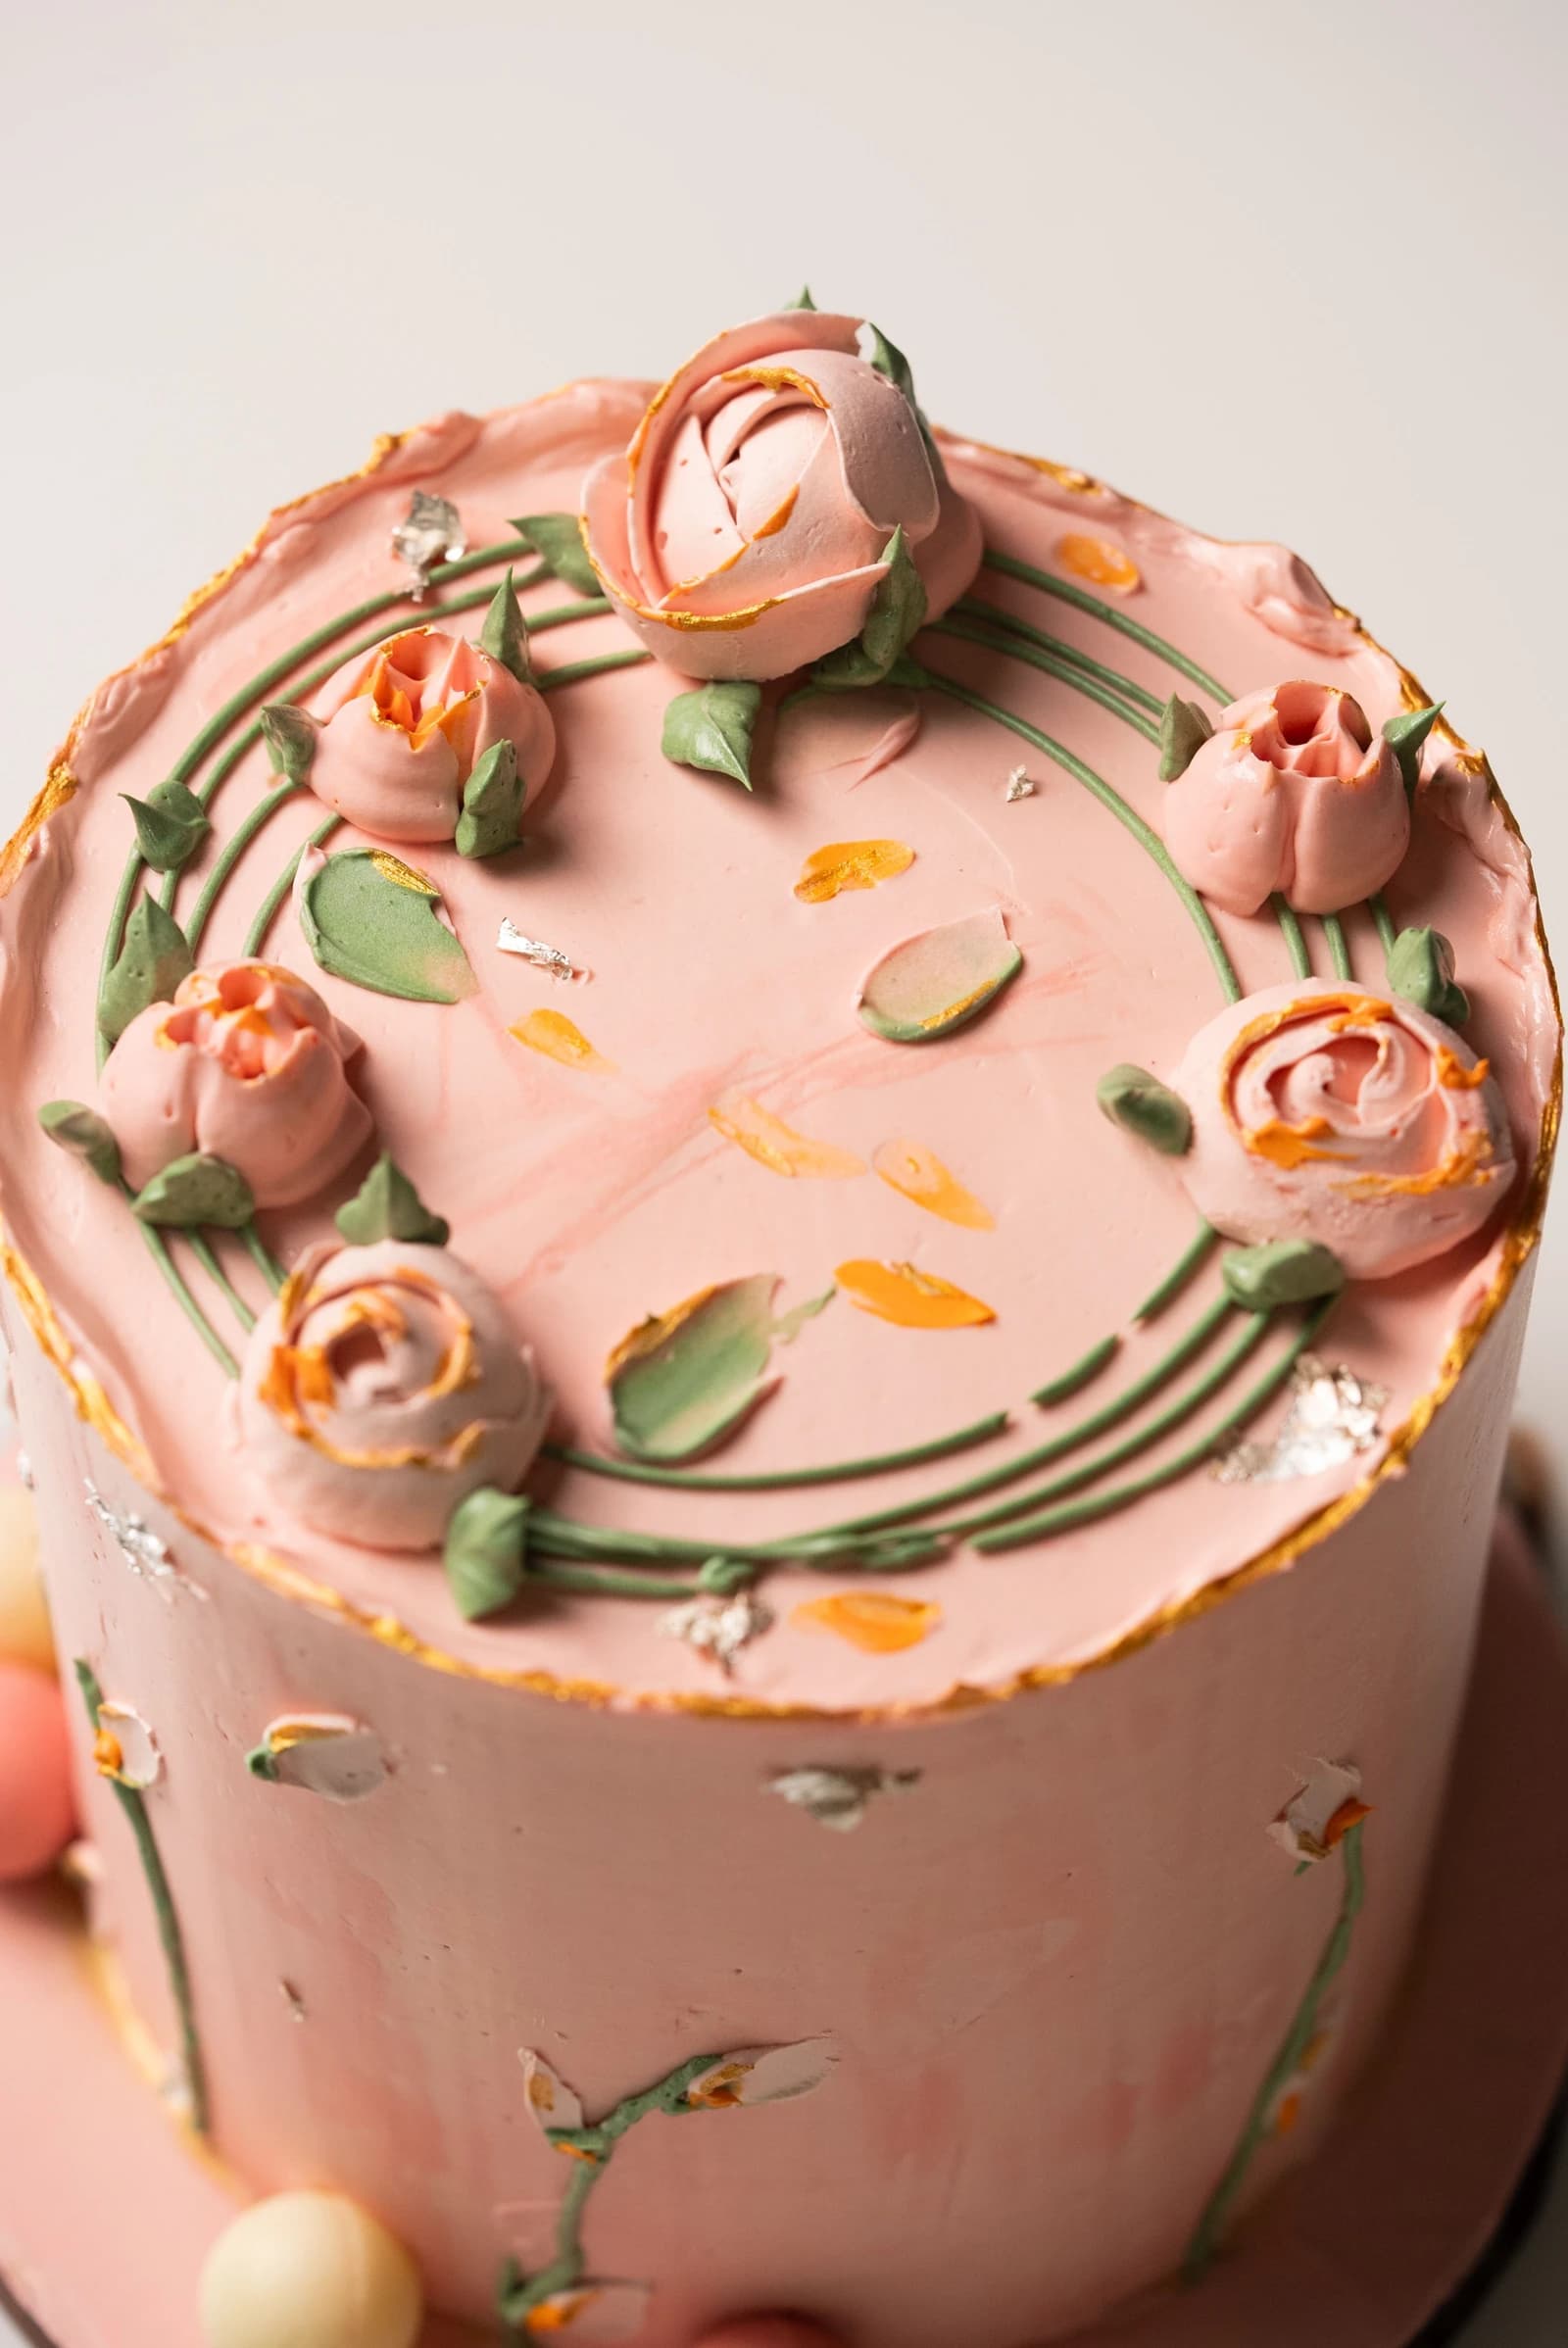
Decorate a smooth pink cake with piped roses, curved green stems and edible gold accents. Follow the flower-making, transfer and finishing sequence. This is a decorating plan for an already baked and assembled cake, not the source baker’s recipe. Choose a cake and frosting formula you have used successfully; the photograph cannot establish their ingredients.
Before you start
- Chilled round cake coated in pink buttercream
- Buttercream that holds a piped petal
- Petal piping tip, flower nail and parchment squares
- Small round tip and leaf tip
- Small scissors or flower lifter
- Offset spatula and spare base-color frosting
Plan the rose clusters and stem paths
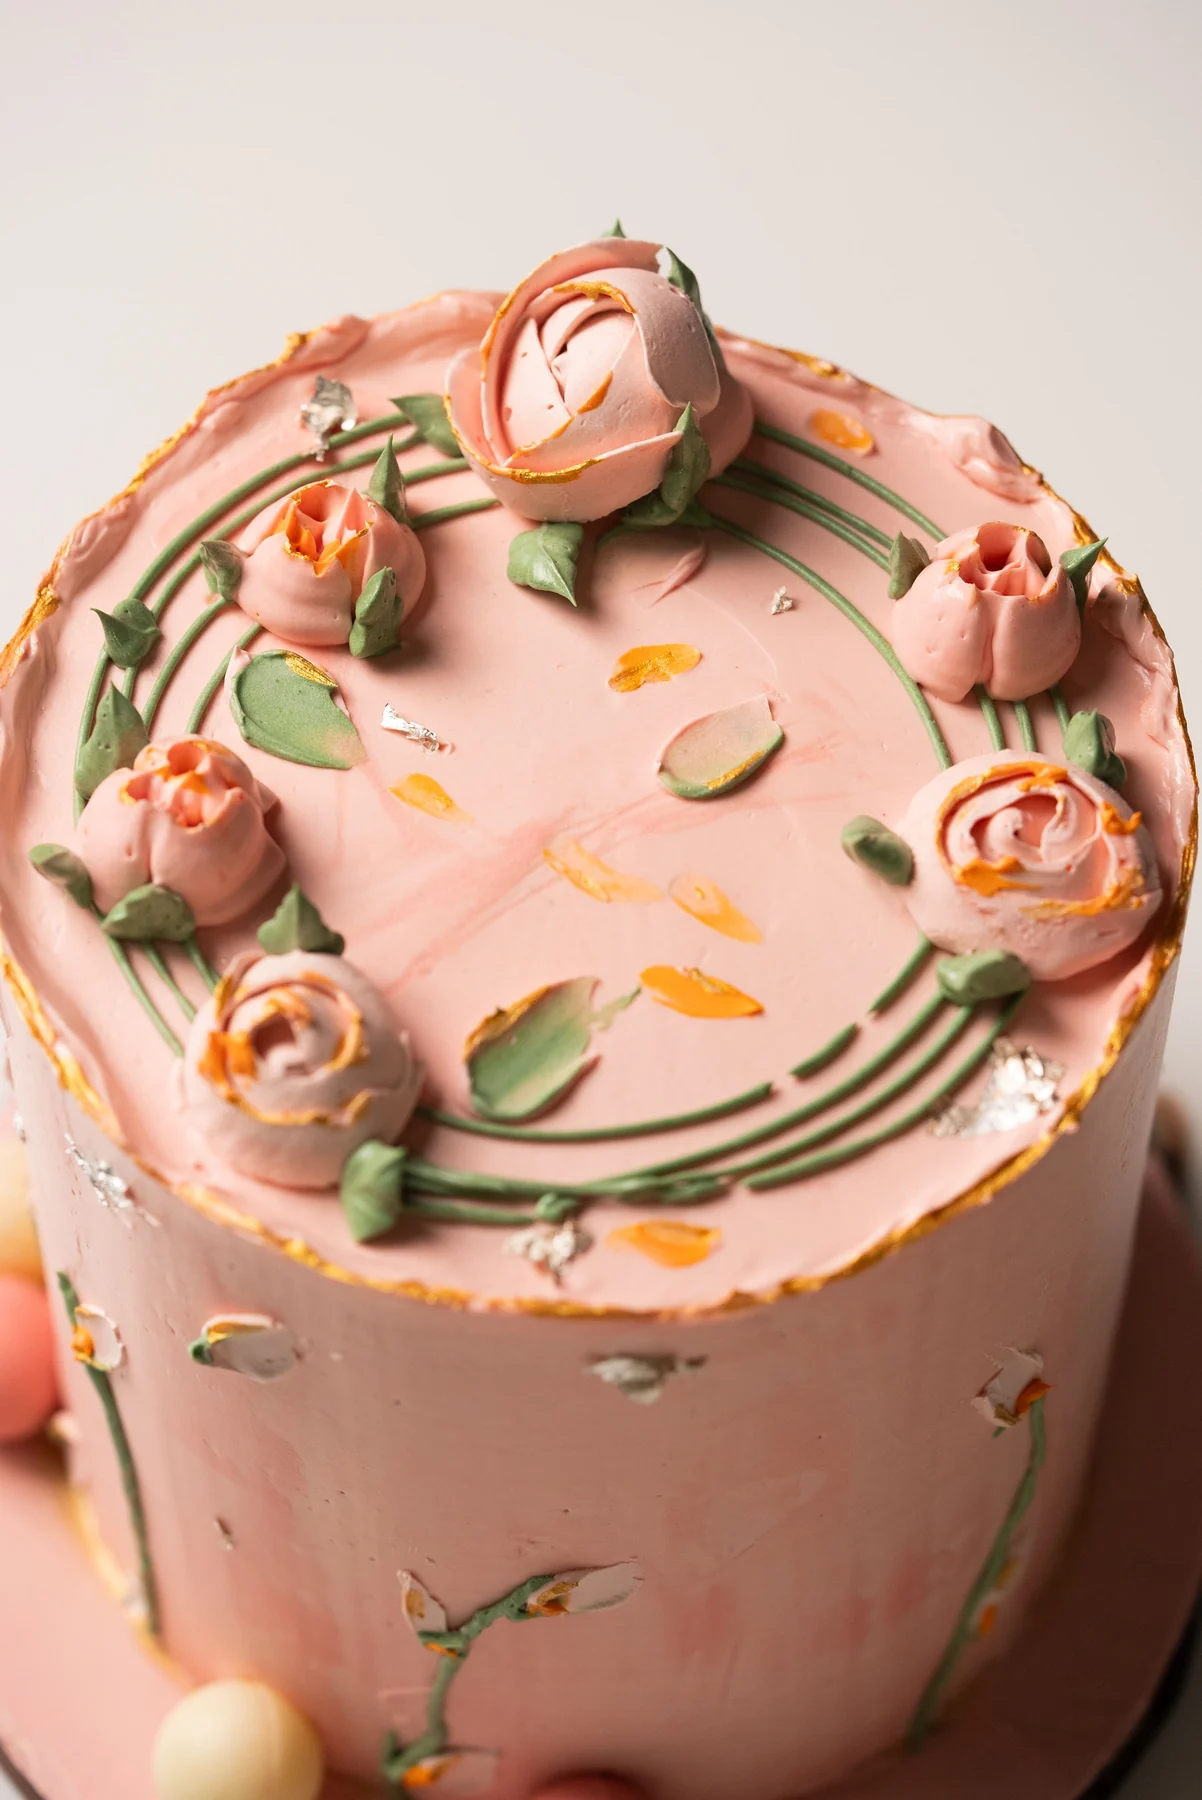
The photographed cake has roses clustered around its top, curved green stems, small green leaves and gold-colored details along the rim and across the pink surface. On a paper circle the size of your cake, mark the larger flower positions first, then add smaller flowers and connecting stem paths. Match the ring-like arrangement without needing an identical flower count.
Use pink for the smooth base and roses, green for stems and leaves, and an edible gold product for the metallic finishing accents. The photograph cannot identify the original metallic material. For your own cake, choose a product explicitly labeled edible and intended for food decoration; decorative craft leaf and non-toxic glitter are not edible substitutes.
Smooth the base and prepare three colors
Crumb-coat the assembled cake and chill it until the surface is firm. Add the final pink coating, then smooth with a scraper in short passes. Patch low spots before taking another pass instead of scraping repeatedly until the sponge shows.
Reserve clean pink frosting for repairs, a slightly different pink for the roses and a small green portion for stems and leaves. Test each portion on parchment. Petals should keep a defined edge without tearing; a stem should hold a narrow line without breaking.
Make the roses away from the cake
Attach a parchment square to a flower nail with a dab of buttercream. Make a small central mound. Hold the petal tip with the wider end down and pipe a short wrap around the mound to create a bud.
Rotate the nail as you add overlapping petals. Let each petal overlap the previous edge; stop squeezing before lifting the tip. Tilt the narrow edge slightly farther outward as the flower opens. Start with fewer petals, since a heavy outer row is harder to lift.
Make extra flowers and keep them on their parchment squares. Chill just until firm enough to move with a lifter without denting the petals. The time depends on your frosting, room and fridge, so test one spare flower instead of relying on a fixed minute count.
Pipe stems, then place the roses
On the chilled cake, mark the main flower positions with tiny frosting dots. Pipe several gentle green curves along the planned stem paths, keeping the areas for the flower bases clear. Stop squeezing before lifting to avoid a long tail.
Slide a lifter under a firm flower, separating it from the parchment. Place a small dab of frosting beneath its intended position and lower the flower onto it. Remove the lifter gently. Put the largest flowers down first, then the smaller ones, keeping some pink base visible between clusters.
Add leaves and edible gold accents
Pipe short leaves beside the roses and at selected stem ends. Squeeze to create the wider base, then reduce pressure as you pull away to form the point. Aim leaves in slightly different directions so the ring feels natural.
Add gold-colored details after the roses and leaves are in place. With an edible gold product, follow its application instructions to add an irregular rim accent and small touches on the pink surface. Use clean food-safe tools and keep the metallic decoration away from delicate petal edges unless the product instructions allow it. Never replace edible gold with craft leaf or decorative glitter.
Repair and transport without flattening the petals
If a rose dents while you move it, replace that flower rather than trying to smooth every petal in place. For a misplaced stem, chill the area, lift the narrow line carefully and patch with the reserved base color.
Chill the assembled decoration before travel and use a level box with clearance above the tallest flower. Keep the cake refrigerated when its filling requires refrigeration. Follow your underlying recipe’s storage limits; flower firmness is not a food-safety test.
About the photograph and this guide
Photograph by Whitecaps International School of Pastry. Source: https://www.pexels.com/photo/elegant-floral-cake-with-buttercream-roses-31108765/ . License: https://www.pexels.com/license/ . The creator does not endorse Kumora.
Written with AI assistance and editorial review; not kitchen-tested. Practice the decoration on parchment and a small frosting sample first. Follow the storage instructions for your chosen cake and filling.
The little details
- Make several spare roses before assembling the wreath.
- Plan the rose clusters and curved stem paths together.
- Transfer one test flower before lifting all the roses.
Your questions, answered
Can I pipe the roses straight onto the cake?
You can, but making them on parchment lets you choose the best flowers and arrange them without pressing on the finished cake. This guide uses the parchment method.
Why do my rose petals tear?
The frosting may be too stiff or cold, or the narrow tip opening may be obstructed. Test a small portion and inspect the tip before changing the whole batch.
Made it? Let’s talk.
Share how your bake went, ask a question, or pass on a helpful tip. There’s a seat for you here.
A kind kitchen is a happy kitchen. Our community guidelines →
No comments yet. Be the first to say hello.