 0 comments
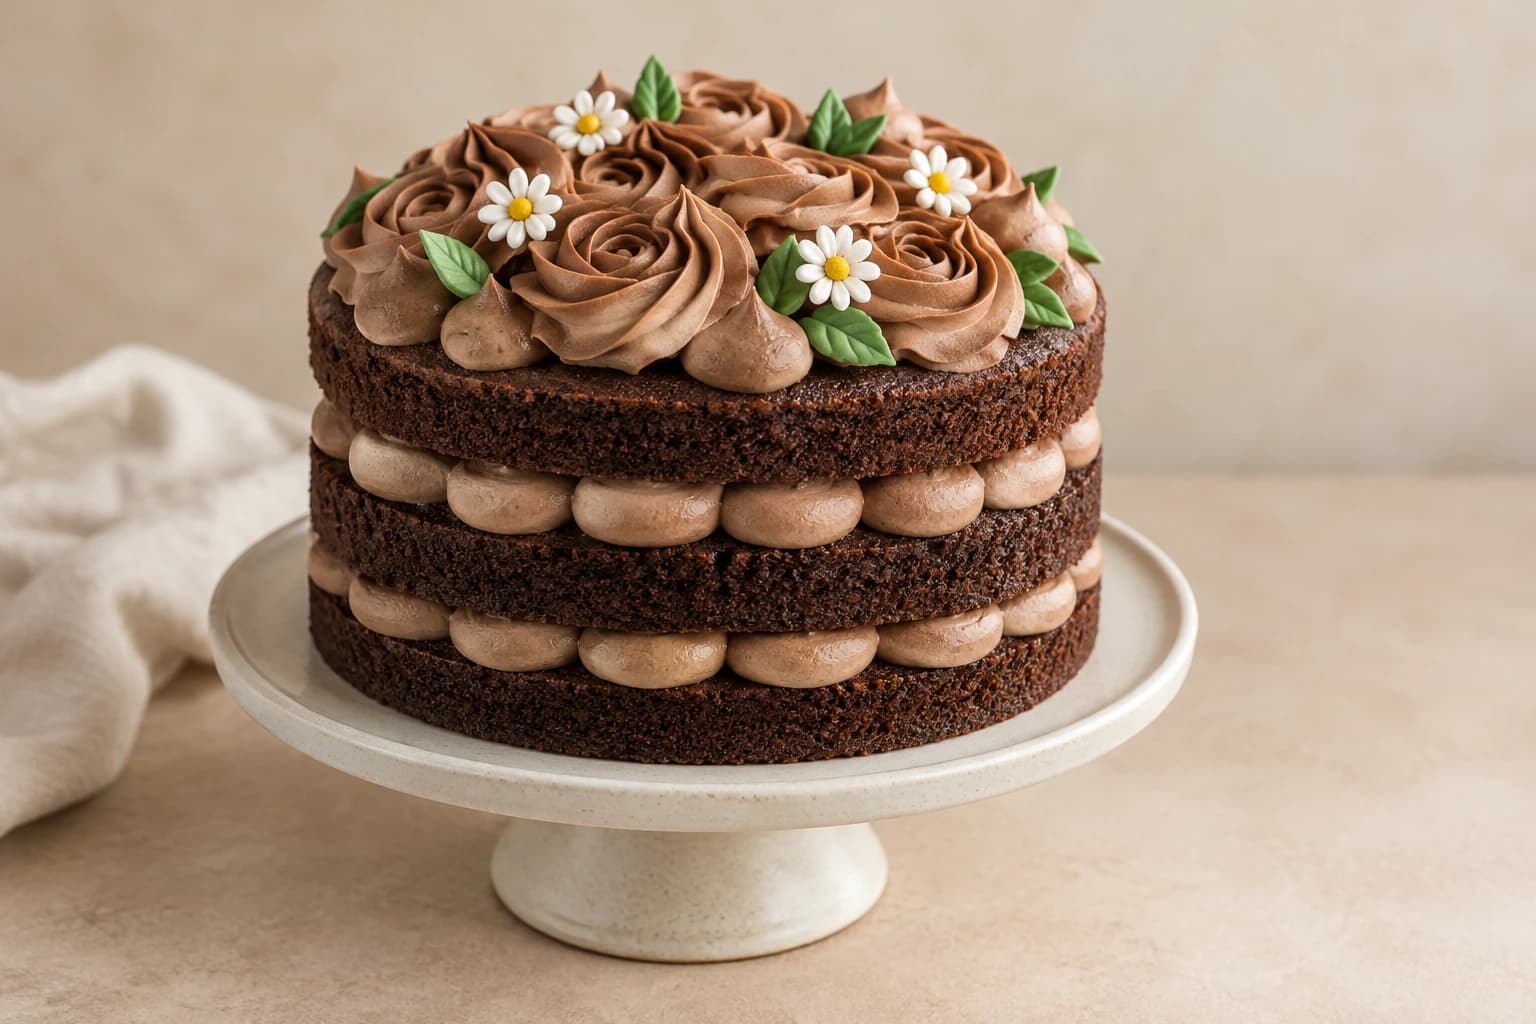
The dark sponge and pale cocoa dollops are the structure of this naked cake. Edible daisies provide the meadow detail without relying on unknown fresh blossoms or greenery. Begin with three cooled chocolate layers from a trusted recipe; no sponge formula is inferred from the reference. This is Kumora’s original interpretation of a Pinterest design, not the pictured baker’s recipe or method. The reference remains credited to its original creator.
An original Kumora recipe inspired by the linked cake design. The linked reference is decorating inspiration, not evidence of a kitchen-tested result from this recipe. The cover is identified in its caption.
Before you start
- Three cooled and level 15 cm chocolate cake layers, about 2.5–3 cm high
- 750 g prepared light cocoa piping buttercream
- 50 g prepared white piping buttercream, 10 g yellow and 20 g green
- 20 cm board, turntable, scale and offset spatula
- Piping bags, 12–15 mm plain round tip, medium open-star tip and small petal tip
- Parchment squares and small flower nail or flat practice board
Select layers that can remain exposed
Choose a moist but structurally sound chocolate cake. Very crumbly layers are difficult to lift intact; very thin layers can bow under a heavy filling. Level the tops with a serrated knife and brush away loose crumbs. Keep the cut faces upward so each frosting layer rests on a level surface. The guide does not identify what sponge or frosting the pictured baker used.
Divide 750 g cocoa buttercream into 260 g for each filling seam and 230 g for top rosettes, dollops and practice. Prepare the small white, yellow and green portions separately. Purchased piping frosting or your own trusted cocoa buttercream both work if the tip ridges hold. Do not use loose chocolate sauce in place of the dollops.
Make food-safe daisies before stacking
On parchment squares, use a small petal tip with its wide end toward the center. Pipe short white petals radiating around a 1 cm circle, then add a yellow dot in the middle. Six to eight petals make a small daisy-like shape; these do not need botanical precision. Make about twelve flowers so you can select eight or nine intact ones.
Chill or briefly freeze the buttercream flowers until firm enough to lift from parchment with a small spatula. Alternatively, buy ready-to-eat sugar daisies with ingredients and allergen information, no wires and no non-edible supports. The source blossoms are not identified: garden daisies, florist sprays and ornamental greenery must not be assumed edible.
Pipe a stable first filling seam
Fix the first cake layer to the board. From its 260 g allocation, spread about 80 g in a thin layer across the center, leaving a 1 cm margin. Pipe the remaining 180 g in touching, generous round dollops around the perimeter, keeping the bag upright. Squeeze to form a mound, stop pressure and lift. A ring around 1–1.5 cm high creates the visible scalloped seam.
Place the second sponge on top without twisting and press only lightly with a flat palm or board. Check whether dollops compress evenly. If the cake tilts, lift the layer and adjust the frosting before continuing. A very high ring with an empty center can leave the layer unsupported, which is why the thin central spread matters.
Repeat, chill and decorate the open top
Repeat the center spread and outer dollops for the second filling seam. Place the final layer, check alignment and refrigerate for 25–40 minutes until the stack feels stable. Keep the sides exposed; a coat of frosting would change the key silhouette. Do not soak the outside with syrup, which can make the cut edges look wet and fragile.
Pipe cocoa rosettes around about two thirds of the top using the star tip: start in the center, circle once and release pressure before lifting. Fill a few spaces with round dollops. Leave some dark cake visible in the middle. Use the remaining cocoa frosting as a small adhesive beneath each cold daisy, then add short green buttercream leaves rather than stems.
Control bulging, drying and fragile flowers
Bulging filling usually means the buttercream is too soft or the upper layer was pressed down too hard. Chill before adding further weight; if a seam has collapsed, disassemble while cold and re-pipe lower dollops. Tall towers of rosettes can destabilize the top, so keep the flowers low.
Exposed sponge dries more quickly than a fully coated cake. Assemble close to serving, ideally the day before or the same day, and store in an airtight tall container without letting plastic touch the dollops. Add crisp commercial sugar flowers shortly before display if their packaging says moisture softens them. Cut between larger rosettes to avoid crushing all the decoration.
Presentation, transport and storage
Place the finished dessert on a clean food-safe board or plate and use a box with clearance above and beside every decoration. Chill before transport, support the board from underneath and keep it level on a nonslip surface in a cool vehicle. Avoid adding paper cards, fabric, wire or florist materials to the edible surface. The concept hero illustrates the intended look; it is not a photograph of a tested result.
Refrigerate covered at 4°C or colder. For best quality, plan to serve within 2 days, following any shorter limit on your cake, filling, frosting or decoration packaging. This is a conservative planning window, not a validated shelf-life claim. Keep leftovers covered and refrigerate promptly. Soften only the cake portions you will serve briefly in a cool room.
Keep perishable desserts out of refrigeration for no more than two hours in total, reduced to one hour above 32°C / 90°F; decorating, transport and display time count together. Use a clean knife and wipe it between portions. This temperature and time guidance follows the FDA’s safe storage advice (https://www.fda.gov/consumers/consumer-updates/are-you-storing-food-safely).
The little details
- Support the center of each sponge as well as its edge.
- Match the height of the two filling seams before adding flowers.
- Use edible piped leaves to replace unidentified greenery.
Your questions, answered
Can I add fresh wildflowers?
This guide deliberately uses edible frosting or labeled ready-to-eat sugar flowers. The photograph does not establish the identity or food safety of any plant, so do not substitute gathered or florist flowers.
Can I use whipped cream?
It creates a different, less rigid assembly. Use a tested stabilized filling and its storage instructions, keep the seams lower and do not assume it can hold the dollop structure described here.
How do I stop the exposed edges drying?
Keep the cake in a covered airtight container, assemble near serving and avoid prolonged uncovered display. Do not increase the filling height to compensate for dry sponge.
Made it? Let’s talk.
Share how your bake went, ask a question, or pass on a helpful tip. There’s a seat for you here.
A kind kitchen is a happy kitchen. Our community guidelines →
No comments yet. Be the first to say hello.