 0 comments
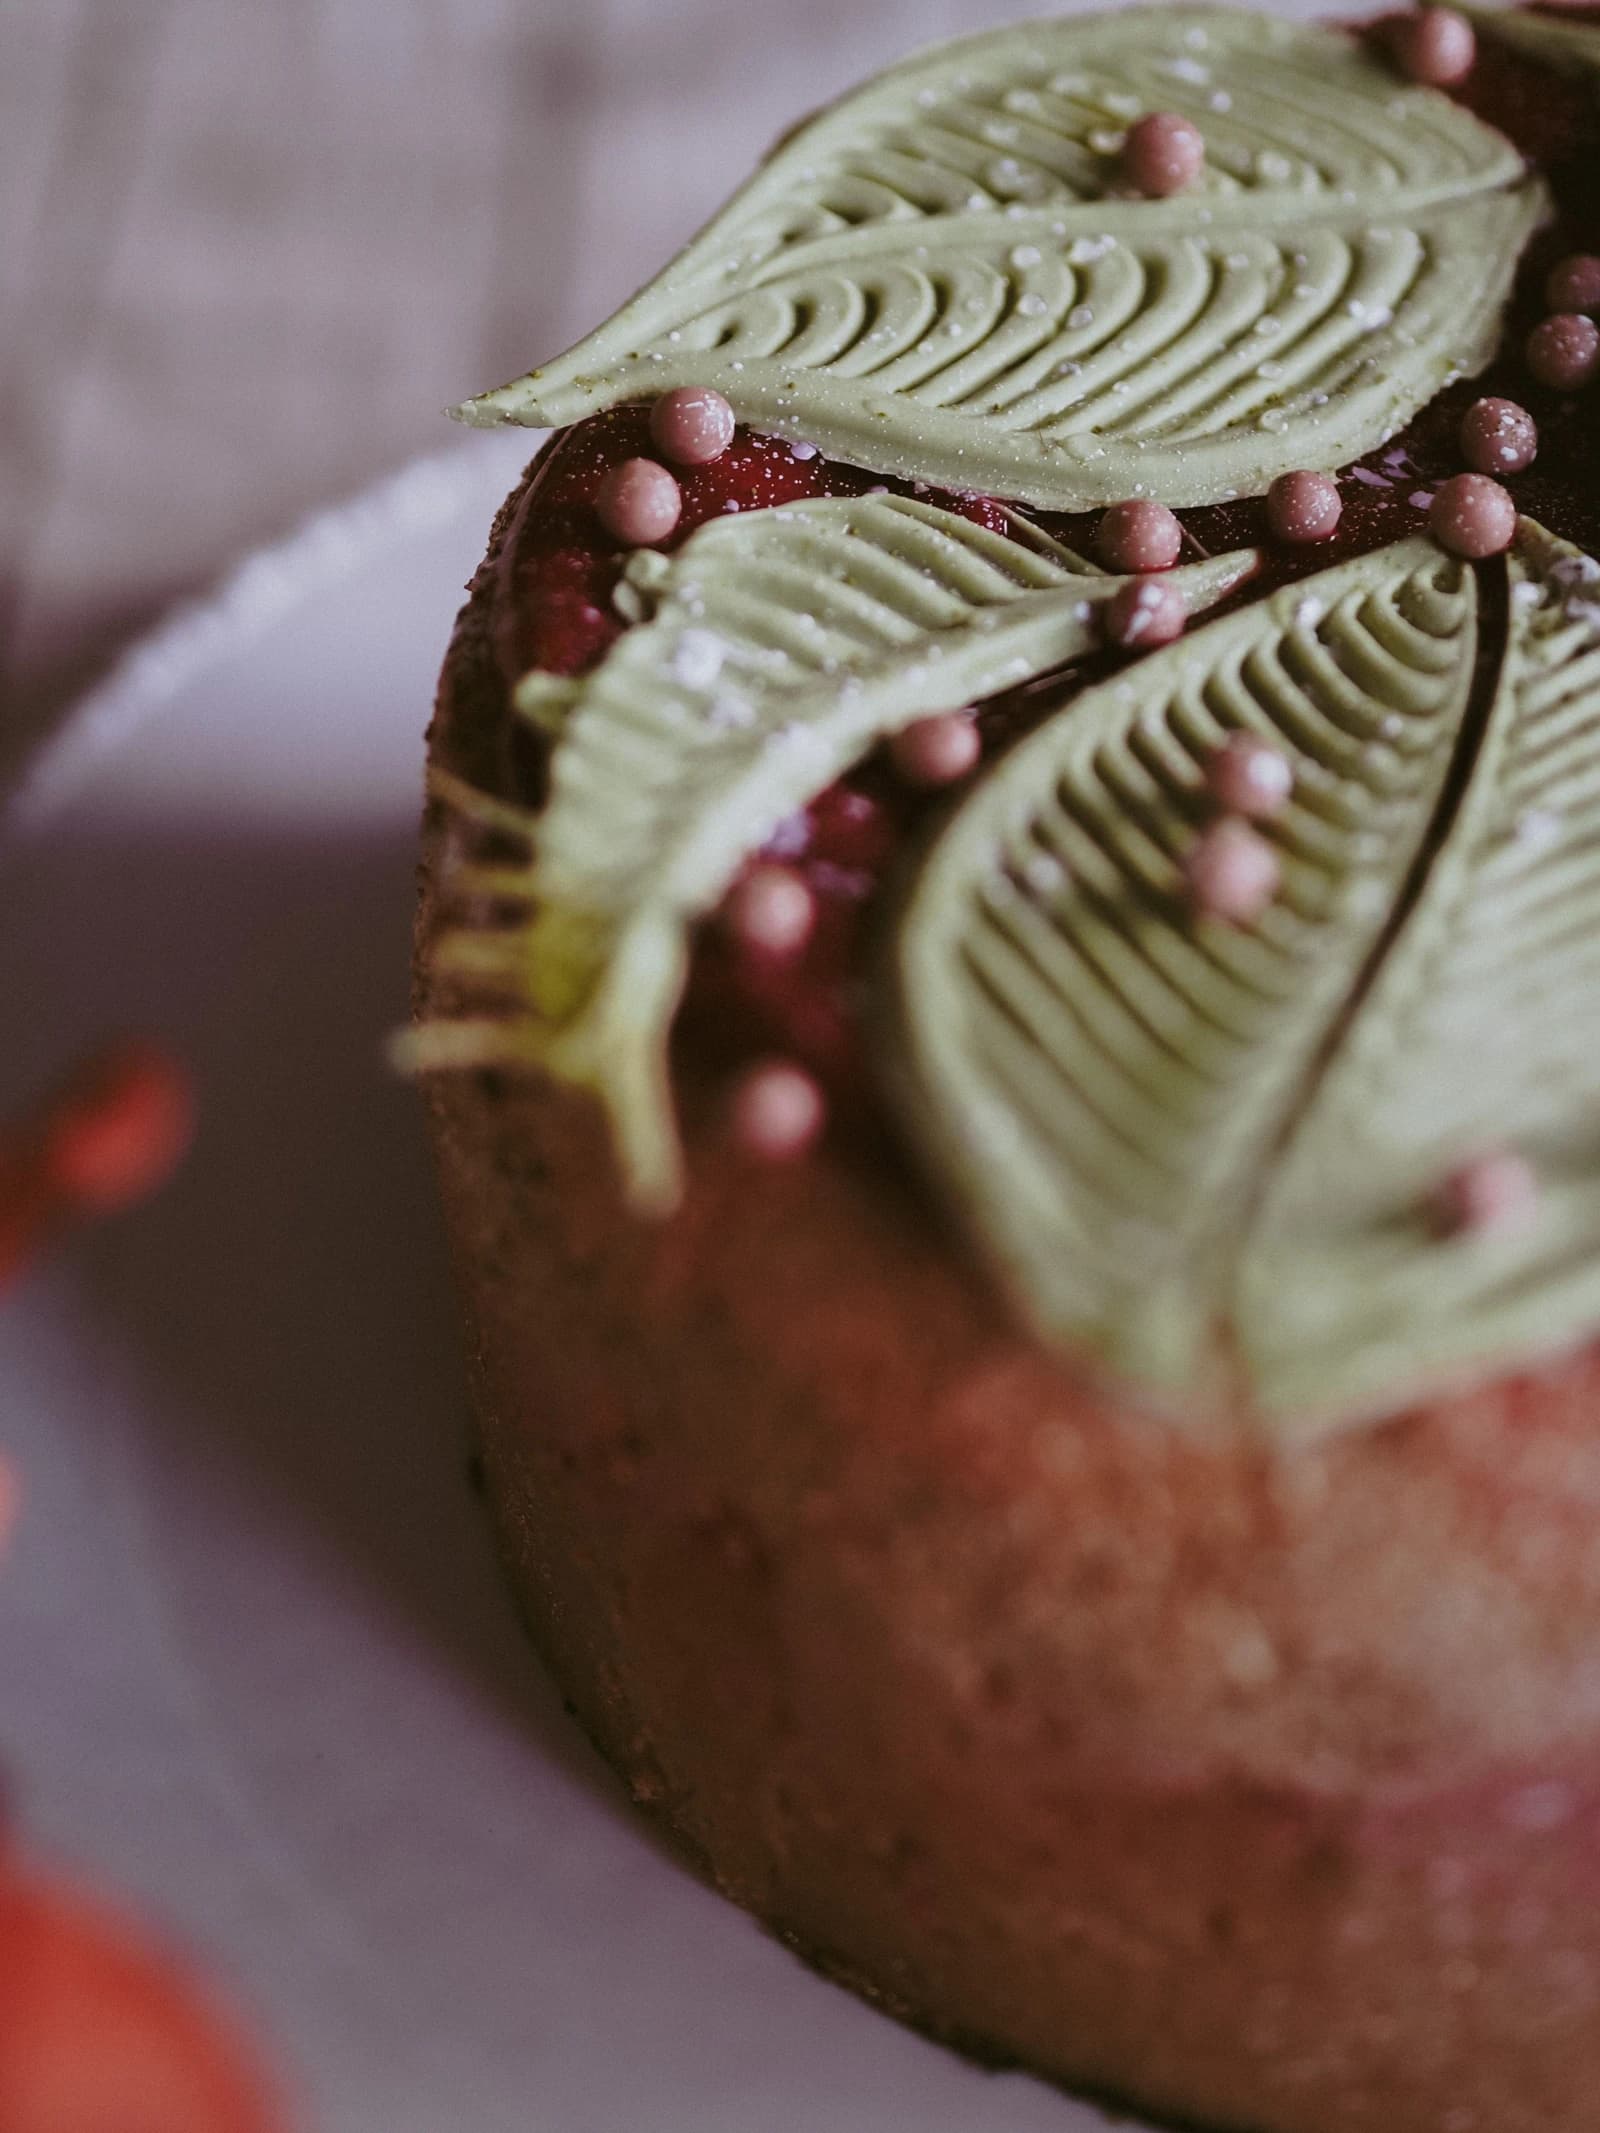
Create a botanical cake topper with edible fondant leaves. This guide covers rolling thickness, simple veins, curved shapes and a balanced arrangement that keeps the cake easy to cut. The licensed photograph is a visual reference. The instructions are an independent approach to the style, not a claim about the source baker’s ingredients or exact method.
Before you start
- A finished cake from a trusted recipe
- Food-grade fondant and gel colors
- Small rolling pin and non-stick mat
- Leaf cutter or clean food-safe knife
- Food-safe modeling tool and parchment
- A little prepared frosting or edible glue labeled for food use
Choose a small, edible arrangement
The reference uses oversized, sculptural leaves. For a manageable first attempt, make three medium leaves and a few smaller ones. Arrange them on the top of a single-tier cake rather than building a heavy upright structure. Fondant is sweet and firm, so a thinner, lighter piece is often more pleasant to serve.
Use fondant sold for cake decorating and check its ingredients for allergens. Keep craft clay, non-edible glitter and florist materials out of the design. The color of the photograph is inspiration, not evidence of a particular fondant brand or flavor.
Roll and cut without sticking
Knead a small portion of fondant until pliable, then tint it a muted green. Work with one piece at a time and keep the rest wrapped so its surface does not dry. Roll to an even sheet about 2–3 mm thick as a starting point. Larger pieces need enough thickness to lift without tearing.
Cut the leaf outline with a cutter or a clean food knife. Lift it gently from the mat before adding all the detail; a leaf that is already stuck is more likely to stretch when finished. Avoid excessive dusting, which can leave pale marks and dry the surface.
Mark the central vein and side veins
Use a blunt modeling tool to press a central line from the base toward the tip. Add smaller diagonal lines on both sides, following the leaf shape. Press shallowly so the fondant stays connected; cutting through the sheet creates fragile strips.
For the raised-looking detail in the reference, an alternative is to add very thin fondant ropes along selected veins. Keep them fine and use only a trace of food-safe adhesive. A few clear lines usually look cleaner than dozens of heavy ridges.
Give the leaf a gentle curve
Place the shaped leaf over loosely folded parchment to lift one edge. Let it rest until it holds a slight curve when moved. Timing depends on the fondant, thickness and room humidity, so check the piece rather than relying on a fixed drying time.
Keep the curve low enough to fit inside the cake box. Avoid making hard points that extend far beyond the cake edge. Prepare extra leaves on the same day so a torn or cracked piece does not force you to patch the most visible part.
Arrange before attaching
Try the layout on a clean board first. Point the leaves in different directions and let one overlap another slightly. Leave clear space for cutting and avoid placing every heavy detail in the same quadrant. Transfer the arrangement to the cake with small dabs of frosting or an appropriate edible adhesive.
Do not soak the leaves with water. Too much moisture can make fondant sticky or soften its shape. If adding berry-colored accents, use edible sugar pieces or fruit suitable for the cake; their color alone is not a reason to use unidentified berries.
Serve and store with the cake in mind
Store the cake according to its filling and frosting, even if the fondant would keep its texture better elsewhere. Perishable fillings take priority. Condensation may affect sugar decorations, so plan to add delicate leaves near serving time when practical.
Lift large firm decorations off before cutting and offer small edible portions separately. For a softer finish next time, try smaller or thinner leaves rather than increasing the number of thick toppers.
About the photograph and this guide
Photograph by Pelageia Zelenina. Original source: https://www.pexels.com/photo/close-up-of-cake-with-fondant-leaves-on-plate-9882896/ . Used under the Pexels License: https://www.pexels.com/license/ . The photographer does not endorse Kumora.
This decorating guide was written with AI assistance and editorial review. It has not been kitchen-tested. Start with a small practice section and use a cake and frosting recipe you already trust.
The little details
- Keep unused fondant wrapped while you work.
- Make veins shallow enough that the leaf remains in one piece.
- Use a restrained number of leaves so the cake is easy to portion.
Made it? Let’s talk.
Share how your bake went, ask a question, or pass on a helpful tip. There’s a seat for you here.
A kind kitchen is a happy kitchen. Our community guidelines →
No comments yet. Be the first to say hello.