 0 comments
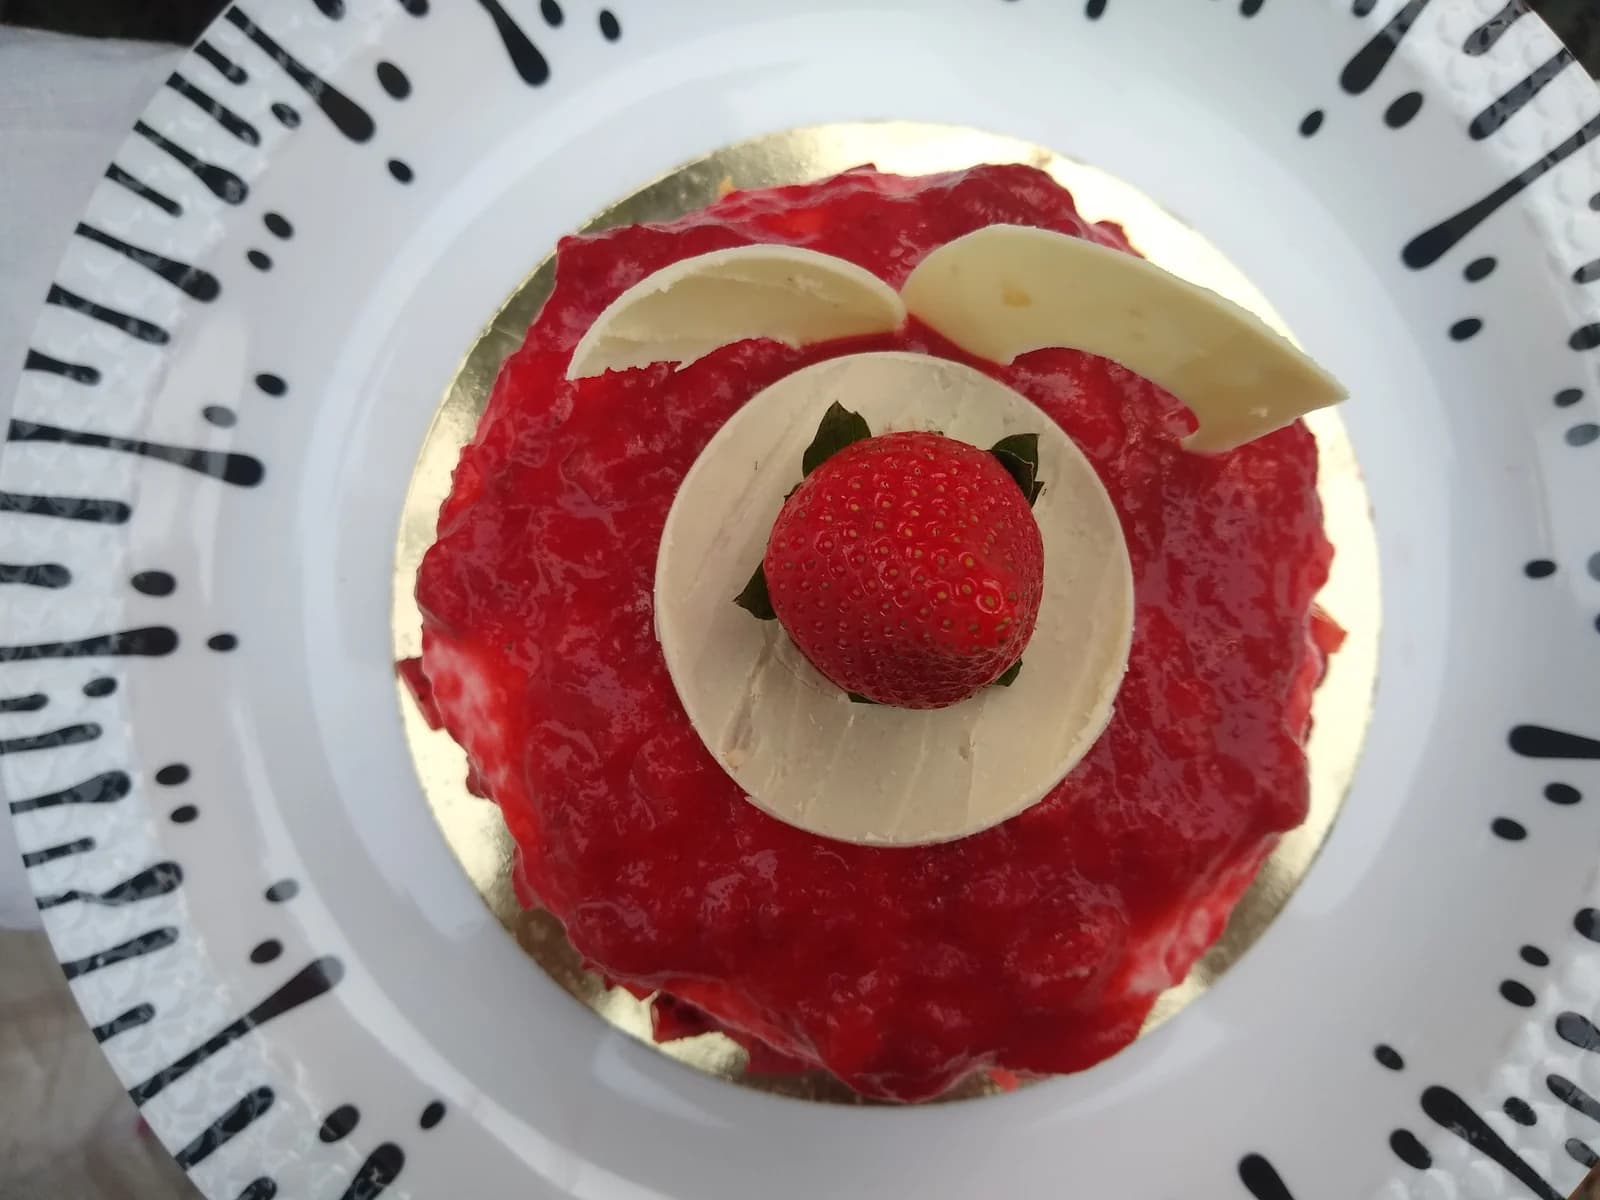
Frame a crown of strawberries with irregular white chocolate pieces, using a manageable method for shaping and attaching the collar. This Kumora guide interprets the reference image; it does not claim to reproduce the original creator’s recipe or methods.
Before you start
- Chilled frosted cake
- White chocolate or coating for edible decorations
- Parchment or food-safe acetate
- Offset spatula and flat tray
- Washed and thoroughly dried strawberries
Make the chocolate separately
The reference gets its shape from narrow upright pieces surrounding a red fruit center. Begin with a stable cake and make the decorations on a tray. That lets you replace a broken piece without disturbing the frosting.
Real white chocolate and compound coating behave differently. Choose your product first and follow its melting and tempering instructions. Do not assume every white baking chip will make a firm, glossy decoration using the same method.
Give each piece a supported base
Spread a thin, even layer on parchment or acetate. Test a few pieces before making a full collar. When partly set but still cuttable, score narrow strips or elongated shapes, leaving the lower end broad enough to attach.
Let them set completely before lifting. Irregular tips look natural, but extremely tall, thin needles break easily. Keep the overall height consistent enough to frame the berries and save a few spare pieces for repairs.
Attach around firm frosting
Lay out the pieces beside the cake to estimate how many you need. Secure the lower sections with small dabs of compatible frosting and overlap slightly where useful. Press near the base, not against a fragile tip.
If the base coat cannot support them, chill it and try again. Work in short sessions with cool hands. Check from above that the collar follows the cake rather than leaning outward into the box walls.
Add fruit near serving
Dry the berries carefully and avoid cut surfaces pooling juice on the cake. Place taller fruit near the center and fill the smaller gaps around it. The collar should frame the berries rather than hide them.
A topper or candle needs its own suitable support. Do not lean it against the chocolate. Follow the storage instructions of the cake’s most perishable component, allowing for the fact that fruit and chocolate can change during prolonged refrigeration.
The little details
- Test one piece against the actual frosting before making the whole collar.
- For a difficult journey, carry fragile pieces separately and finish at the destination.
Your questions, answered
Can I use white candy coating?
Yes, if it is intended for edible decorations. Follow its own instructions; it handles differently from real chocolate.
Why do the pieces snap?
They may be too thin or unsupported while lifting. Try a slightly thicker base and handle each piece close to its attachment point.
Made it? Let’s talk.
Share how your bake went, ask a question, or pass on a helpful tip. There’s a seat for you here.
A kind kitchen is a happy kitchen. Our community guidelines →
No comments yet. Be the first to say hello.