 0 comments
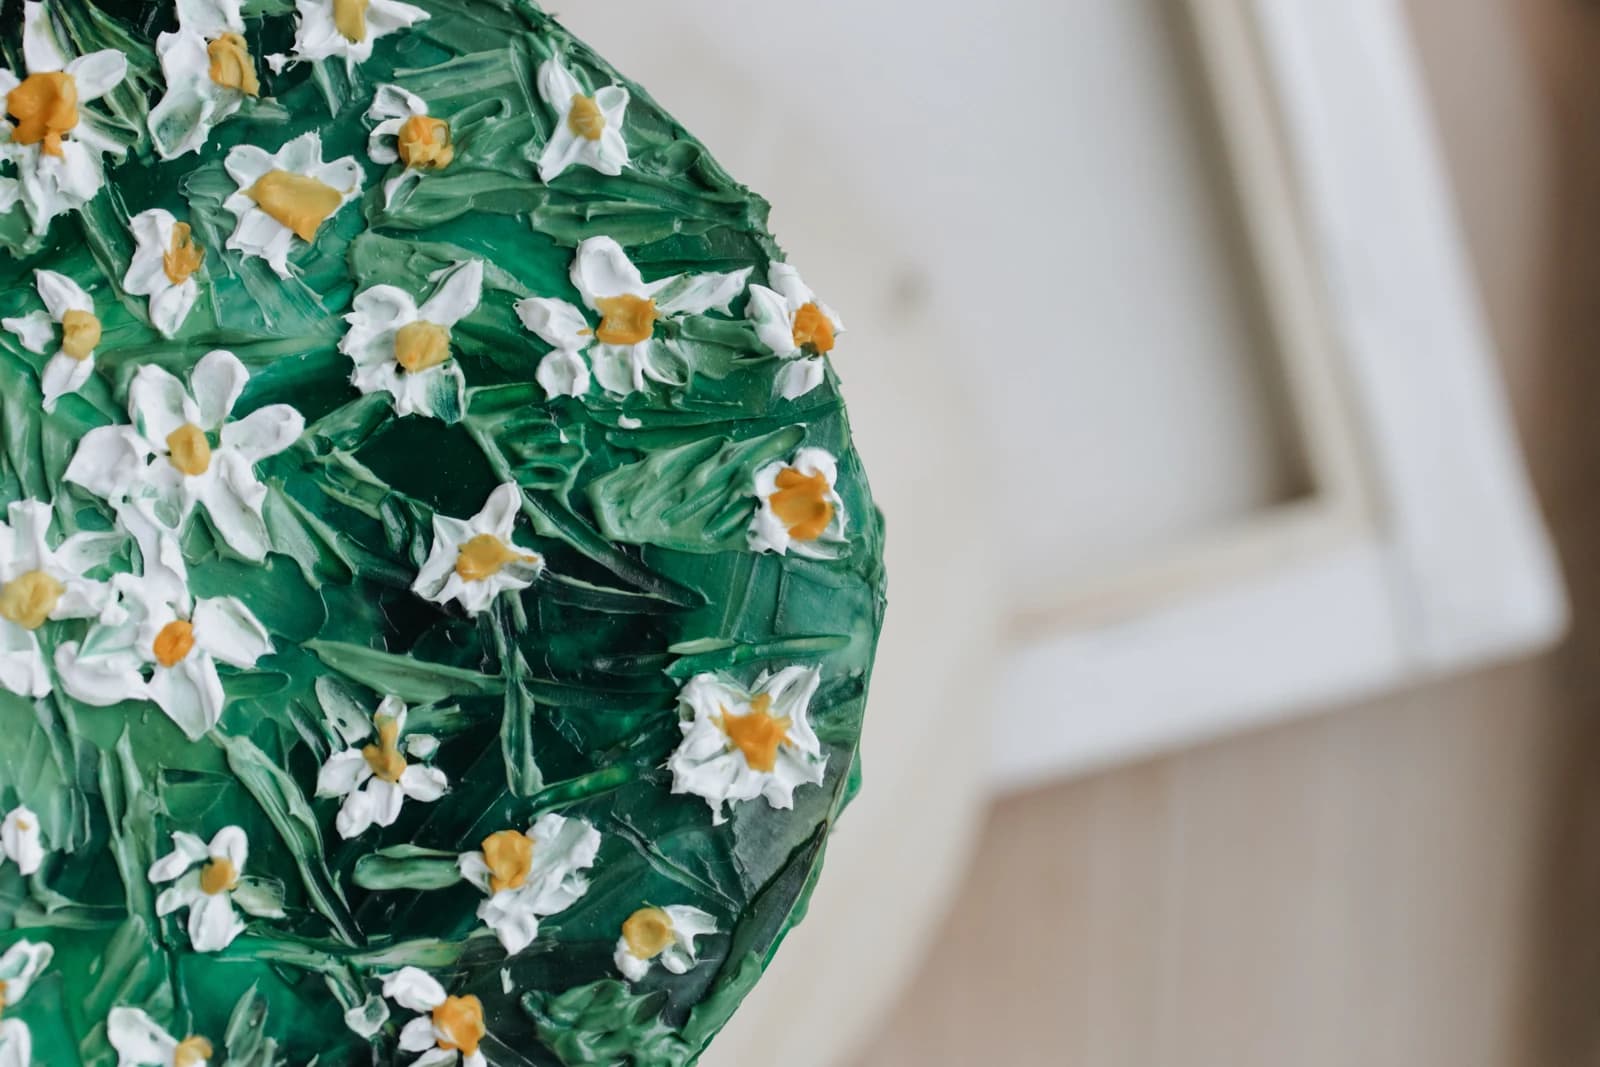
A green meadow cake begins with overlapping leaves, then small white daisies. Follow the layer order, practice the palette-knife movement and repair smudges without covering every detail. The licensed photograph is a visual reference. The instructions are an independent approach to the style, not a claim about the source baker’s ingredients or exact method.
Before you start
- A filled, crumb-coated cake made from a trusted recipe
- Prepared buttercream in green, white and yellow
- Small food-safe rounded palette knife
- Small piping bags, a fine round tip and parchment
- Cake board, turntable and clean spatula
Plan three layers of decoration
Think of the finish in three passes: a thin green background, larger leaf strokes and the flowers. Choose one main green and tint a small extra portion darker. White petals and yellow dots can provide contrast without adding more colors.
Sketch a few flower positions on parchment before starting. Leave small irregular spaces between them. A uniform grid reads differently from the loose meadow in the photograph; vary the direction of the leaves instead of making every flower a different size.
Chill the base; soften the detail frosting
The cake should be level and its crumb coat firm enough that a light palette-knife touch does not pull crumbs into the decoration. Spread a thin green coat and chill until it stays in place when gently touched. The detail frosting should be spreadable while holding a small ridge.
Try three green strokes on parchment. If the buttercream rolls off the knife in a lump, let a small portion soften and stir it smooth. If it immediately puddles, cool it briefly. Test the correction before changing the whole bowl.
Lay down the leaves first
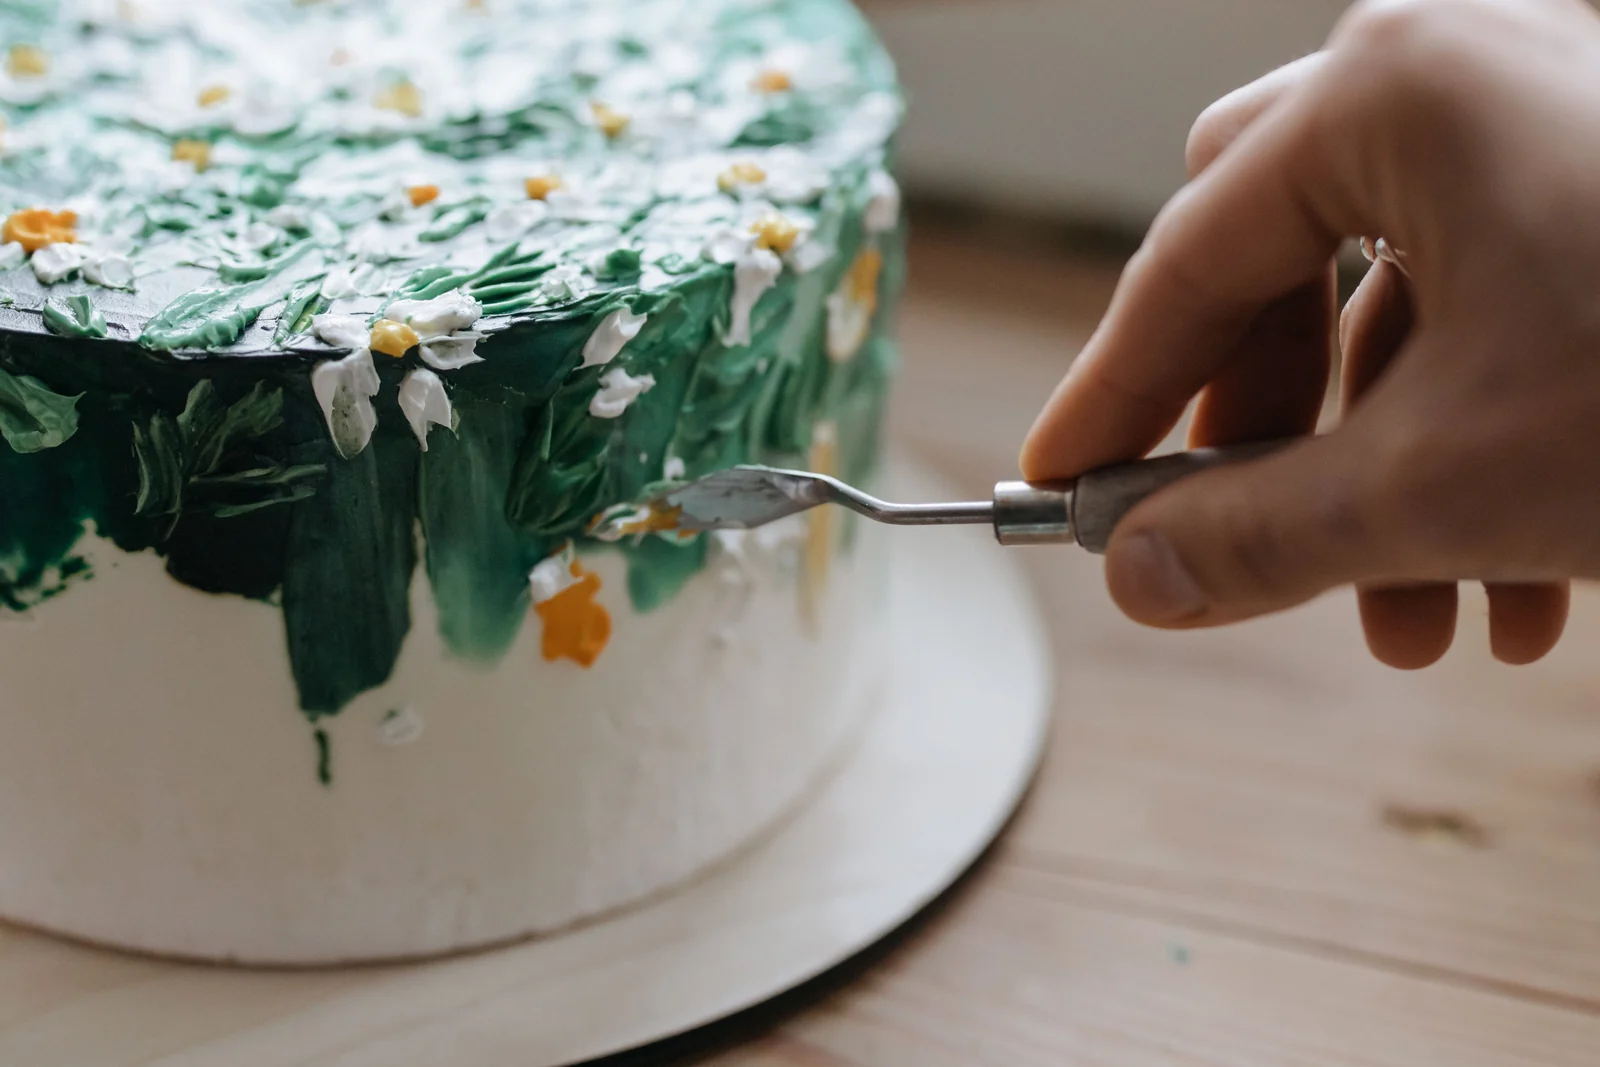
Put a small dab of green buttercream on the back of the rounded knife. Touch one edge to the surface, draw a short tapered stroke and lift away. Wipe the knife between colors so the background does not turn muddy. Use a light touch; heavy pressure can scrape away the chilled coating.
Work around the cake rather than completing one dense patch at a time. Alternate upward, diagonal and sideways strokes. Let the ridges remain visible. The point is a leafy texture, so there is no need to smooth the surface after every mark.
Add white petals, then yellow centers
Practice tiny daisies on parchment with a small piping bag. Place short white strokes around an empty center, easing pressure as each stroke ends. Five to seven petals give a useful starting arrangement; their exact number and size can vary. Add a small yellow center after the white petals.
On the cake, add the largest daisies first and fill selected gaps with smaller ones. Keep some green visible. Work on a chilled, stable surface and avoid pressing the nozzle into the leaves. A few flowers can be allowed to overlap a ridge, but do not bury the whole leaf layer.
Repair one area at a time
A muddy patch is easier to fix after chilling. Let the frosting firm, lift the unwanted stroke with a clean small spatula, then add a fresh leaf or flower. Repeated scraping while it is warm spreads the colors further.
If petals merge together, use smaller amounts and check that the bag has not warmed in your hand. Set it down between flowers. Put the yellow dots on last, so they remain distinct instead of being pulled into the white.
Keep the finish intact
Box the cake with clearance around the leaves and transport it level. Follow the storage requirements of the cake, filling and frosting you used; the green outer decoration does not change those requirements. Keep perishable fillings refrigerated.
For a less elaborate version, decorate only the top and upper edge. The same layer order works, and fewer flowers give you more time to practice each one.
About the photograph and this guide
Photograph by cottonbro studio. Original source: https://www.pexels.com/photo/close-up-of-floral-pattern-frosting-on-a-cake-5681748/ . Used under the Pexels License: https://www.pexels.com/license/ . The photographer does not endorse Kumora.
This decorating guide was written with AI assistance and editorial review. It has not been kitchen-tested. Start with a small practice section and use a cake and frosting recipe you already trust.
The little details
- Use dedicated food tools, not art palette knives that have touched paint.
- Work from broad green texture to small white detail.
- A clean knife prevents streaks between the colors.
Made it? Let’s talk.
Share how your bake went, ask a question, or pass on a helpful tip. There’s a seat for you here.
A kind kitchen is a happy kitchen. Our community guidelines →
No comments yet. Be the first to say hello.