 0 comments
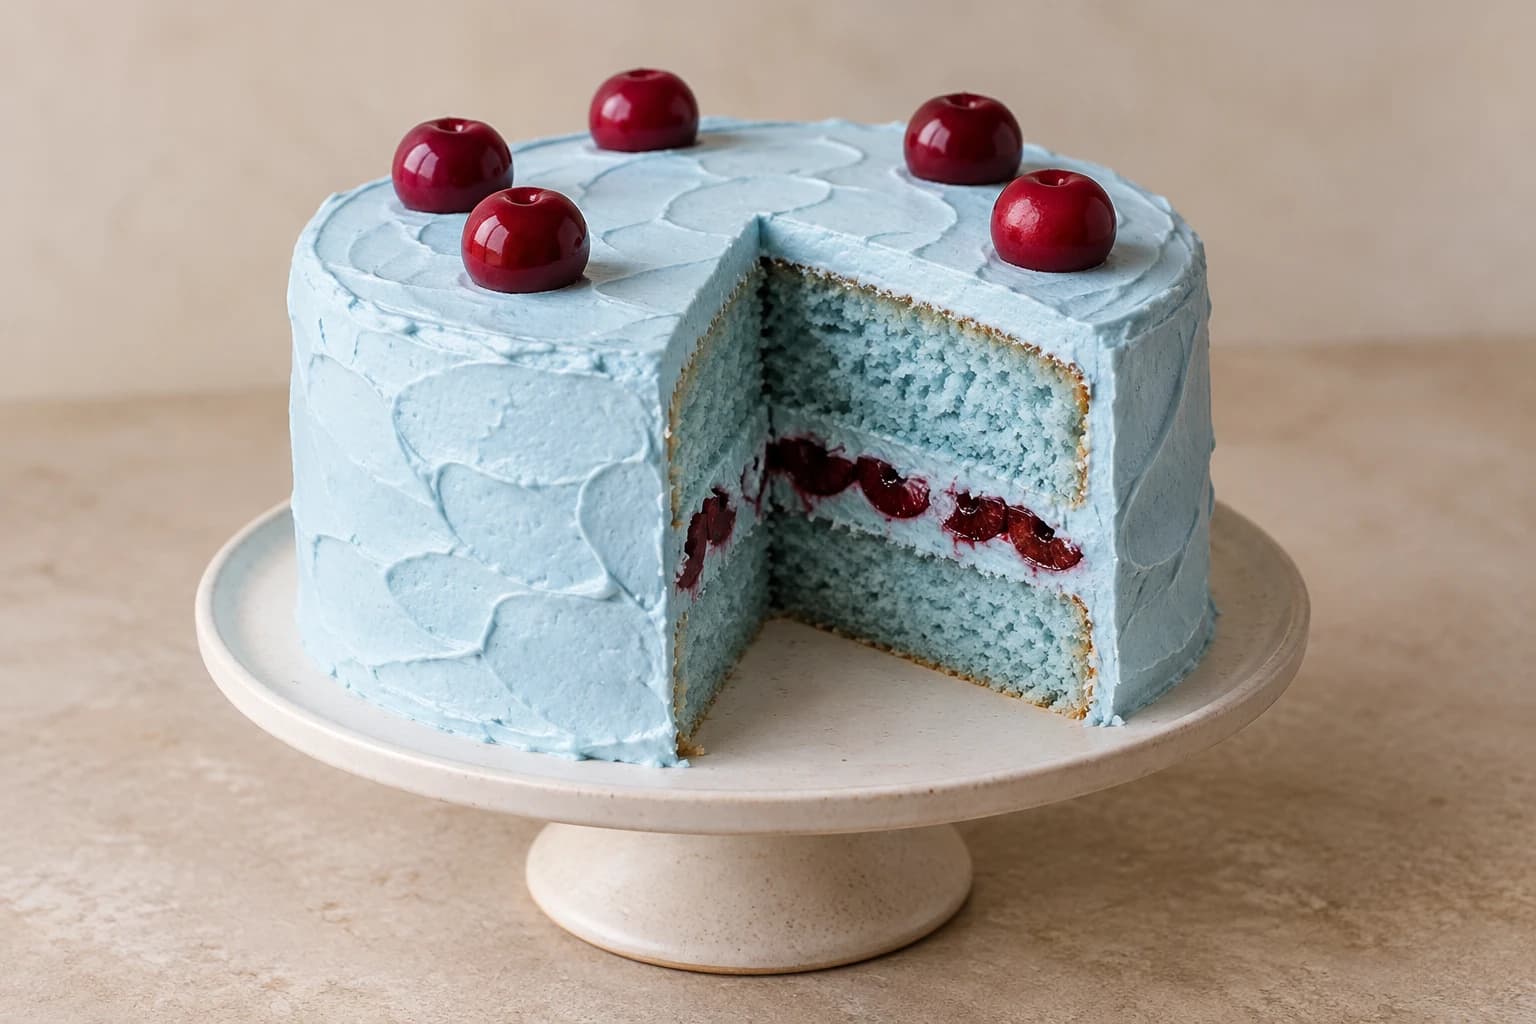
Blue sponge and red cherries give this cake its visible contrast. This guide covers an original assembly using a tested vanilla sponge recipe chosen by you, not a new sponge formula or the source baker’s recipe. A pale blue buttercream dam contains a modest single layer of pitted fruit, making the colorful seam easier to slice. This is Kumora’s original interpretation of a Pinterest design, not the pictured baker’s recipe or method. The reference remains credited to its original creator.
An original Kumora recipe inspired by the linked cake design. The linked reference is decorating inspiration, not evidence of a kitchen-tested result from this recipe. The cover is identified in its caption.
Before you start
- Two fully cooled 15 cm blue-tinted vanilla cake layers, about 3 cm high
- 800 g prepared stable pale blue piping buttercream
- 180 g fresh cherries, washed, dried, pitted and halved; 50 g additional pitted cherries for top
- Food-grade blue gel suitable for baking; scale and cherry pitter
- Turntable, 20 cm board, offset spatula, scraper and 8–10 mm round piping tip
Bake separately from a recipe you trust
Choose a vanilla cake formula you have already used successfully or another tested published recipe suitable for two 15 cm layers. Follow its ingredient quantities, mixing method, pan preparation, oven settings and doneness checks. Add only a small amount of baking-suitable blue gel where that recipe permits coloring. This guide supplies no sponge formula and does not validate a modified recipe.
Cake batter containing yellow yolks or butter can shift blue toward turquoise; browning can dull the outer edges. Do not promise a precise shade from a photograph. If bright blue is essential, use a tested white-cake recipe that accepts color and check its instructions. Let the layers cool completely, then level them; remove only a thin dark crust if necessary rather than weakening the structure.
Control cherry moisture before stacking
Wash the fruit under running water, dry thoroughly, pit every cherry and halve it. Inspect each half for retained stone fragments. Use about 180 g prepared halves for the seam and 50 g pitted fruit for the top. Do not leave whole stones hidden inside an edible-looking filling. Place the halves on paper towel briefly to blot cut-surface moisture.
Fresh firm cherries are easier to keep in one layer than thawed fruit, which releases more liquid. If using frozen cherries, follow a separately tested cooked thick filling recipe and cool it completely; that makes a different seam. Do not pour loose cherry syrup into this buttercream assembly or use a pile of wet fruit to imitate the photograph.
Allocate buttercream and make a firm dam
Divide 800 g pale blue piping buttercream into 180 g for the filling, 90 g for the perimeter dam, 100 g crumb coat, 380 g outer coat and 50 g top dollops and repair. Choose a stable buttercream suitable for both piping and refrigeration. Unstabilized whipped cream is not interchangeable here; the image cannot tell us what the source cream was.
Attach the first layer to the board. Spread about 100 g of the filling portion evenly over it, then pipe the 90 g dam in a thick ring just inside the edge. Keep its height around 1 cm. Arrange cherry halves cut-side down in one layer within the ring, leaving small gaps and keeping them away from the outer edge. Do not force in fruit that will not fit.
Close the seam and coat after chilling
Use the remaining 80 g filling frosting to fill gaps between cherries and lightly cover them; a thin continuous cushion helps the upper sponge sit evenly. Place the second cake layer without twisting and press only enough to seat it. The fruit should be nestled in frosting, not carrying all the weight. Check level and refrigerate 25–40 minutes until the seam is stable.
Apply the 100 g crumb coat, chill until firm, then smooth the pale blue final coat. If fruit protrudes, correct the seam before coating rather than concealing a bulge beneath a thick side layer. Keep top decoration modest: a few small buttercream dollops with dry pitted cherries make the flavor and palette clear. Add the fruit near serving for less moisture staining.
Slice to reveal the blue-and-red seam
Chill until firm enough to portion, then cut with a warm, wiped and fully dried knife. The first wedge may compress; support it with a cake server and lift from beneath. A cut through a cherry half will show the red seam, but each slice naturally contains different fruit positions. The concept hero is an illustration, not evidence of a tested cross-section.
If the cake slides, the filling may be too warm, too thick or too wet. Chill, lift the upper layer if necessary and reduce fruit to one dry layer inside a stronger dam. Juice staining cannot always be erased; preventing it with dry fruit and delayed topping is easier. Do not soften the whole cake on a warm counter just to make the first cut.
Presentation, transport and storage
Place the finished dessert on a clean food-safe board or plate and use a box with clearance above and beside every decoration. Chill before transport, support the board from underneath and keep it level on a nonslip surface in a cool vehicle. Avoid adding paper cards, fabric, wire or florist materials to the edible surface. The concept hero illustrates the intended look; it is not a photograph of a tested result.
Refrigerate covered at 4°C or colder. For best quality, plan to serve within 2 days, following any shorter limit on your cake, filling, frosting or decoration packaging. This is a conservative planning window, not a validated shelf-life claim. Keep leftovers covered and refrigerate promptly. Soften only the cake portions you will serve briefly in a cool room.
Keep perishable desserts out of refrigeration for no more than two hours in total, reduced to one hour above 32°C / 90°F; decorating, transport and display time count together. Use a clean knife and wipe it between portions. This temperature and time guidance follows the FDA’s safe storage advice (https://www.fda.gov/consumers/consumer-updates/are-you-storing-food-safely).
The little details
- Pit and inspect cherries before they go anywhere on the cake.
- Keep the fruit layer below the top of the dam.
- Use gel color intended for baking and follow its label.
Your questions, answered
Does the guide include a tested blue sponge recipe?
No. Choose a tested vanilla or white sponge recipe yourself and follow its instructions. This original guide focuses on coloring considerations, stable filling and assembly.
Can the filling be whipped cream?
Only with a separate tested stabilized cream filling and its own assembly limits. The buttercream dam and quantities here should not be assumed suitable for loose whipped cream.
Can I leave stems on top cherries?
The guide uses pitted cherries without stems so the garnish is ready to eat. If styling with stems, remove and pit that garnish before serving; never conceal stones in the filling.
Made it? Let’s talk.
Share how your bake went, ask a question, or pass on a helpful tip. There’s a seat for you here.
A kind kitchen is a happy kitchen. Our community guidelines →
No comments yet. Be the first to say hello.